Section 1: Timesheet
Navigating to Timesheets
Step 1
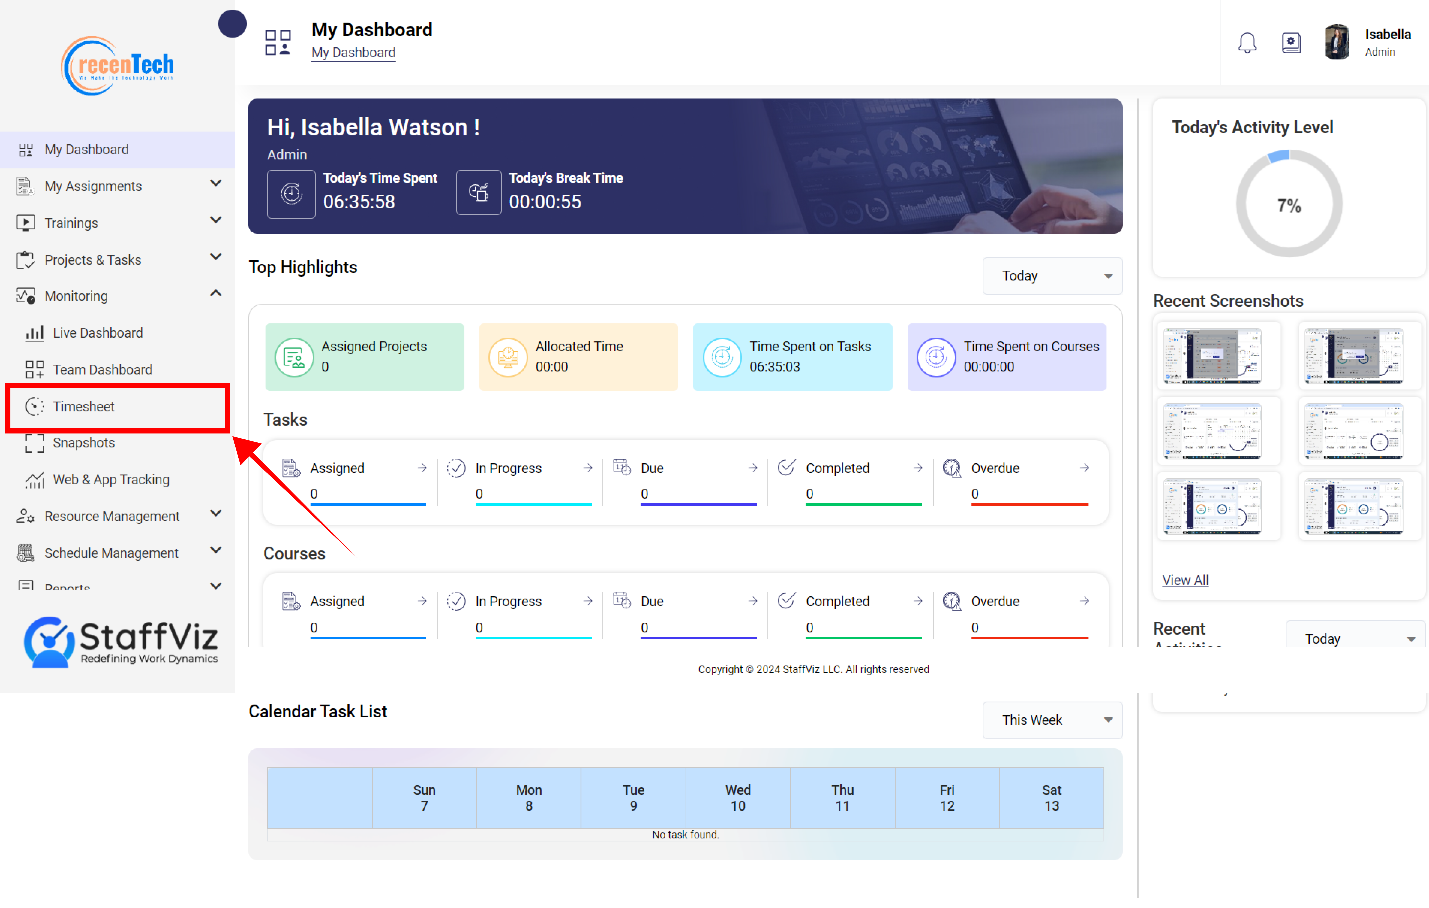
Time sheet section is on StaffViz main navigation panel. Please click on Monitoring>Timesheet to open this section.
Step 2
Upon clicking the Monitoring>Timesheet a new page will appear on the screen. This is where you can monitor the timesheets of the employees.
Timesheet Overview
Timesheet is the all-inclusive monitoring panel when it comes to individual monitoring. This panel allows admins to demonstrate the complete activity of the employee and measure their performance.
Admins have options to select the specific employee, a specific project on which he/she is working and select the dates on the calendar for which they are looking to get the report. Reports include all the useful information, like total time spent, total tasks, time took to complete each task and much more.
Section 1.1: How To Preview Employee Timesheet
Follow the steps to have a preview employee's Timesheet.
Step 1
Please click the Monitoring>Timesheet.
Step 2
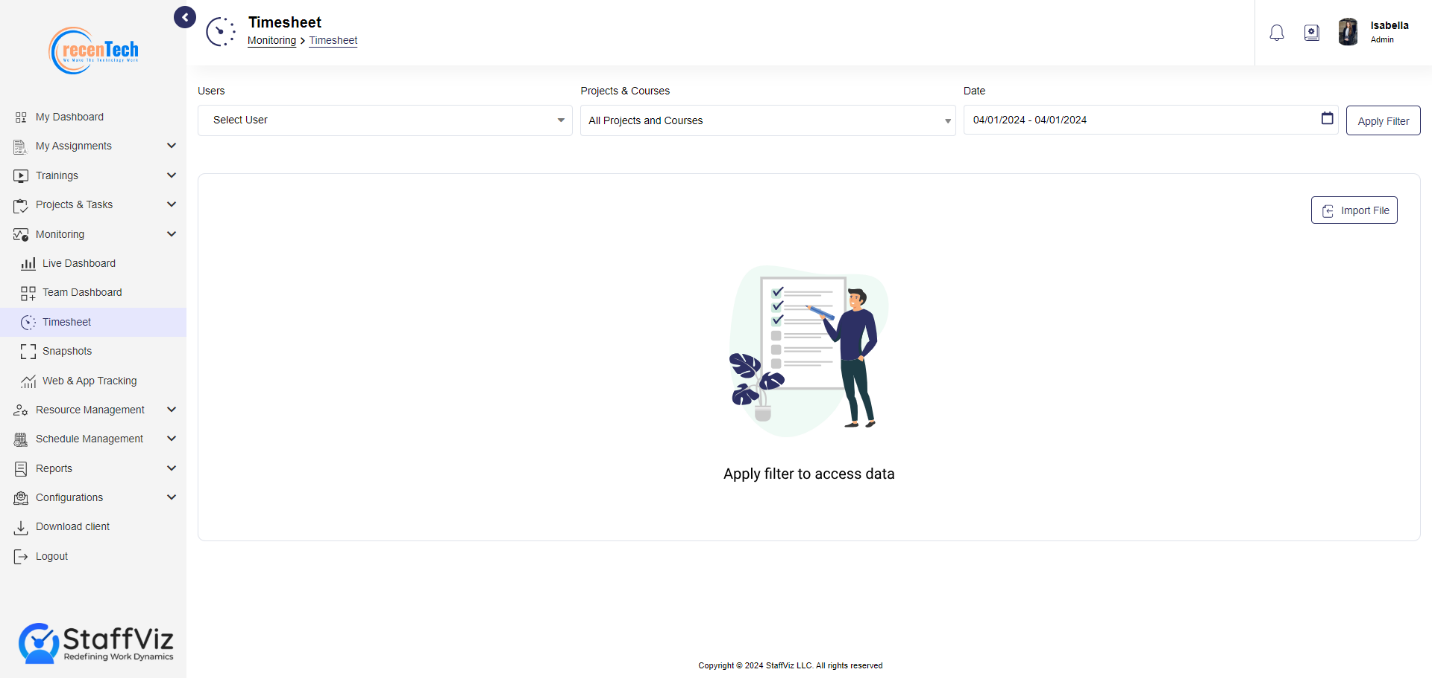
A new page will appear on your screen. This is the Timesheet Monitoring panel.

Step 3
This page has some useful options to get the precise employee data to save your time.
Step 3.1: Select User
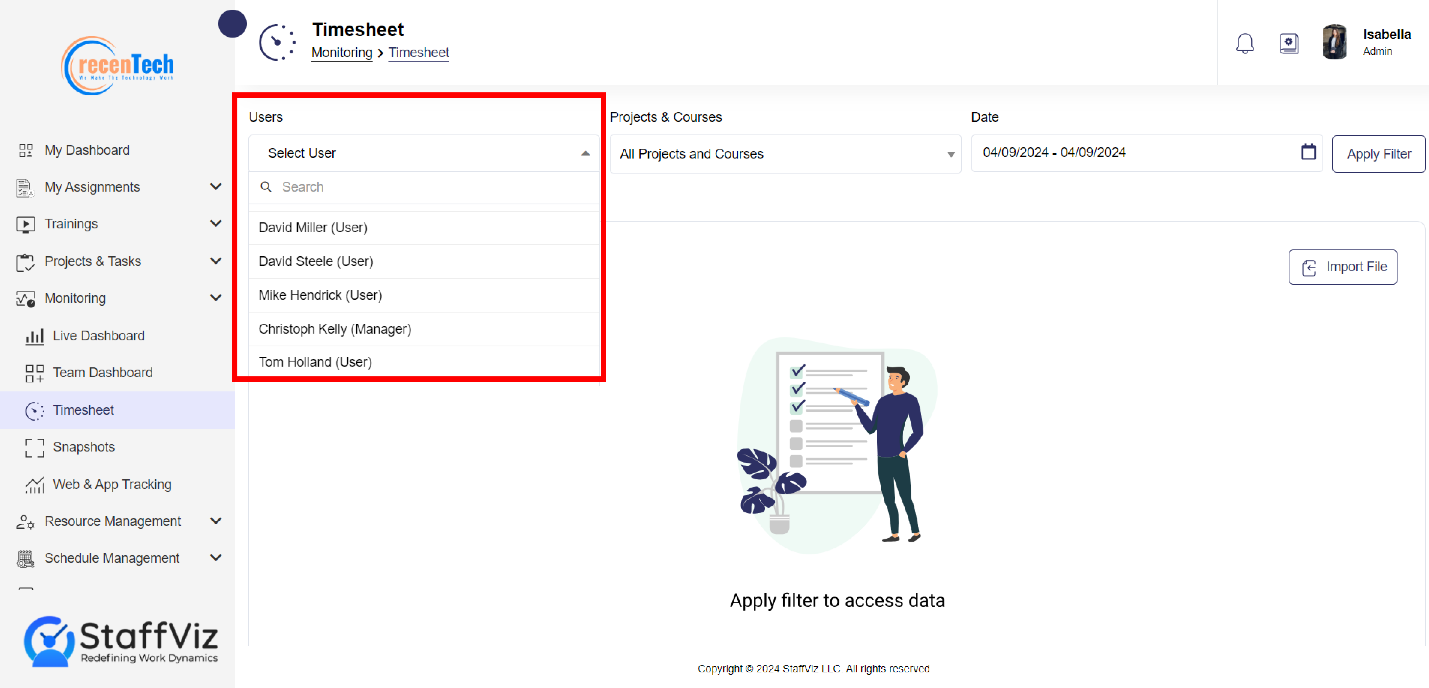
Please click on the users and select the specific person for whom you want to monitor the timesheet.
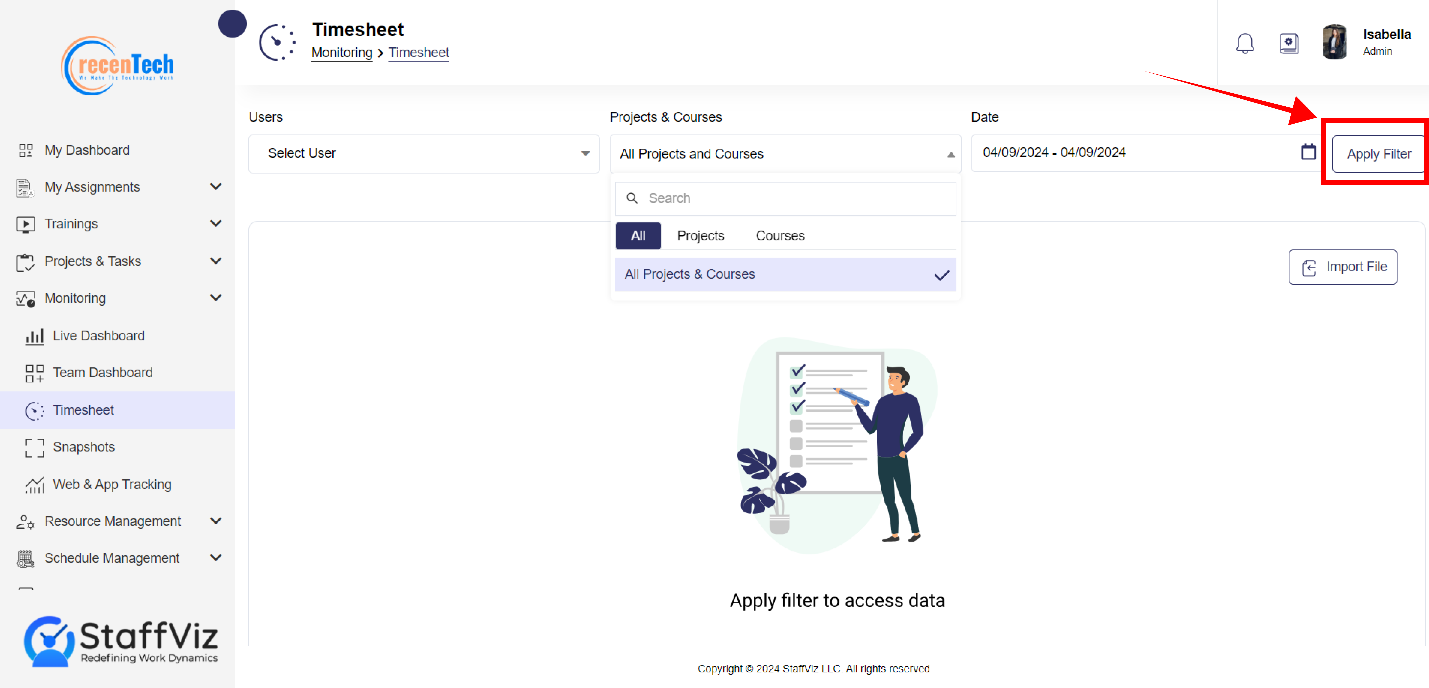
Step 3.2: Select Assignments
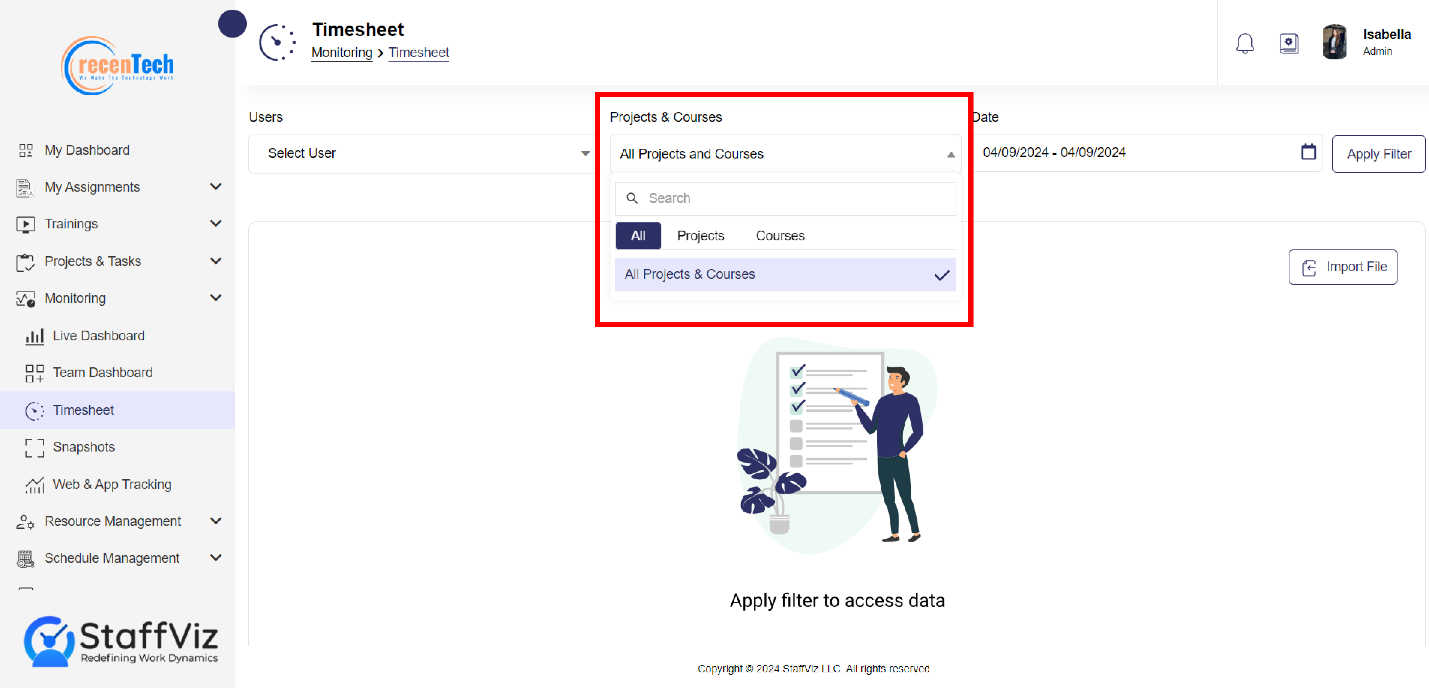
Once the user is selected, please select the assignments for which you want to check the time spent. Admin can also select the All, Projects, or Courses option to check the overall time management and performance of the employee.
Step 3.2.1: Please click on the dropdown, and you’ll see three more options.
>All: Includes all the projects and courses.
>Projects: Only displays the projects.
>Courses: Sort courses from the projects for you.
Step 3.3: Select a Date Range
Admins can select the specific dates and get the information of time spent on tasks.
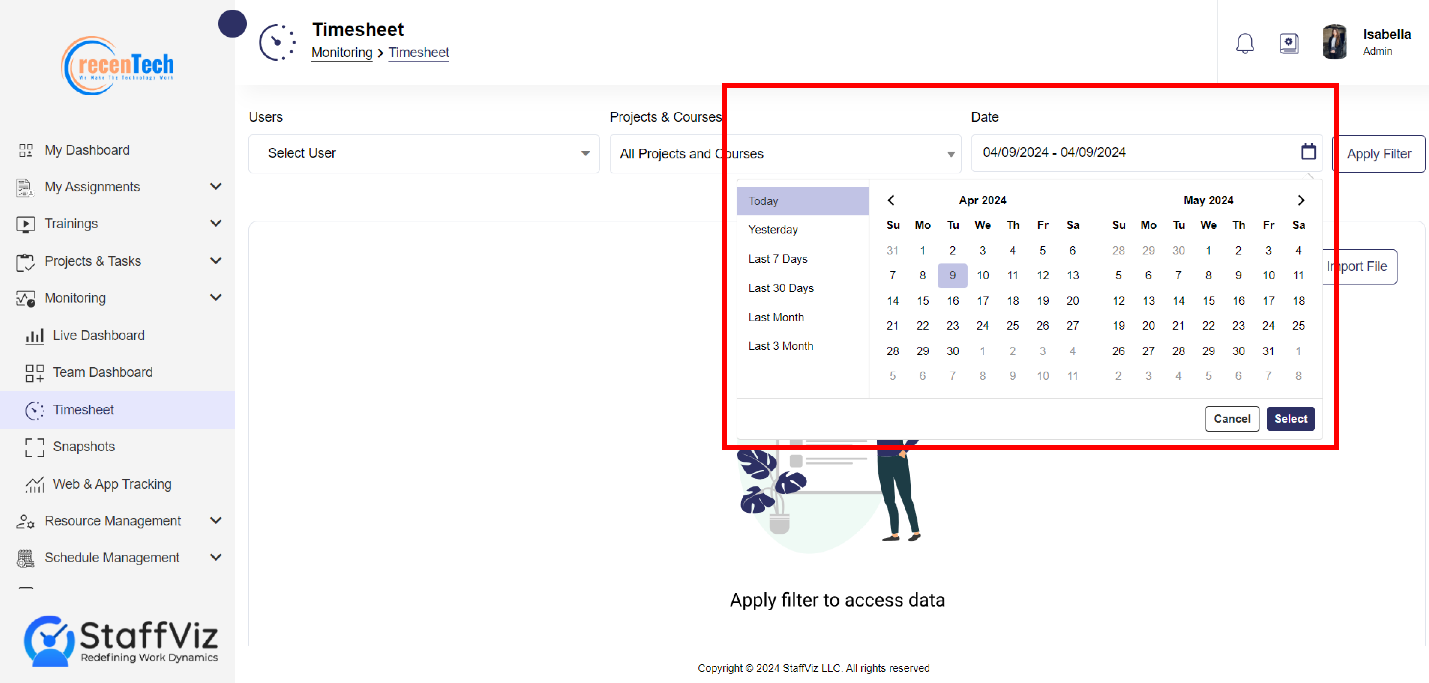
Once the assignments are selected, please click on the date section. (Click on calendar at the date bar.)
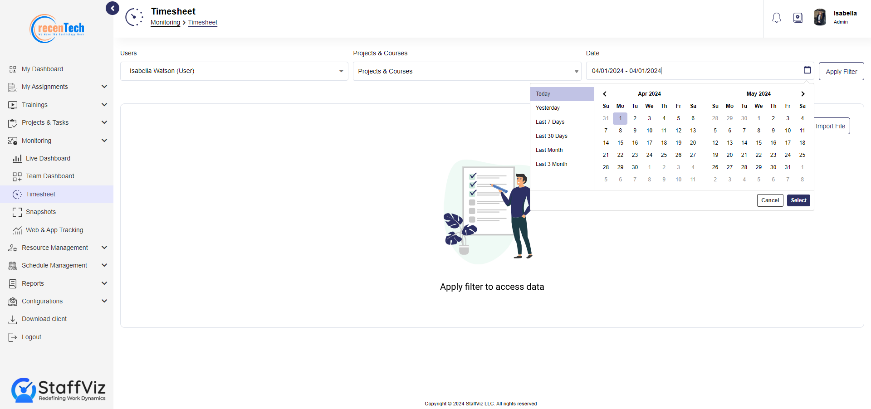
Please select the start and end dates for which you want to see the report.
Step 3.4: Apply Filter
After completing all the previous steps, click the Apply Filter button, and a comprehensive report will appear on your screen.
Section 1.2: Timesheet Monitoring
Once all the steps 1st, 2nd, and 3rd Steps of employee timesheet preview are completed, admin should know how to monitor the timesheet to judge the employee performance.
The following information will guide you about timesheet monitoring.
StaffViz shows the employee activity of each date in a separate panel. Admin can scroll down to see all the previous day’s performance reports.
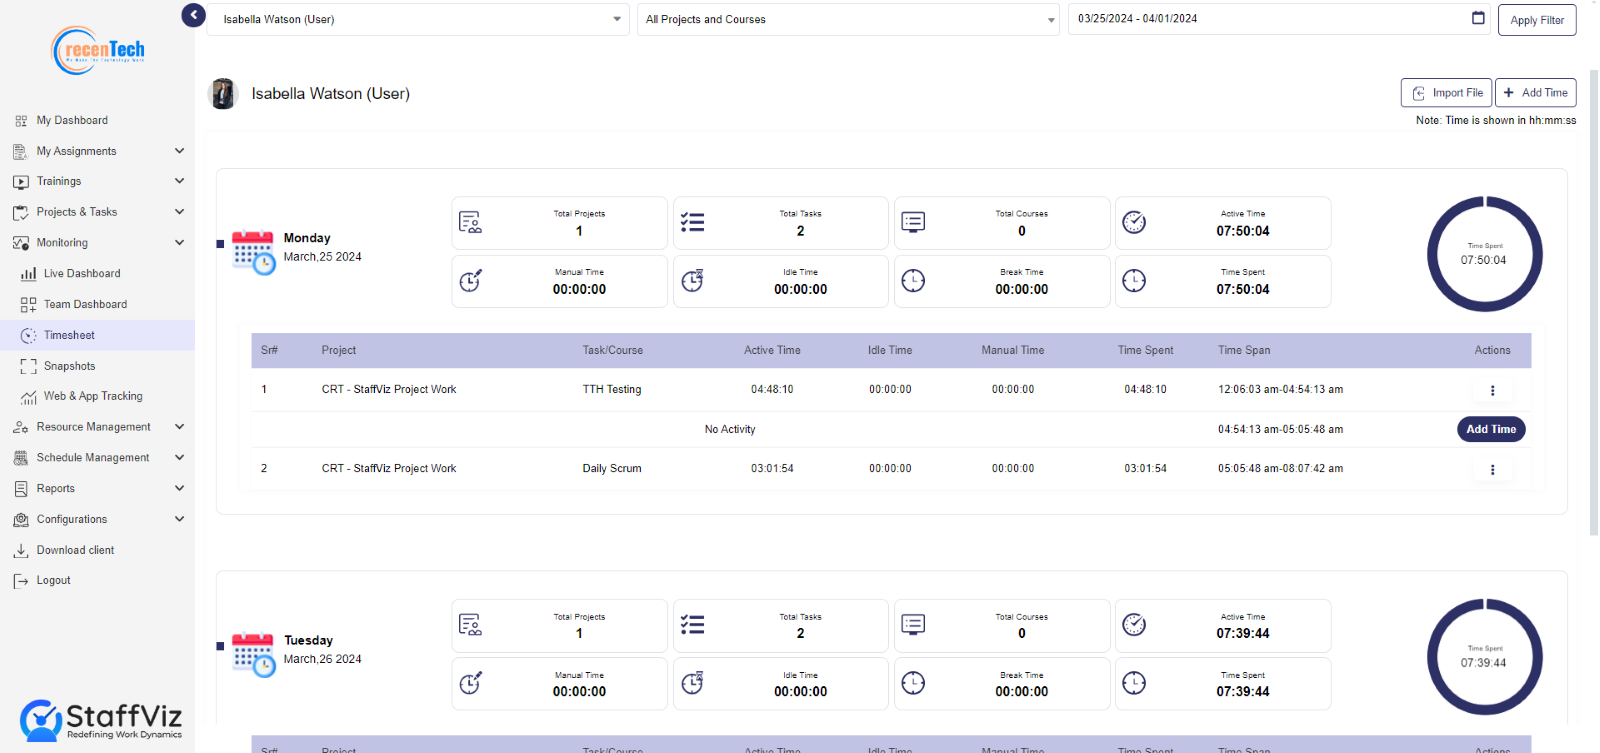
The daily performance panel shows the following data.
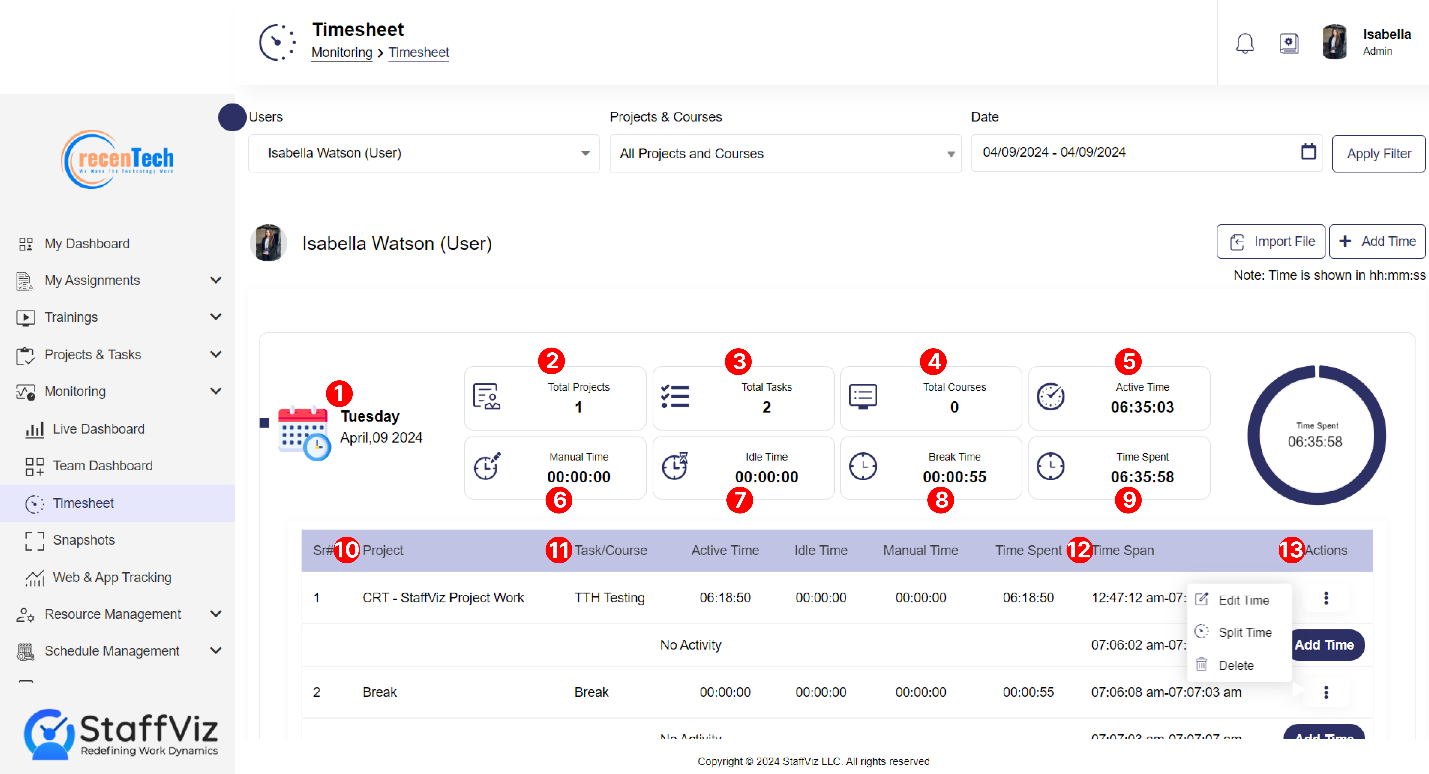
Day, Date and Month: On the left side of the of your screen you can see the day, date, month, and year to which the data belongs.
Total Projects: Total Number of projects assigned to the employee.
Total Tasks: Total number of Tasks assigned to the employee.
Total Courses: Total courses assigned to the employee.
Active Time: Total productive hours excluding the break and idle hours.
Manual Time: Time added by the admin in case of any error or inconvenience.
Idle Time: Non-productive time spent other than the break time.
Break Time: Time spent during the allowed break time.
Time Spent: Total Time spent on a specific task.
Projects: Project Name on which the time was invested.
Task/Course: Specific task/course on which the time was spent.
Time Span: Starting and ending time of the project/task/course.
Actions: Action are the three dots at the right side of your screen. Action options are explained further in this guide.

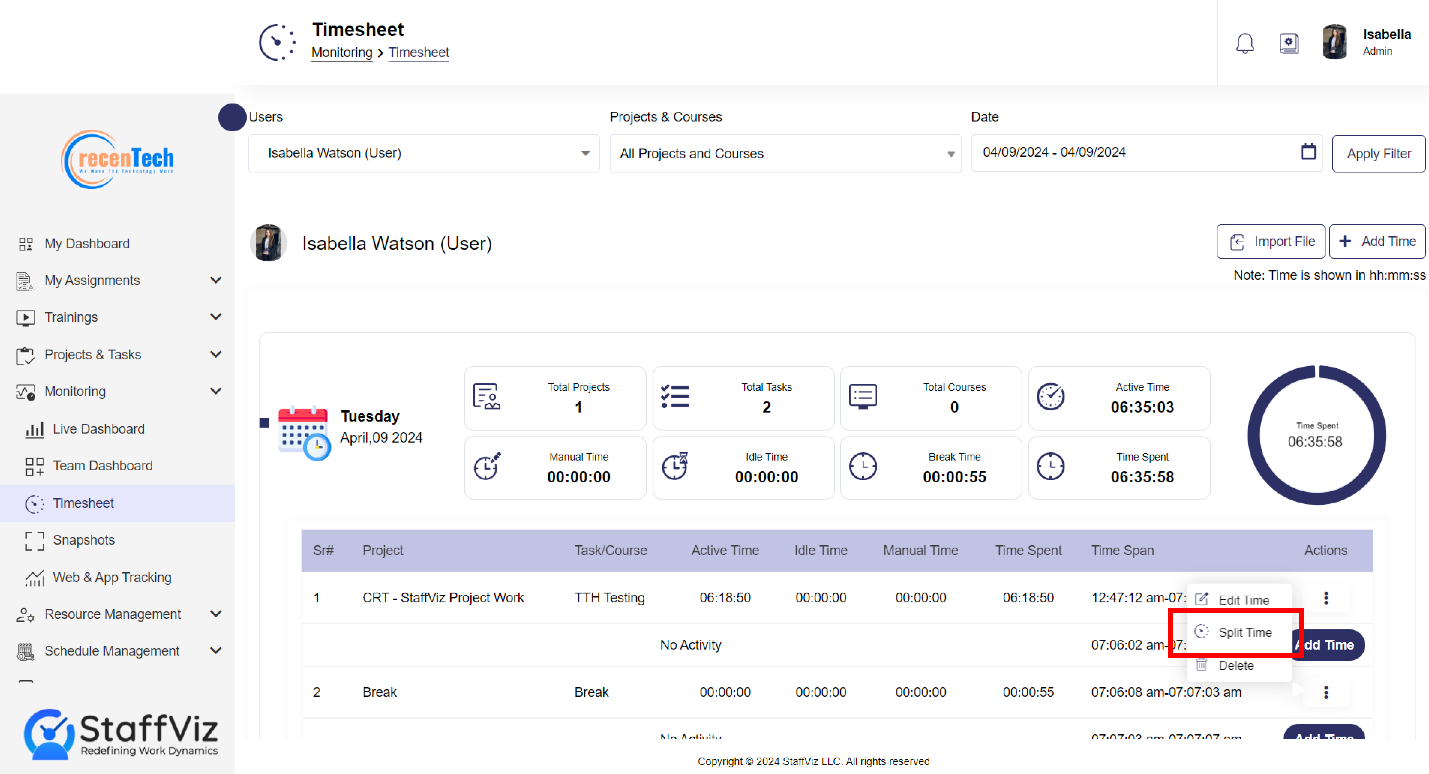
Step 1
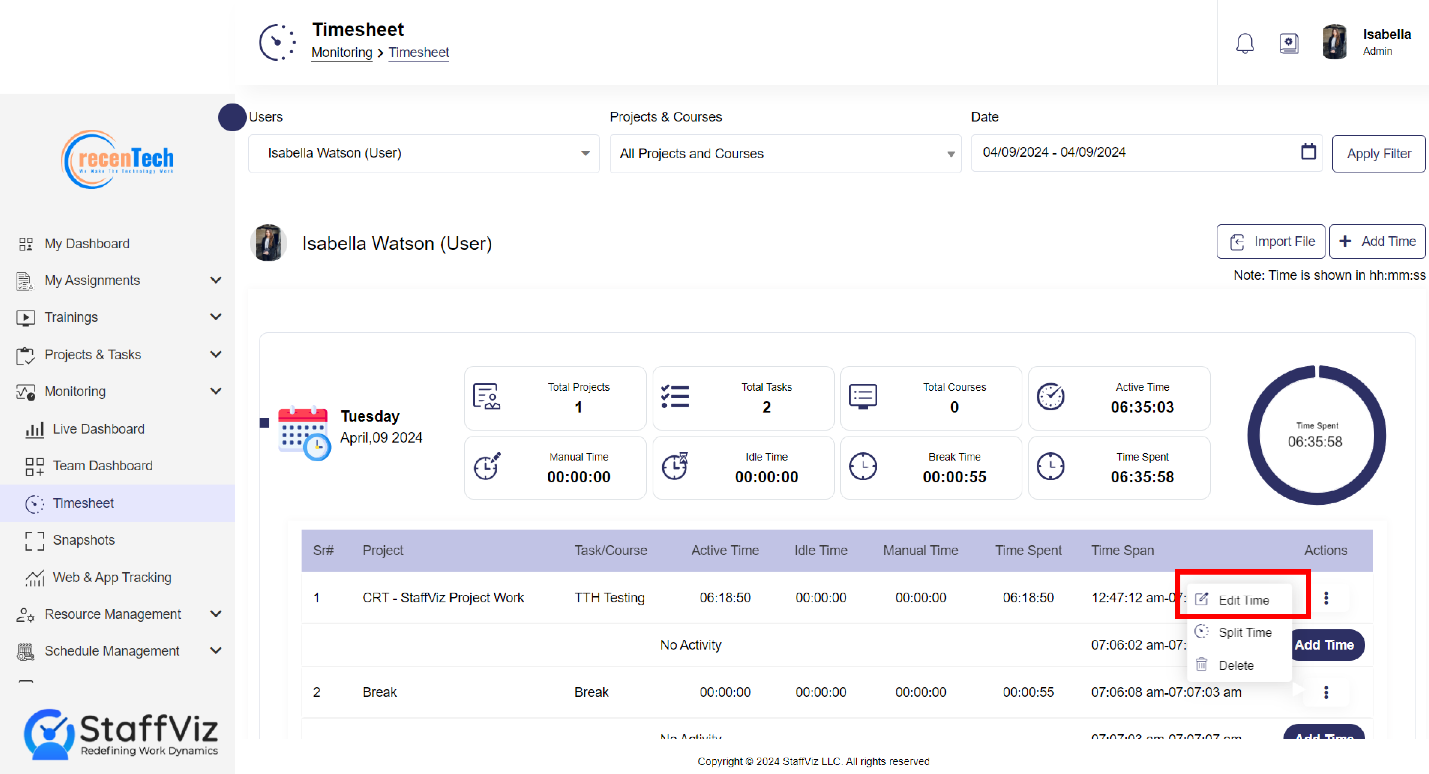
Please click the three Action dots. Three options will appear. Edit, Split Time, and Delete.
Edit Time
Edit time option is used to rectify any errors in time capturing. Incase if someone forget to turn on the StaffViz, or if they experience any technical issue in their system then in that case admins can rectify the mistakes or omissions by using edit time option.
Step 1
Please click the Edit Time option.
Step 2
Upon clicking the edit time button, a new Edit Time pop up will appear on your screen.
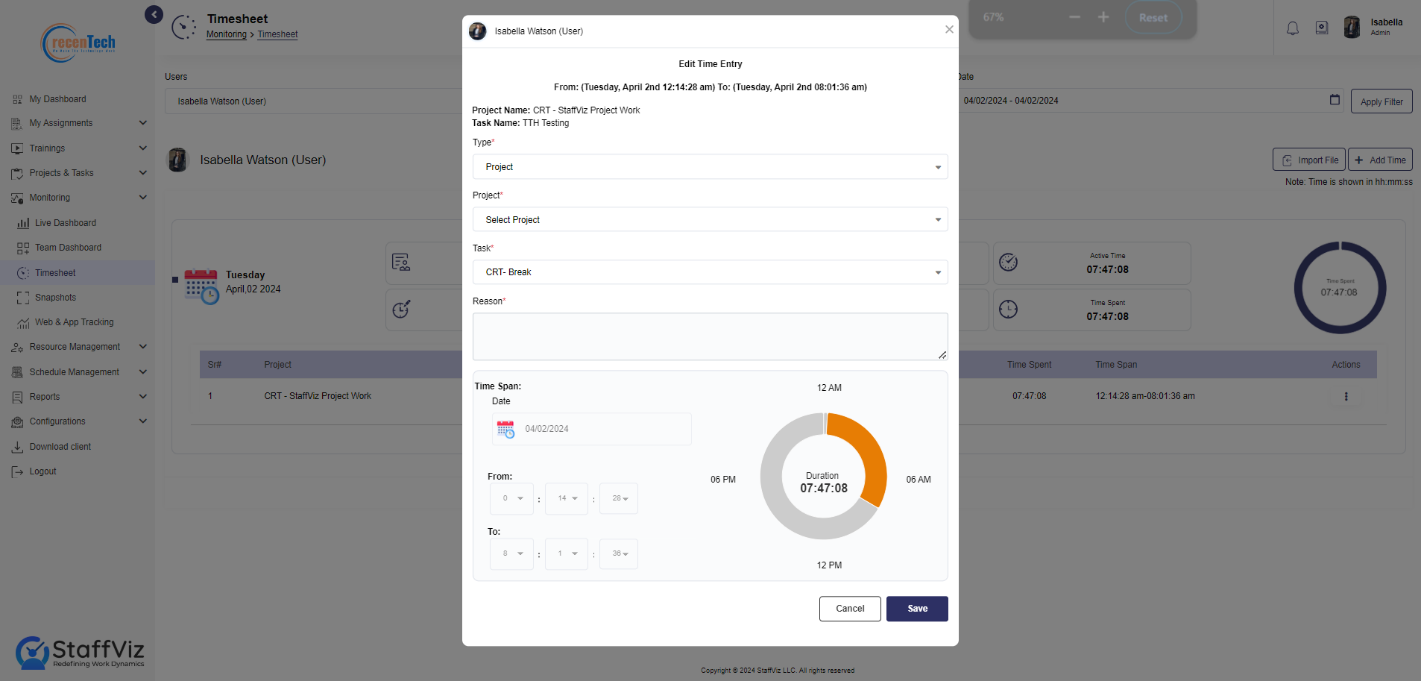
Step 3
Please fill out the Edit Time Entry by following the given instructions.
Type: Select the project, courses or break from the option.
Project/Courses/Break: Select the relevant project, course, break for which you want to edit the time.
Task: In case you selected the project in the previous option, you’ll have to select the task for which you want to change the time. You’ll only see the tasks related to the project you’ve just selected. (If you select courses or break option in the previous section, you won’t see this dropdown).
Reason: Give a valid reason to justify the time.
Date: Select the date from the calendar for which the time needs to be edited.
From: Select the starting time here.
To: Select the completion time.
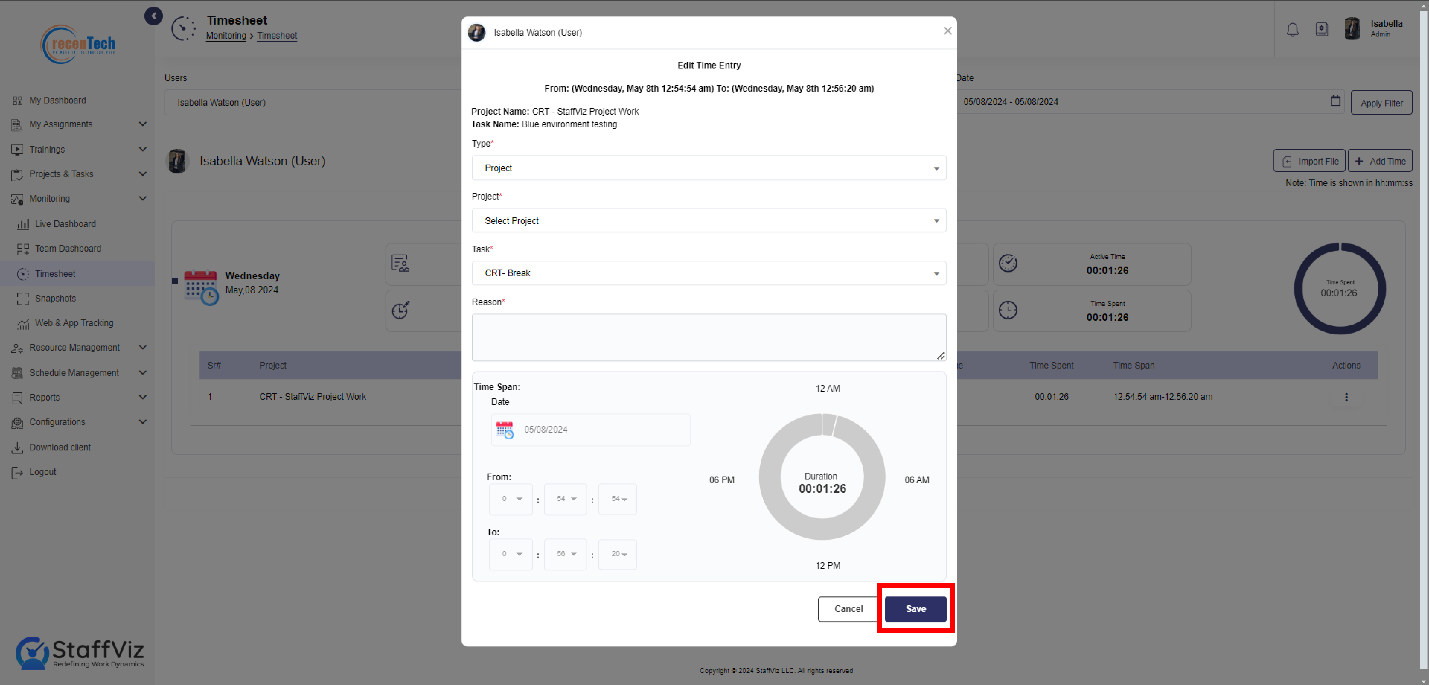
Step 4
Click the Save button and the time will be edited on the panel.
Split Time
Split time option is used to add the time to the relevant task that has been mistakenly marked in some other tasks. Suppose an employee was working on the data entry task but unintentionally started the clock for reports managements task then in that case admin can use the split time option and rectify the mistake.
Step 1
Click the Split Time option.
Step 2
Upon clicking the Split time button, a new Edit Time dialog will appear on your screen.
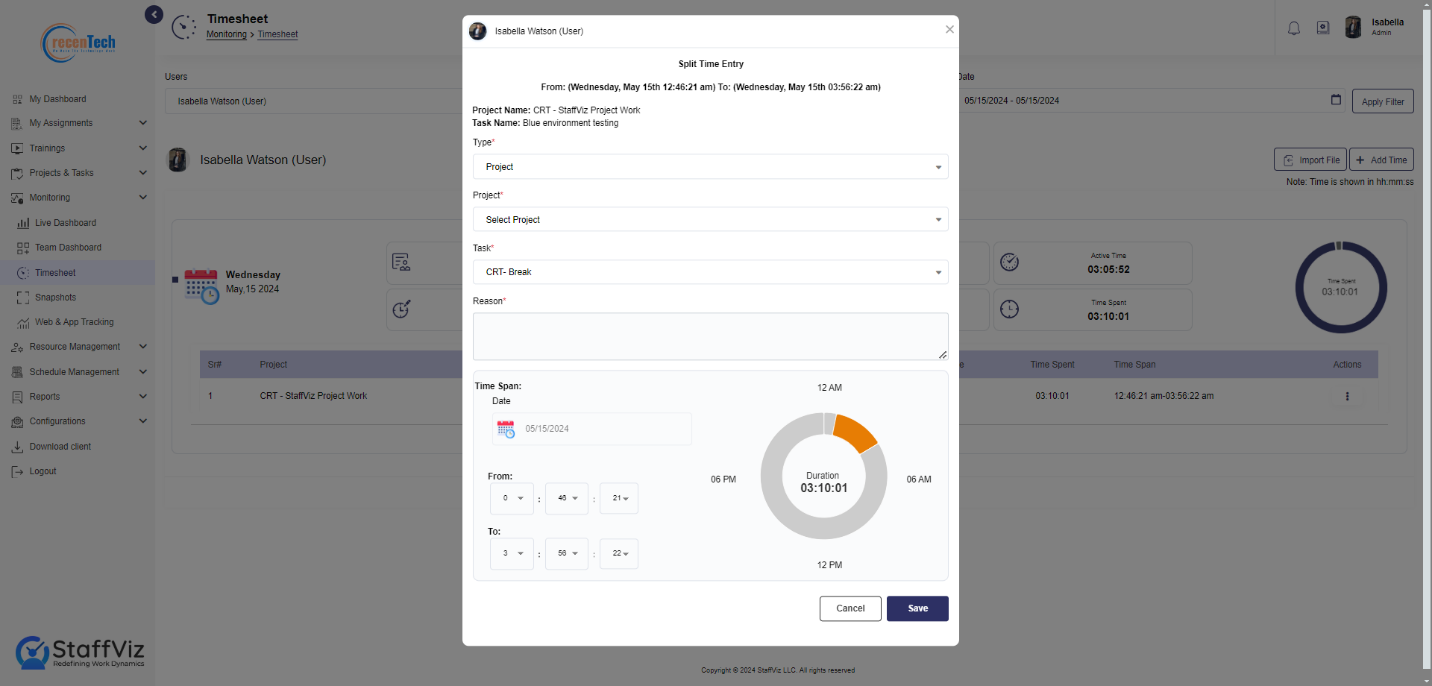
Step 3
Please fill out the Split Time Entry form following the given instructions.

Type: Select the project, courses or break from the option.
Project/Courses/Break: Please select the relevant project, course, break for which you want to split the time.
Task: In case you selected the project in the previous option, you’ll have to select the task for which you want to change the time. If you select courses or break option in the previous section, you won’t see this dropdown.
Reason: Give a valid reason to justify the action.
Date: Select the date from the calendar for which the time needs to be splitted.
From: Select the starting time here.
To: Select the completion time.
Note: Keep in mind that when you split the time besides the starting point of the captured time, the time will be splitted into three time slots. Think of it as slicing a cake into three equal pieces starting from one end—you get three separate chunks of time.
Step 4
Please click the Save button and the time will be split among the projects.
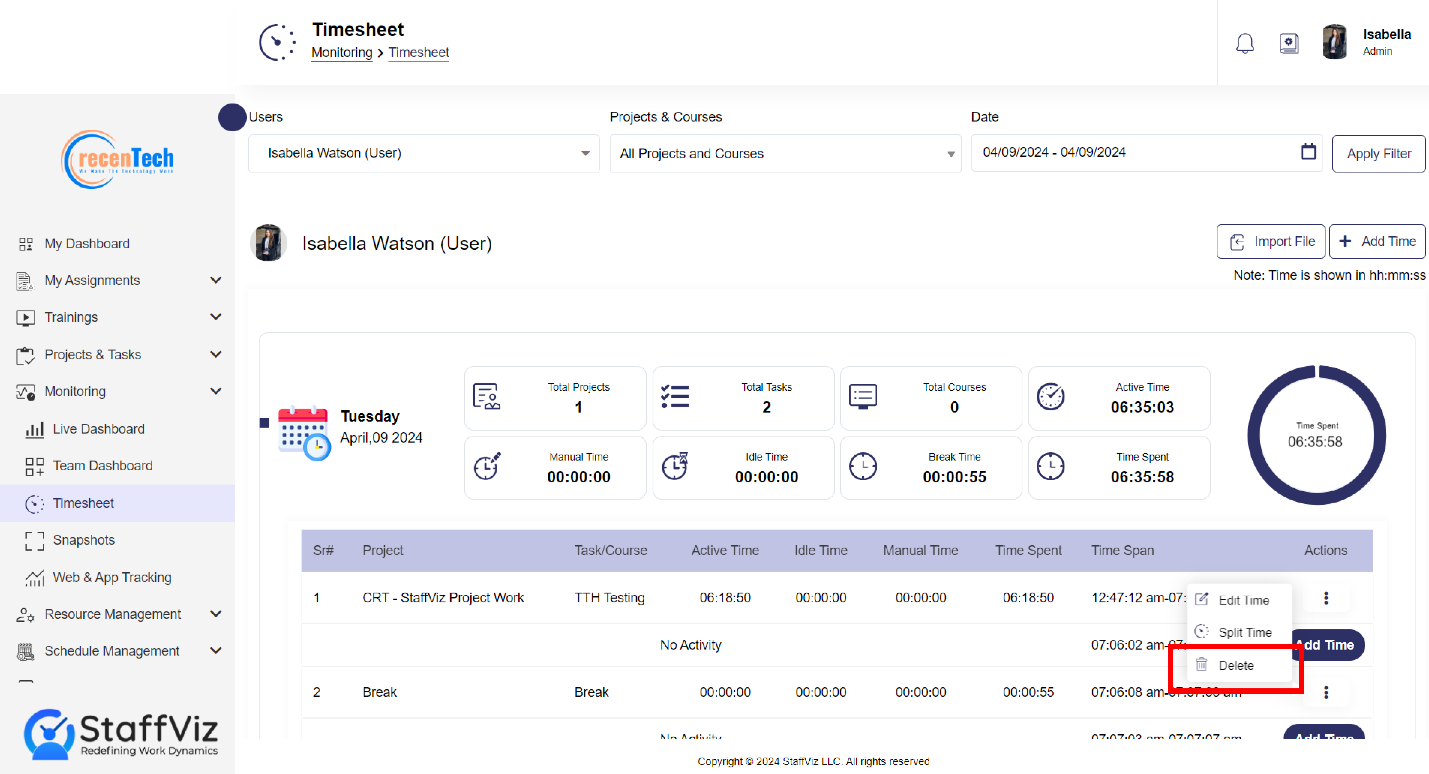
Delete
Click the Action>Delete button and time slot will be erased.
Section 1.3: How To Add Time to The Employee’s Tasks/Projects Manually
In case the StaffViz didn’t calculate a specific time for the task due to some error or omission, the mistake can be rectified by the admin. In such cases, StaffViz allows admins to add time to the task manually upon receiving the request from the employee.
Please follow further instructions to add time manually.
Step 1
After opening the timesheet report for a specific employee by following the above-mentioned steps, please navigate to the top right of your screen and look for the Add Time button.
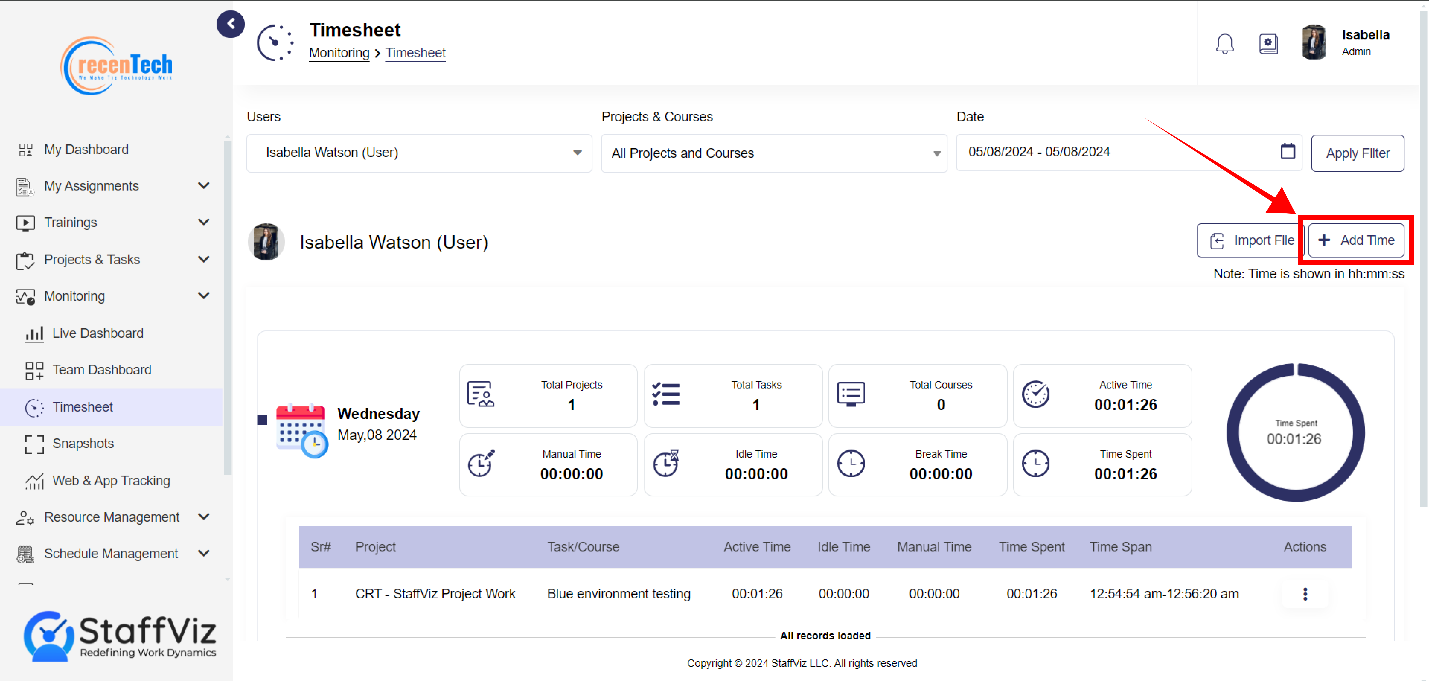
Step 2
Upon clicking the Add Time button, a new pop up will appear. Please fill in the following information by following the given instructions.
Type: Select from Project, Course, or Break.
Project/Break/ Course: Select the specific course/ project/ break in which you want to add time manually.
Task: Select a specific task from the dropdown where all the assigned tasks are shown as options.
Reason: Give a valid reason to add time for course/project/ break.
Time Span: Select the date from the calendar to which the manual time needs to be added.
Select “From” Time: Timings are shown as Hours | Minutes | Seconds. Please fill up the start time.
Select The “To” Timing: Please select the end time in the employee’s working hours.
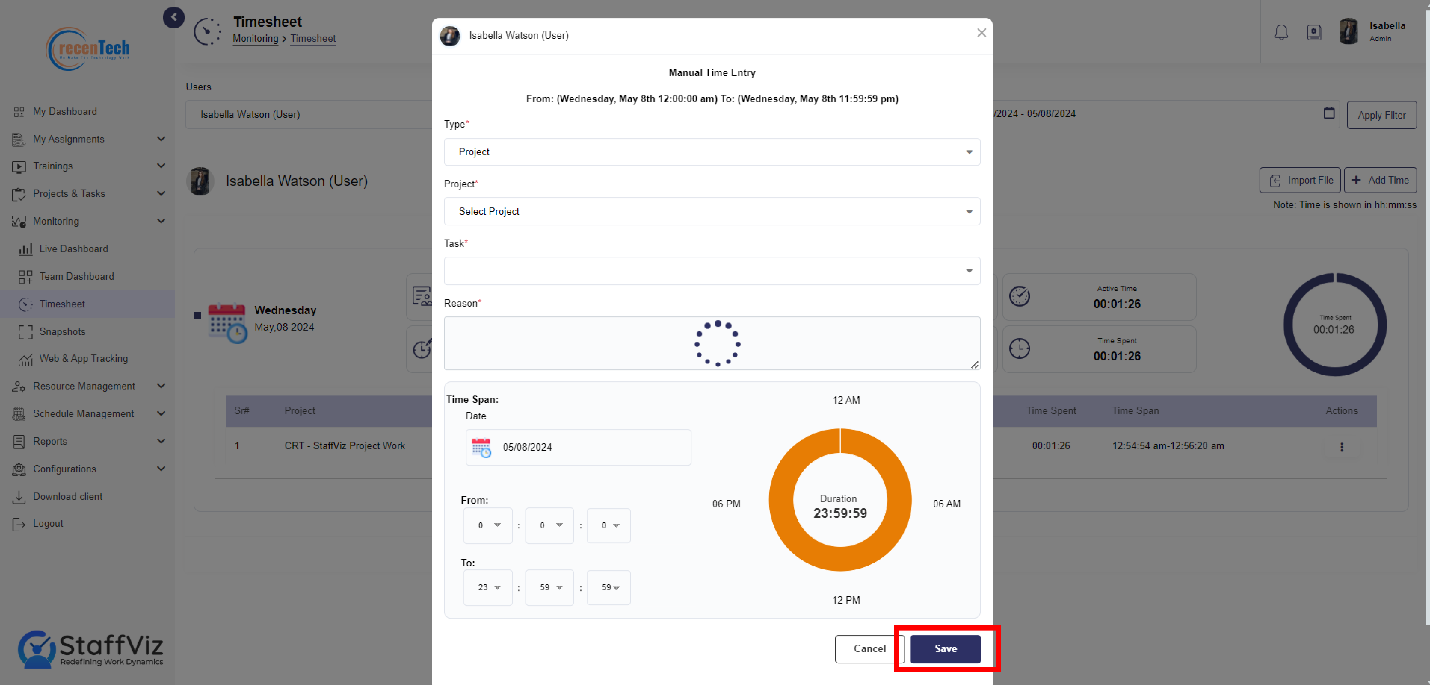
Step 3
Please click the save button and manual time will be added to the employee’s specific task/project/break.
1.3.1: Import File
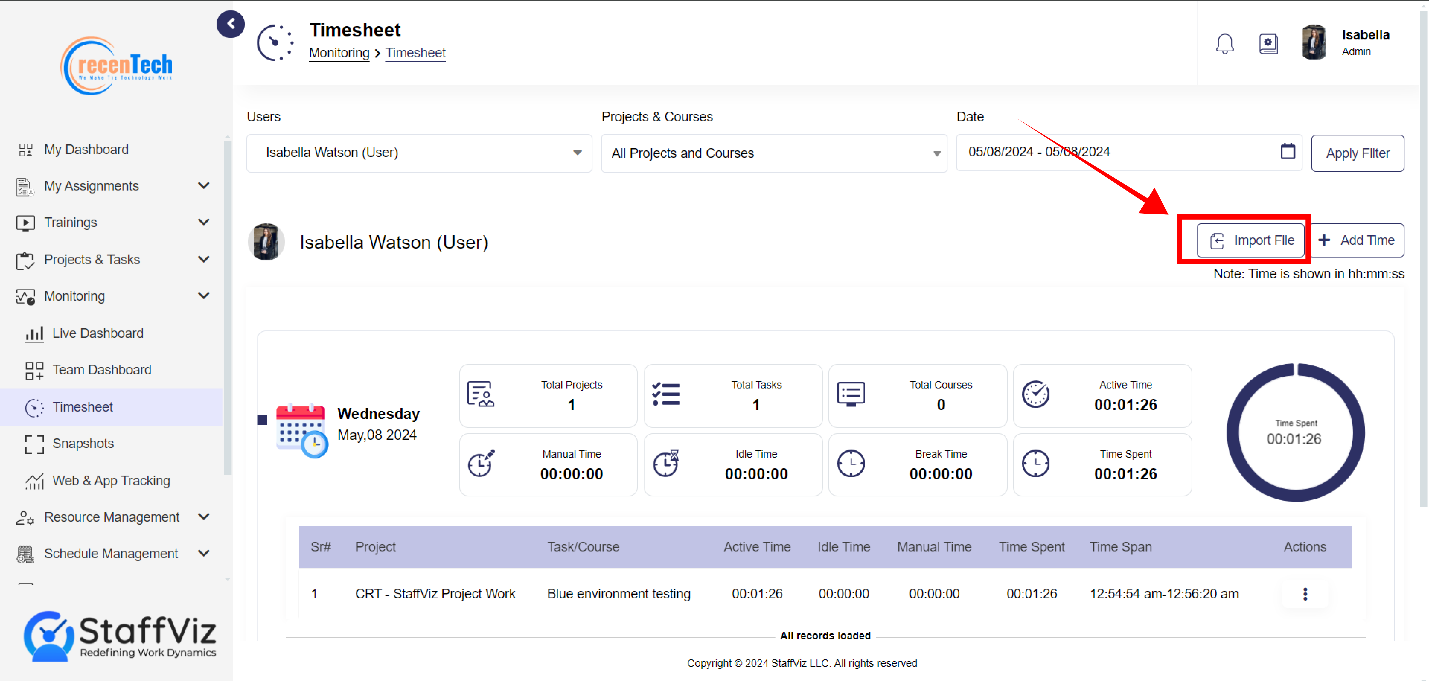
Import File button is on the right side of your screen, beside the Add Time button.
Import File Overview
The import file section is designed to save time for admins and allow them to add time for multiple employees at a single time. Admins can download the CSV file where they can adjust the time entries for different employees and import data into StaffViz using a single file.
1.3.2: How To Manually Add Time for Multiple Employees
Step 1: Navigation
Click Monitoring >Timesheet.

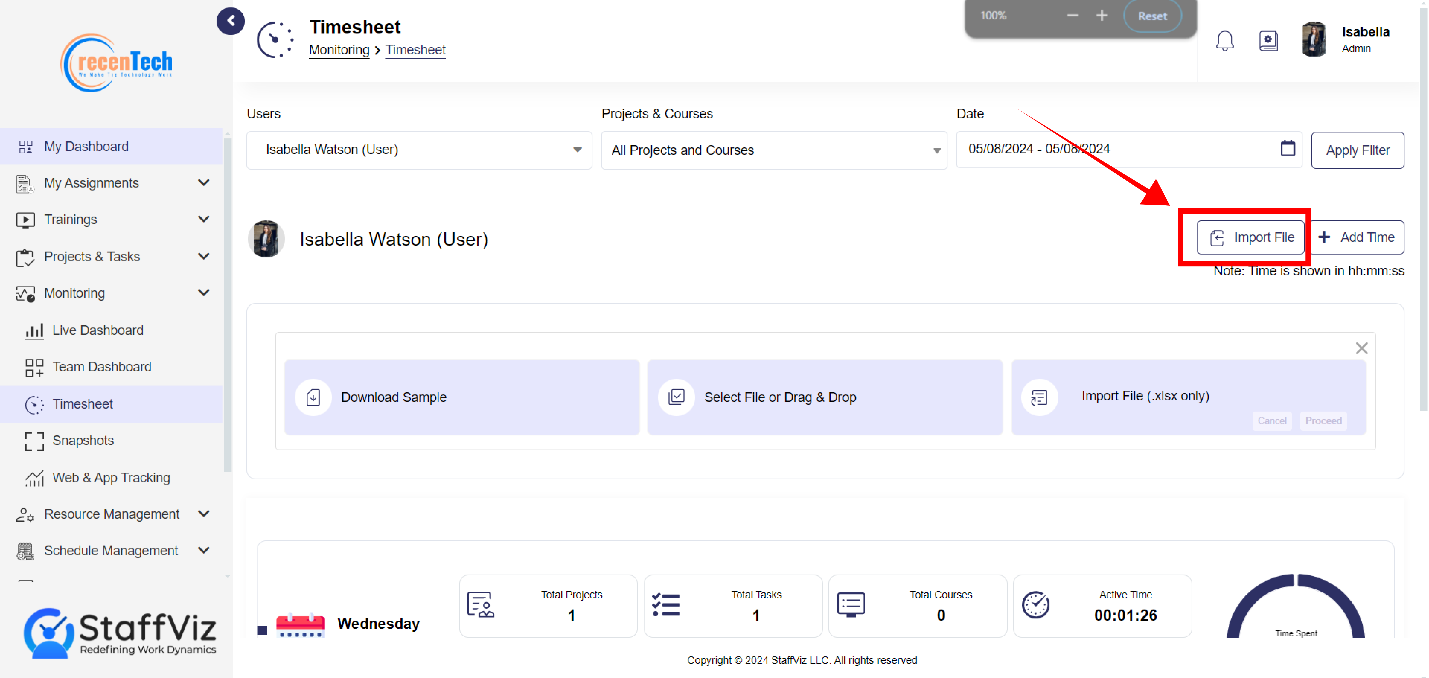
Step 2: Import File Button
Upon clicking the option, a new page will appear. Here on this Timesheet panel, click the Import File button which is on the top right side of your screen.
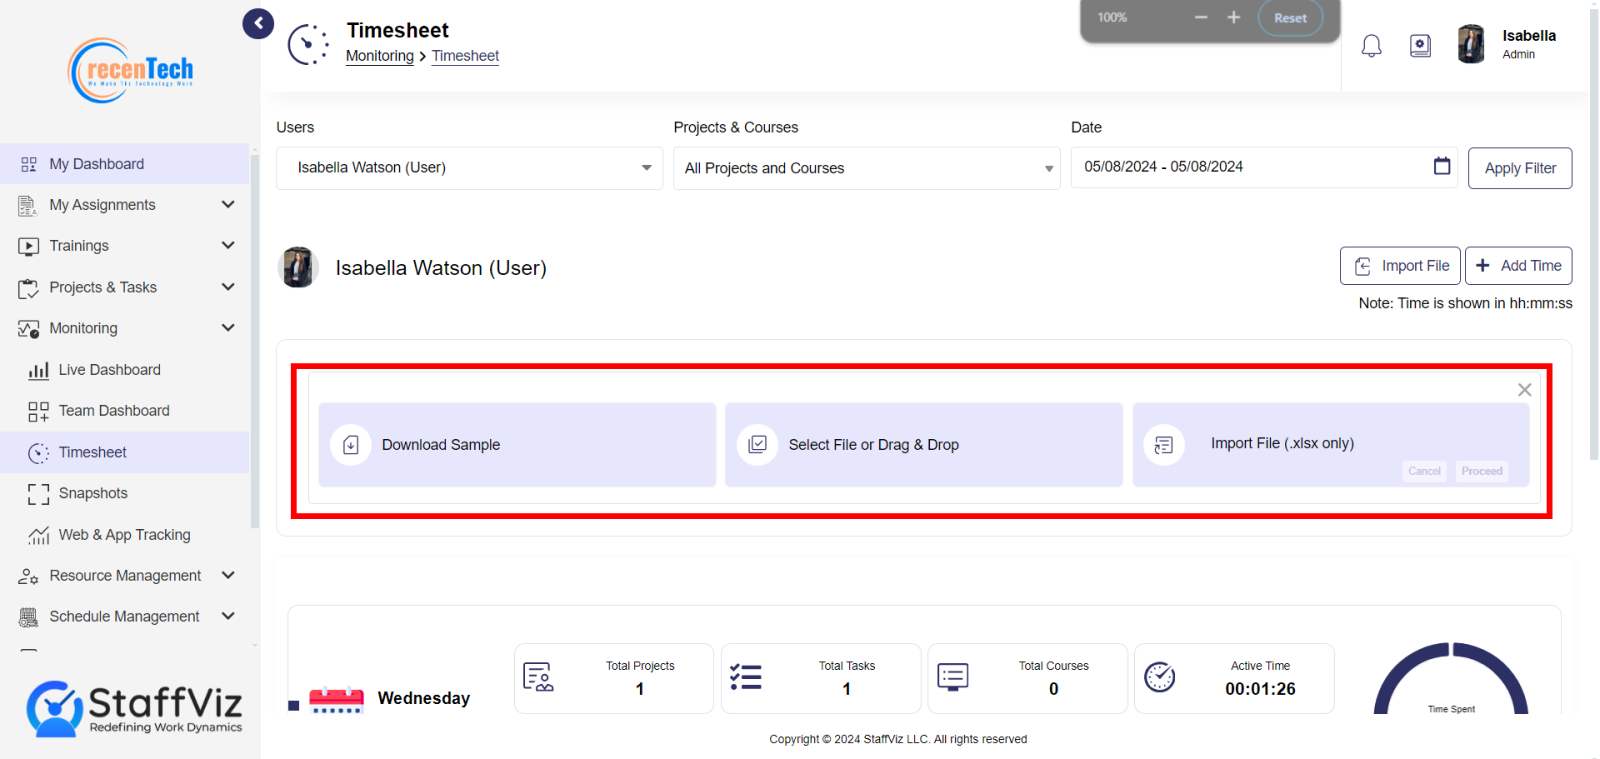
Step 3: Import File Options
After clicking the Import File button, follow three options that just appeared on your screen.
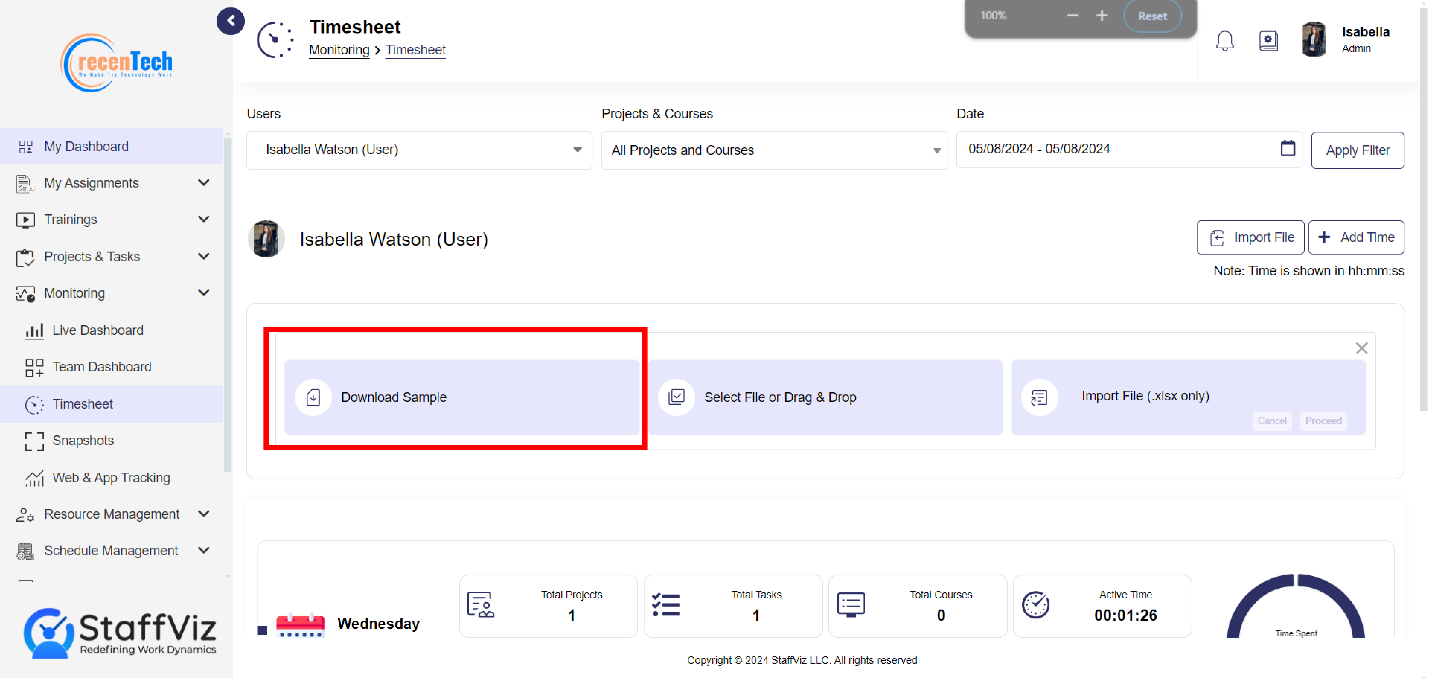
Step 4: Download Sample File
Please click download sample and an Excel file will be downloaded on your computer.
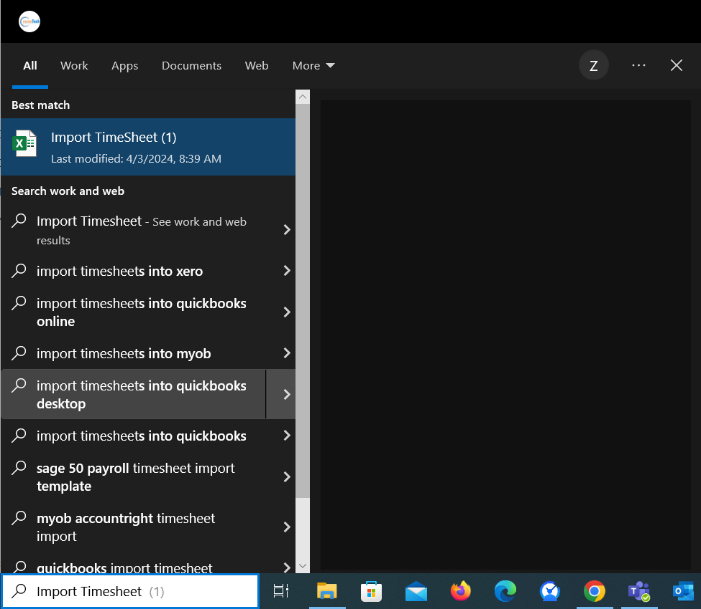
Step 5: Find Downloaded CSV File
Please find the downloaded file from the windows search bar and type “Import Timesheet”.
Step 6: Fill Import Timesheet
Import files allow admins to add time for courses, tasks, projects, or breaks for the multiple employees in one go.
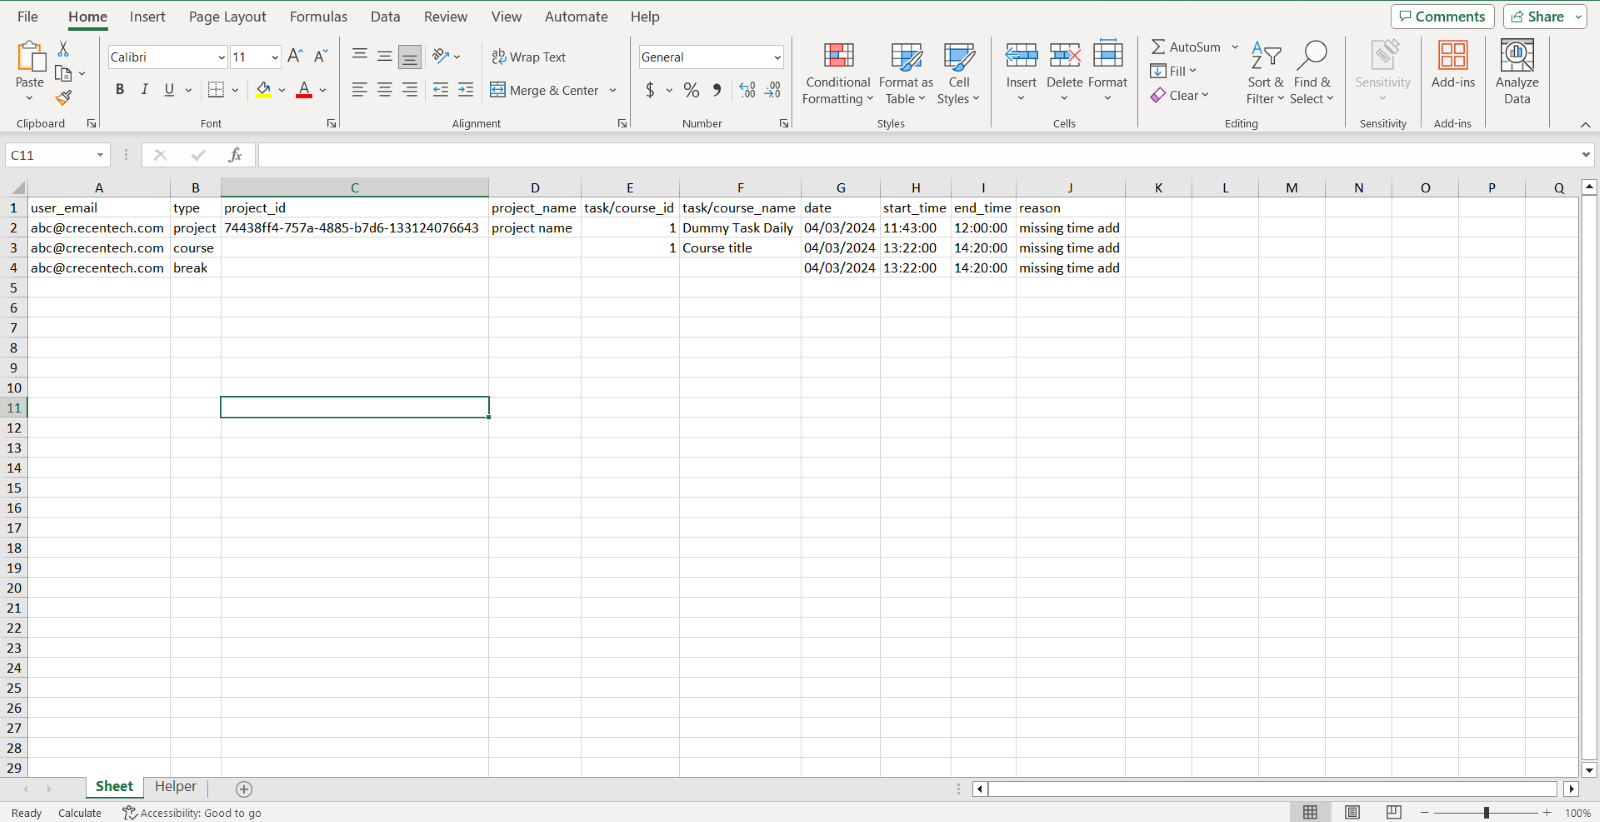
Step 6.1
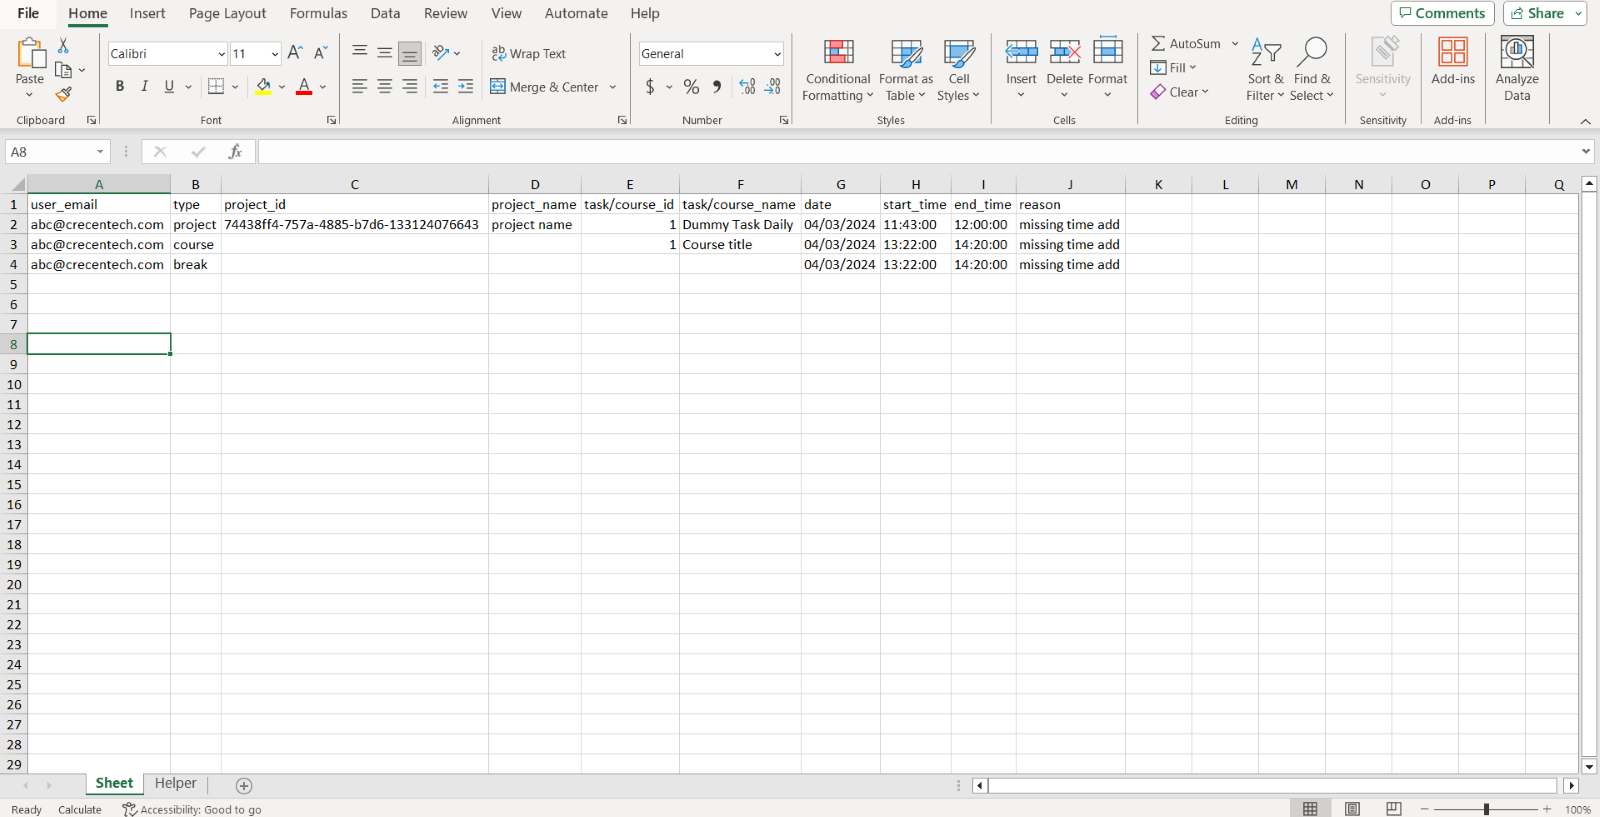
Once you open the file, you will find columns where you need to fill in the data.
Step 6.2
Please fill the sheet by following the given instructions.
6.2.1: User Email: Type in the employee\user’s official email address.
6.2.2: Type: Write the type of work (can be task, project, or break) for which you want to add time.
6.2.3: Project ID: In case you want to add time to a specific project, you will need to mention project ID. StaffViz issues specific code to each project called Project ID.
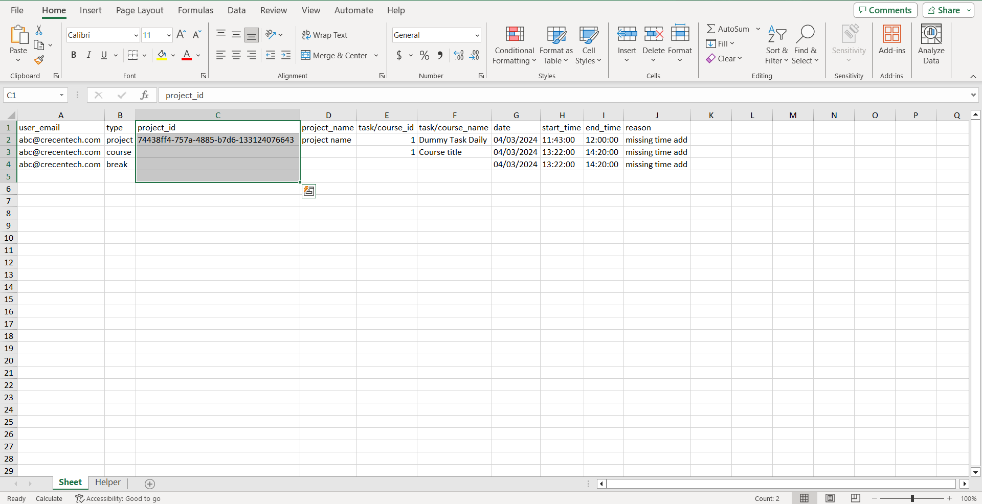
To find the project Id please navigate to the Help Tab in the bottom left corner of the excel sheet. Help tab will open.
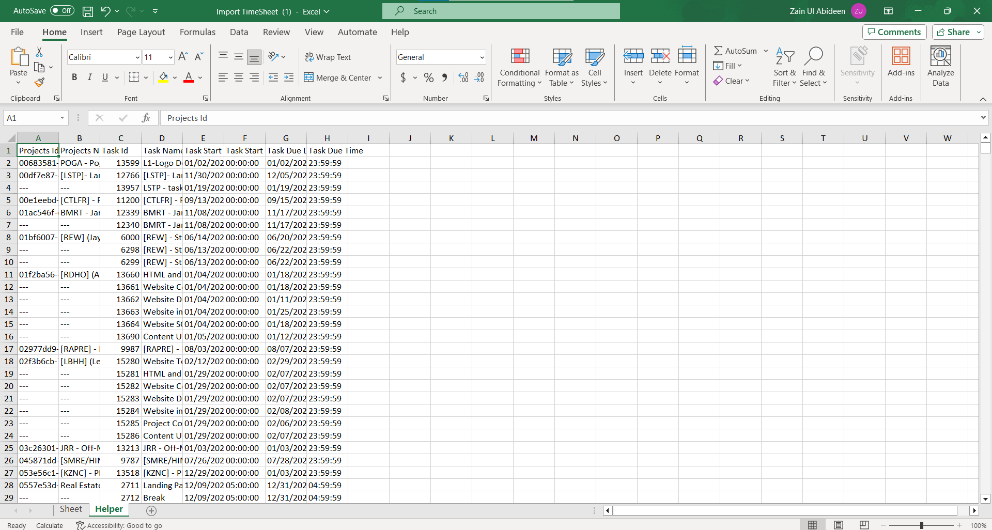
Here you can either scroll to search for a particular project or use the short key CTRL+F to search for the project by typing in the name in the search bar.
When you find the project name, you’ll find the project ID in the same row.
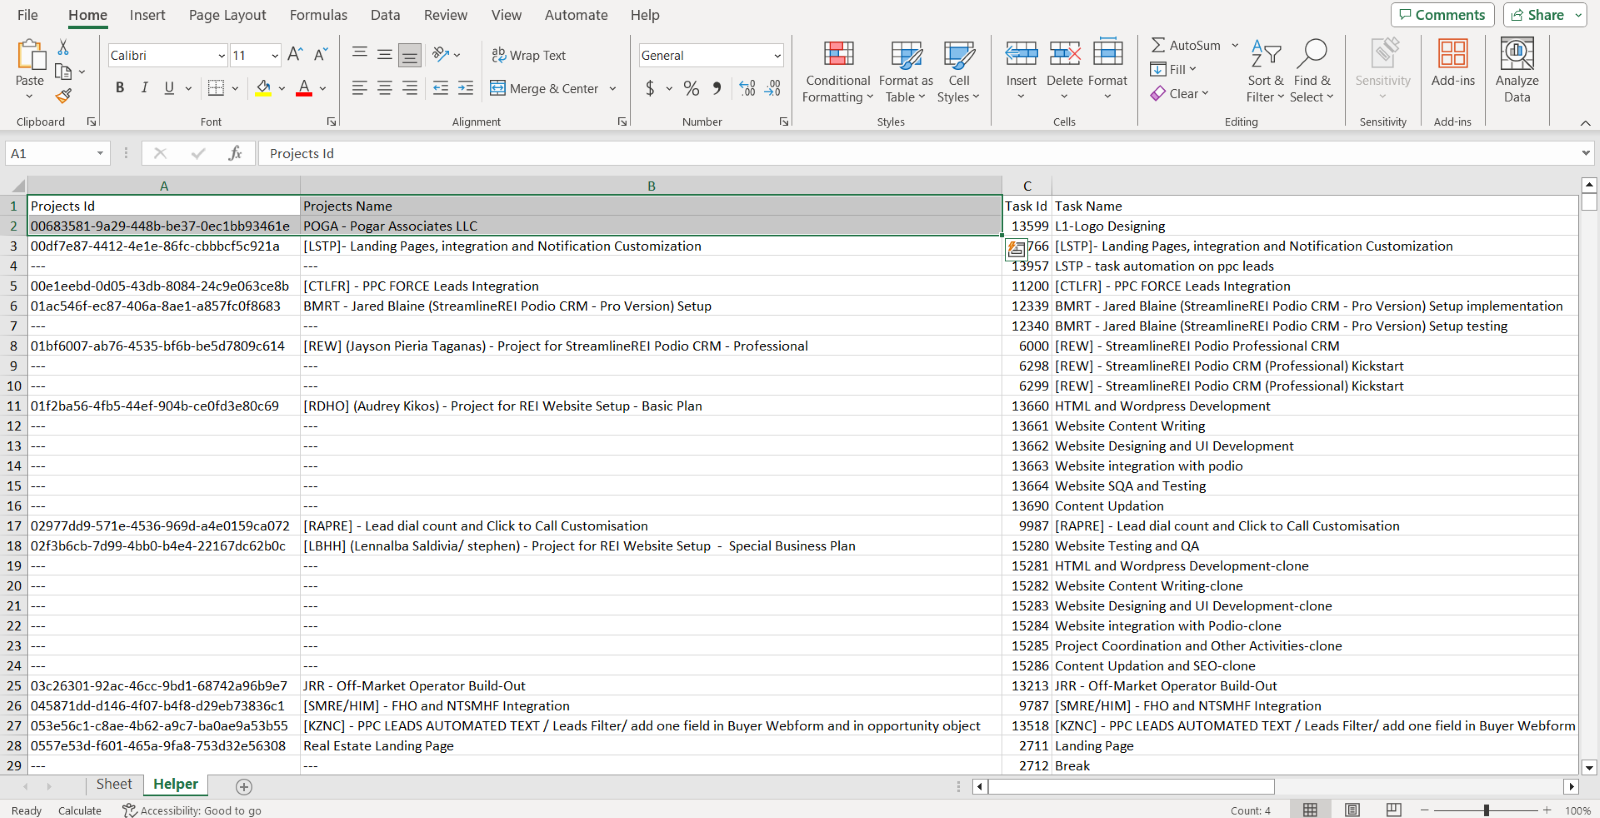
Click the cell with relevant project Id and use CTRL+C short key to copy the project ID.
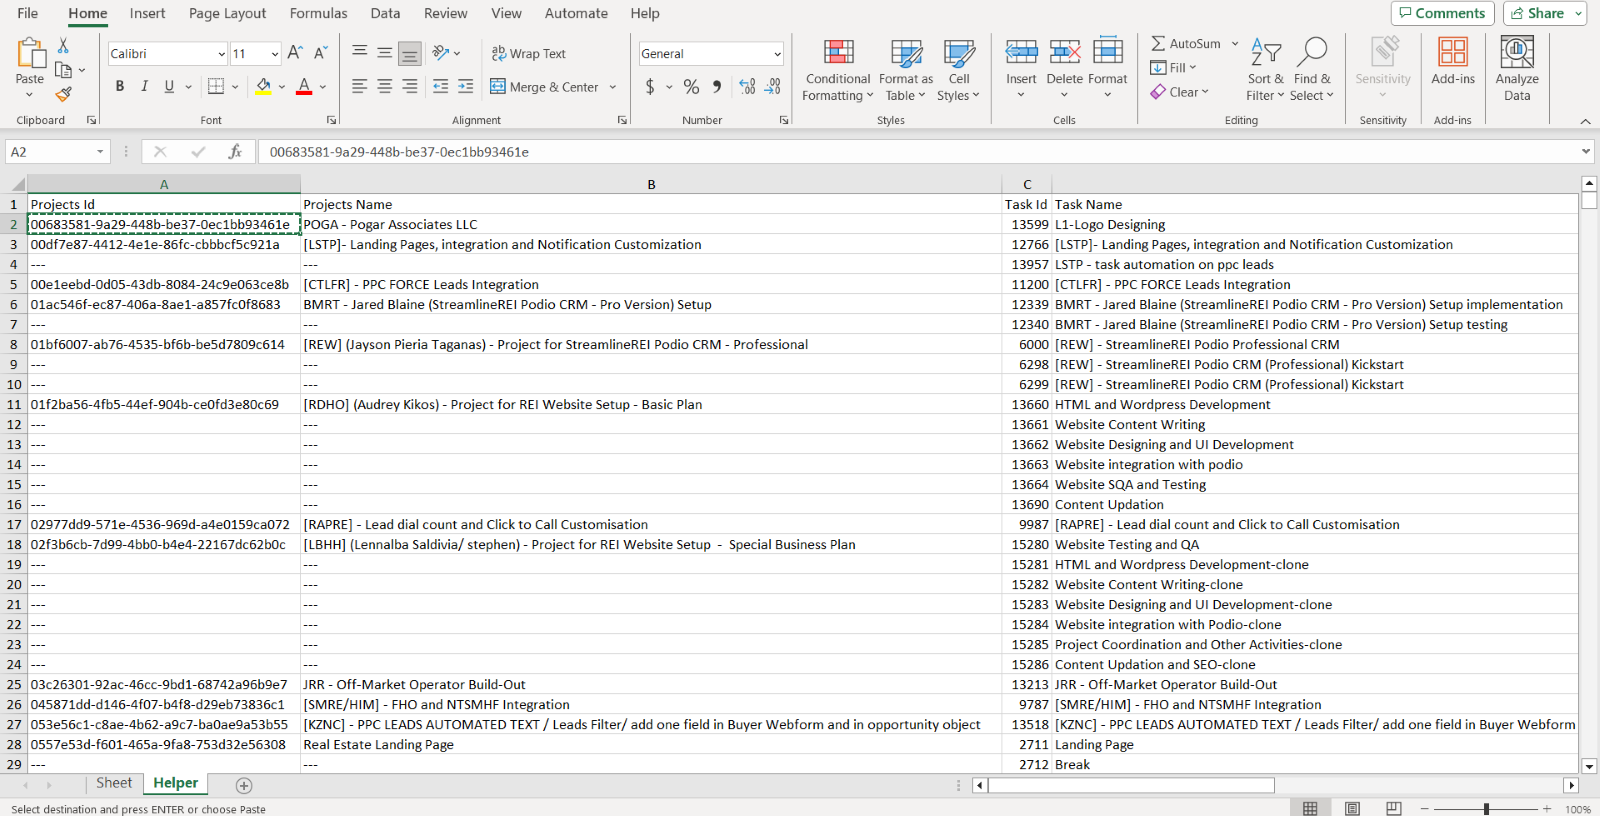
Now when you have the project id, please click the Sheet tab in the bottom right corner.
Use CTRL+V short key to paste the project id in the relevant column on the sheet.
6.2.4: Project Name: write the relevant project name in this column.
6.2.5: Task/Course ID: Follow step 6.2.3 to find the course/task ID.
6.2.6: Date: Please select the date for which you want to add time.
6.2.7: Start Time: Please mention the start time from which you want to add time manually. Please make sure that time format should be HH:MM:SS (Hours: Minutes: Seconds). Mention the time in Eastern Standard Time (EST).
6.2.8: End Time: Please mention the end time to which you want to add time manually. Please make sure that time format should be HH:MM:SS (Hours: Minutes: Seconds). Mention the time in Eastern Standard Time (EST).
6.2.9: Reason: Give a valid reason for the time addition.
Step 7
Add the time data for all the employees. Please use the CTRL+S to save the changes you made in the sheet and close it.
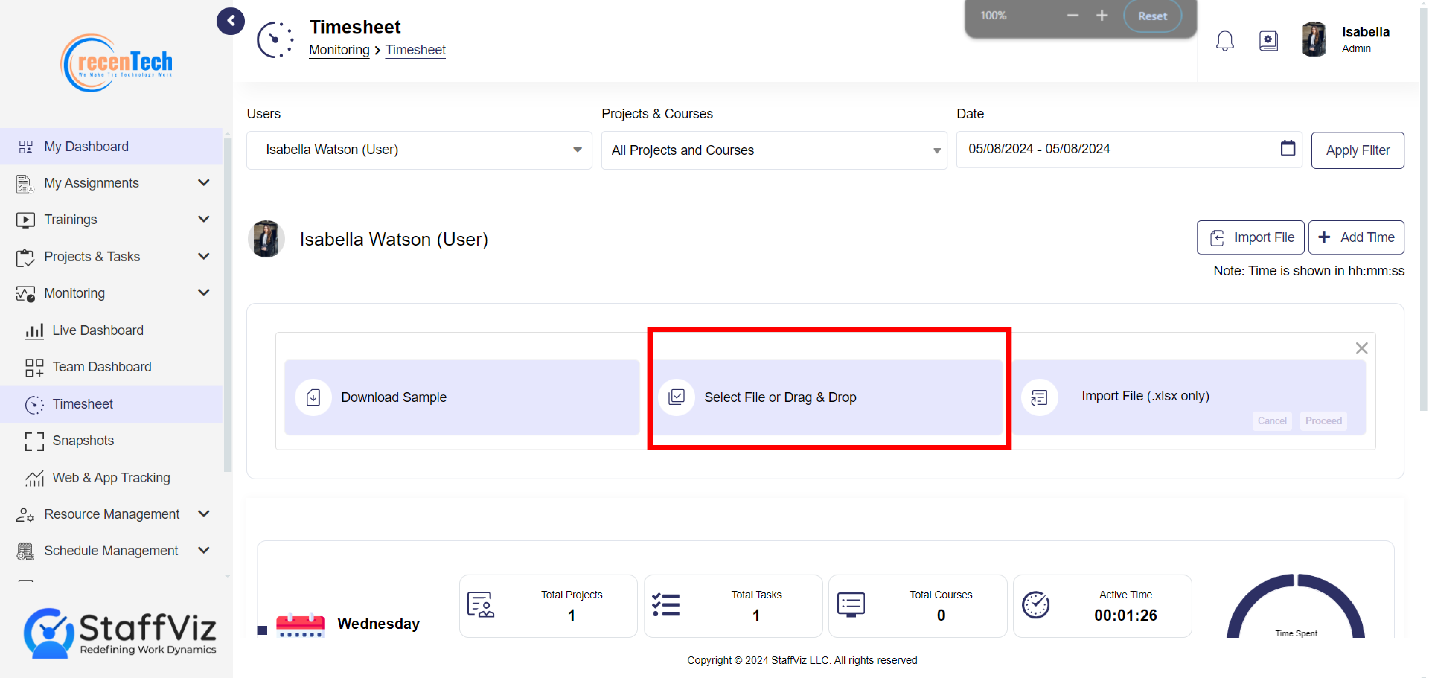
Step 8
Open the Timesheet panel on StaffViz and click the Select File/Drag and Drop option.
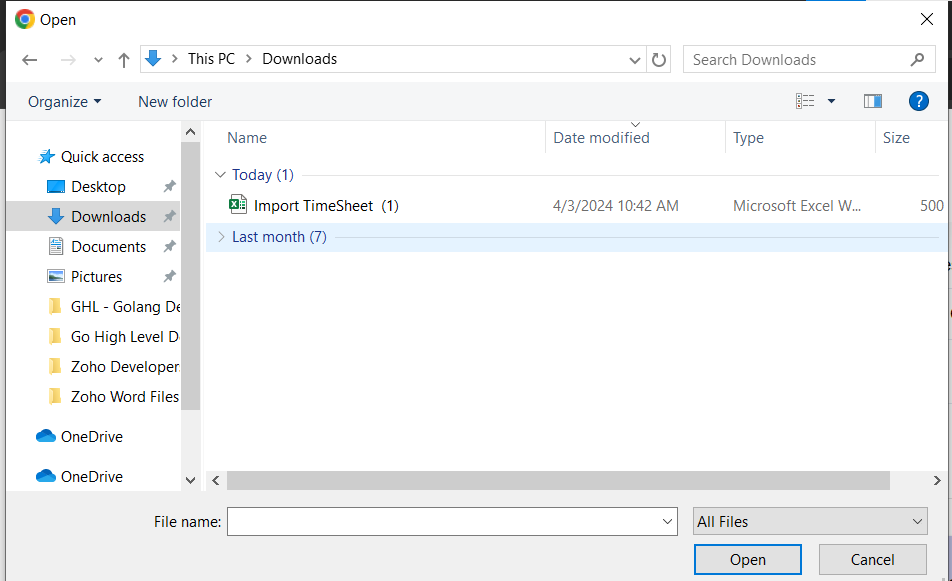
Step 8: Browse Import Timesheet File
A browsing dialog will appear, where you can browse the Import Timesheet file here.
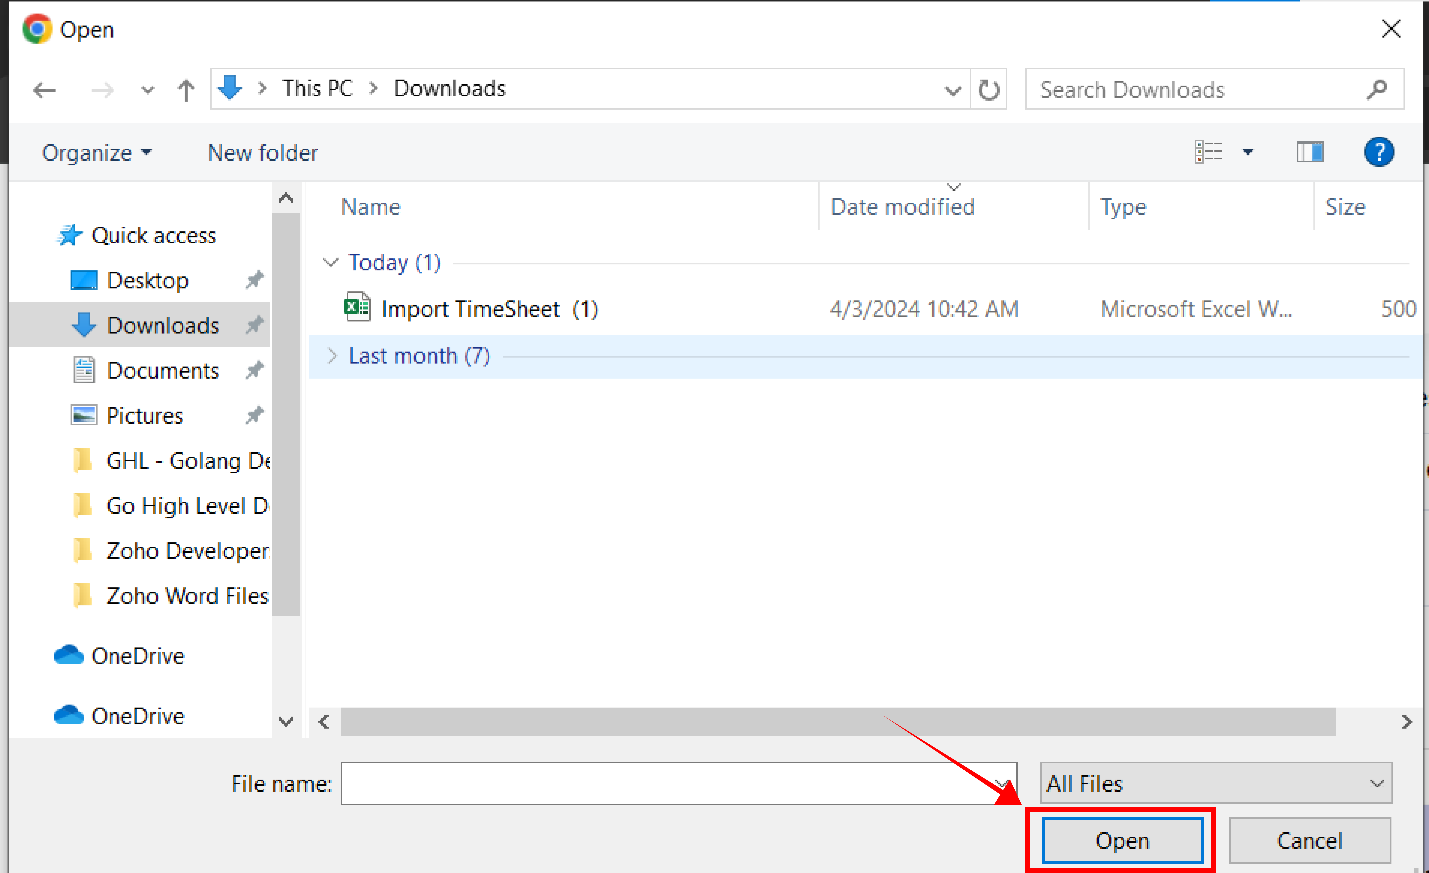
Step 9: Upload File
Click the Open button in the bottom left corner on your screen.
Step 10: File Format Varification
Upon clicking the Open button, the file will be uploaded and a File Verified message will appear on the third button on your screen. In case of any error the proceed button won’t appear and it provides the error list. Correct the errors or remove them to proceed further.
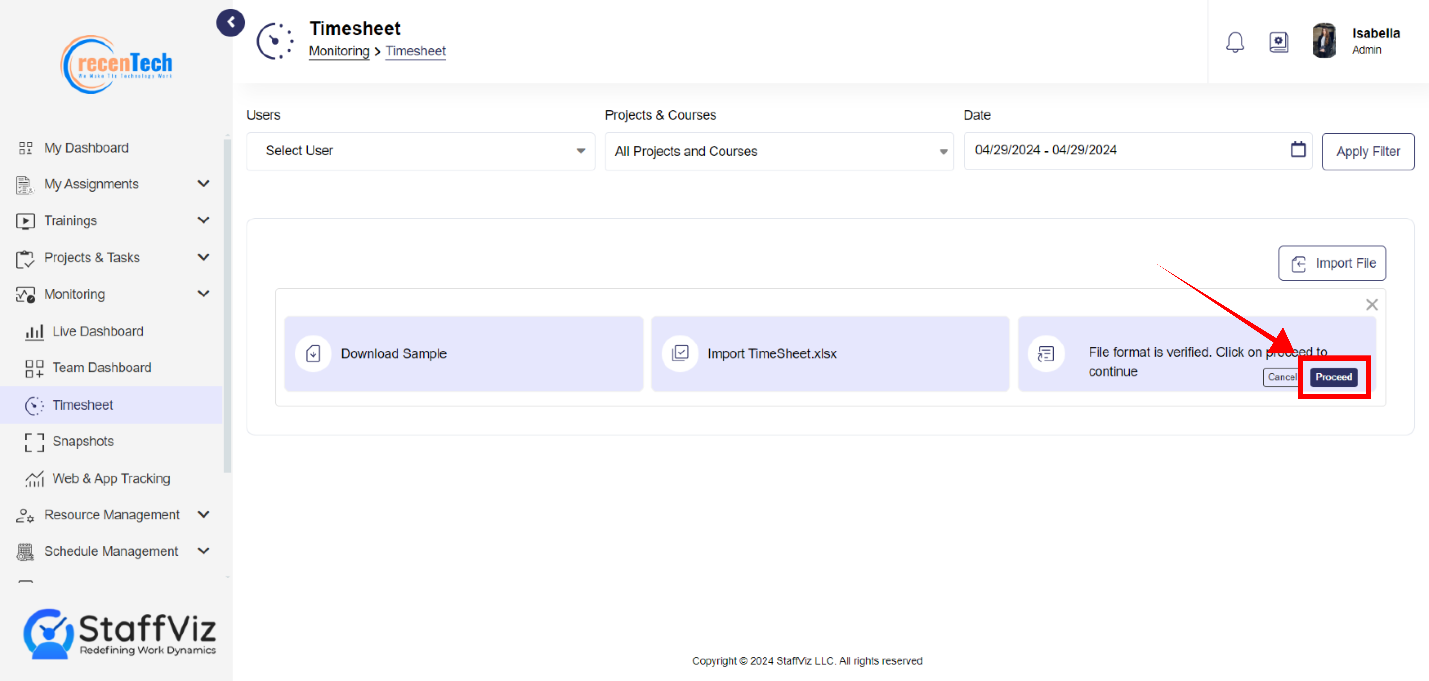
Step 11: Proceed and Finish
Click proceed and time will be added to the relevant tasks/courses/breaks of all the employees you mentioned in the sheet.