StaffViz provides powerful tools to manage your workforce, including employees and departments. The Resource Management feature is specifically designed for Human Resources (HR) managers, enabling thee and organize employee data in one unified system. Both admins and HR managers have full access to view and manage comprehensive details about all resources from this single, easy-to-use interface. This streamlined approach ensures efficient resource tracking and management, saving time and improving organizational oversight.
The following are sections of resource management.
Section 1: Employees
Section 2: Department
Section 3: Idle Time Approval
Section 1: Employees
Navigating to Employee Section
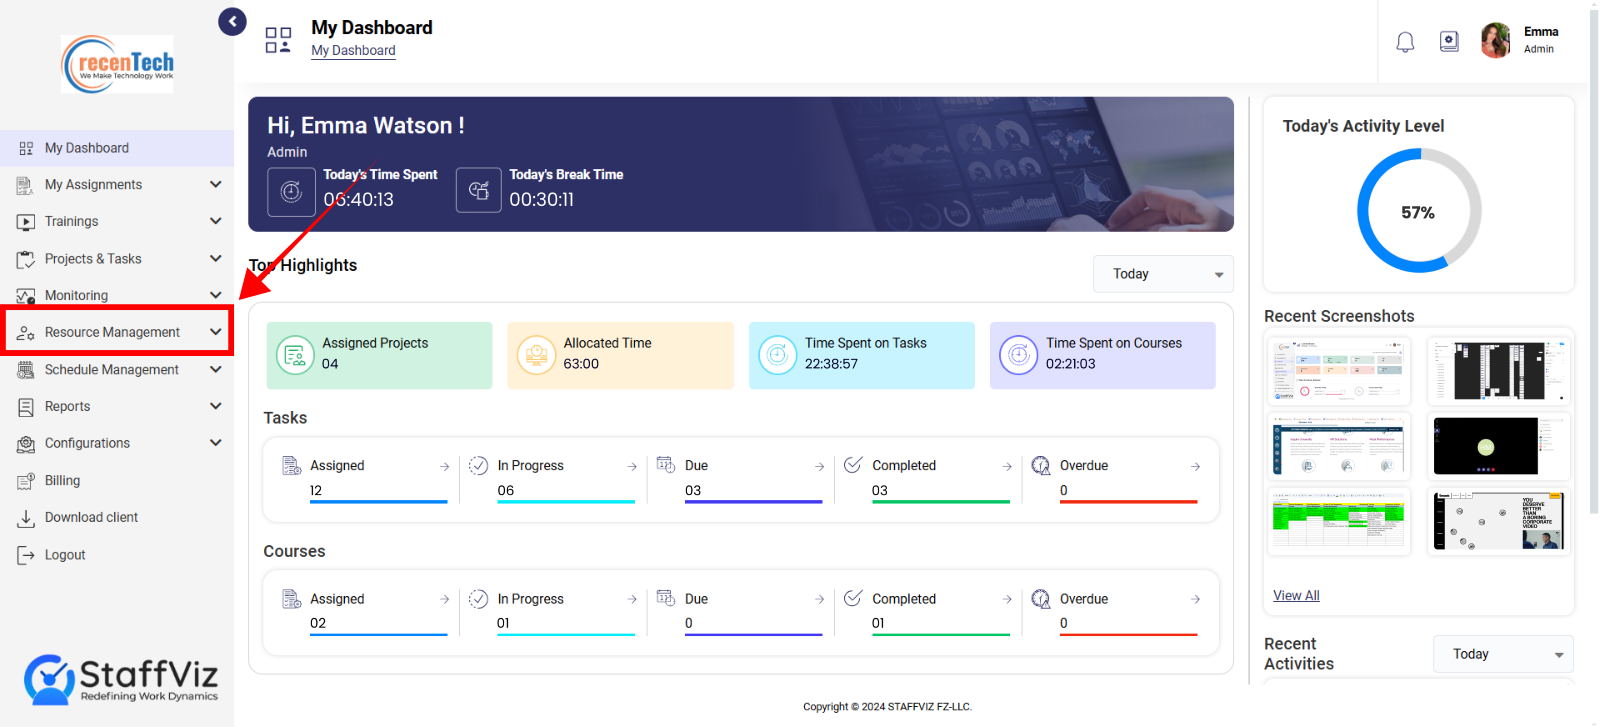
Step 1
On the main menu navigate to the Resource Management Section and click the option.
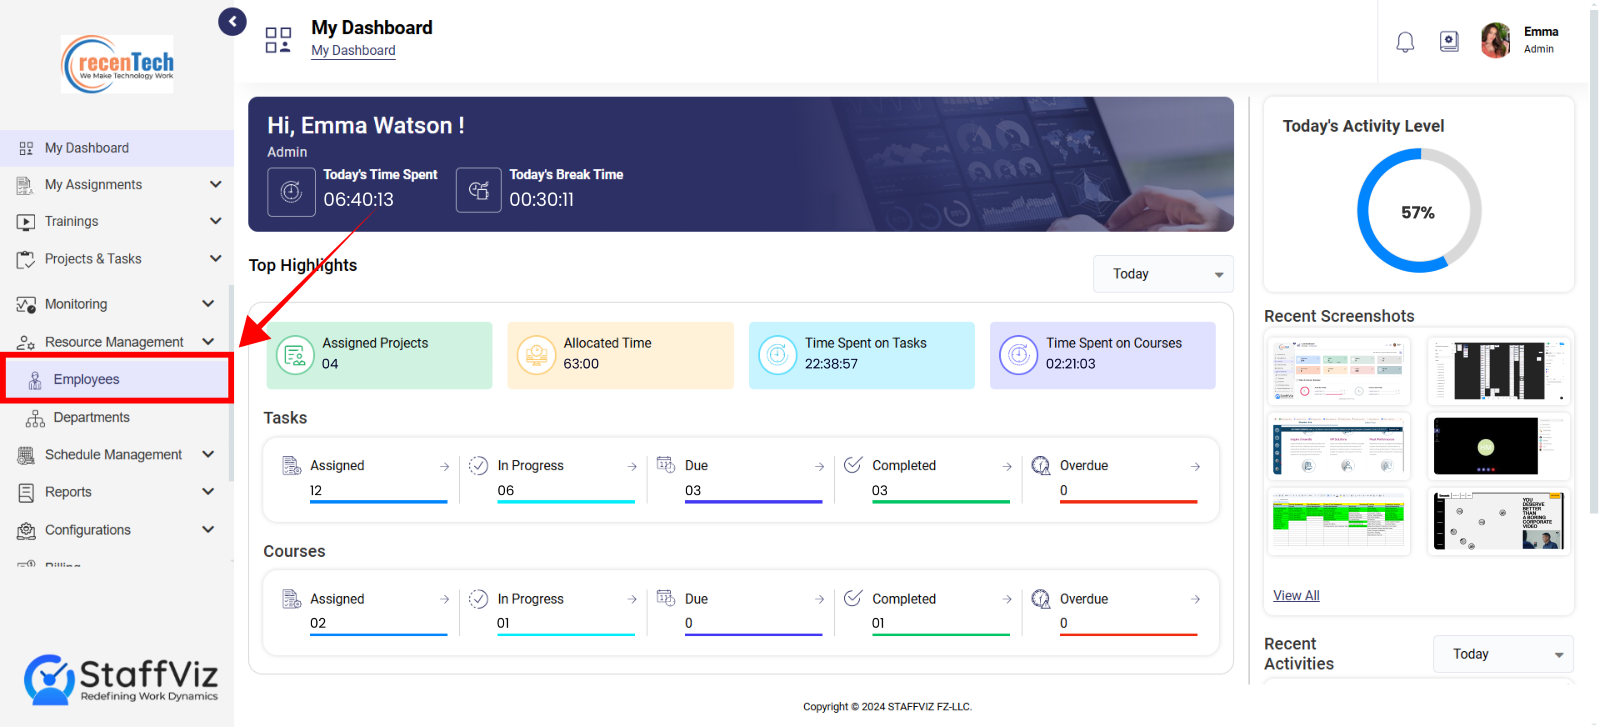
Step 2
From the dropdown, select the employee section. This will land you to the main employee management section.
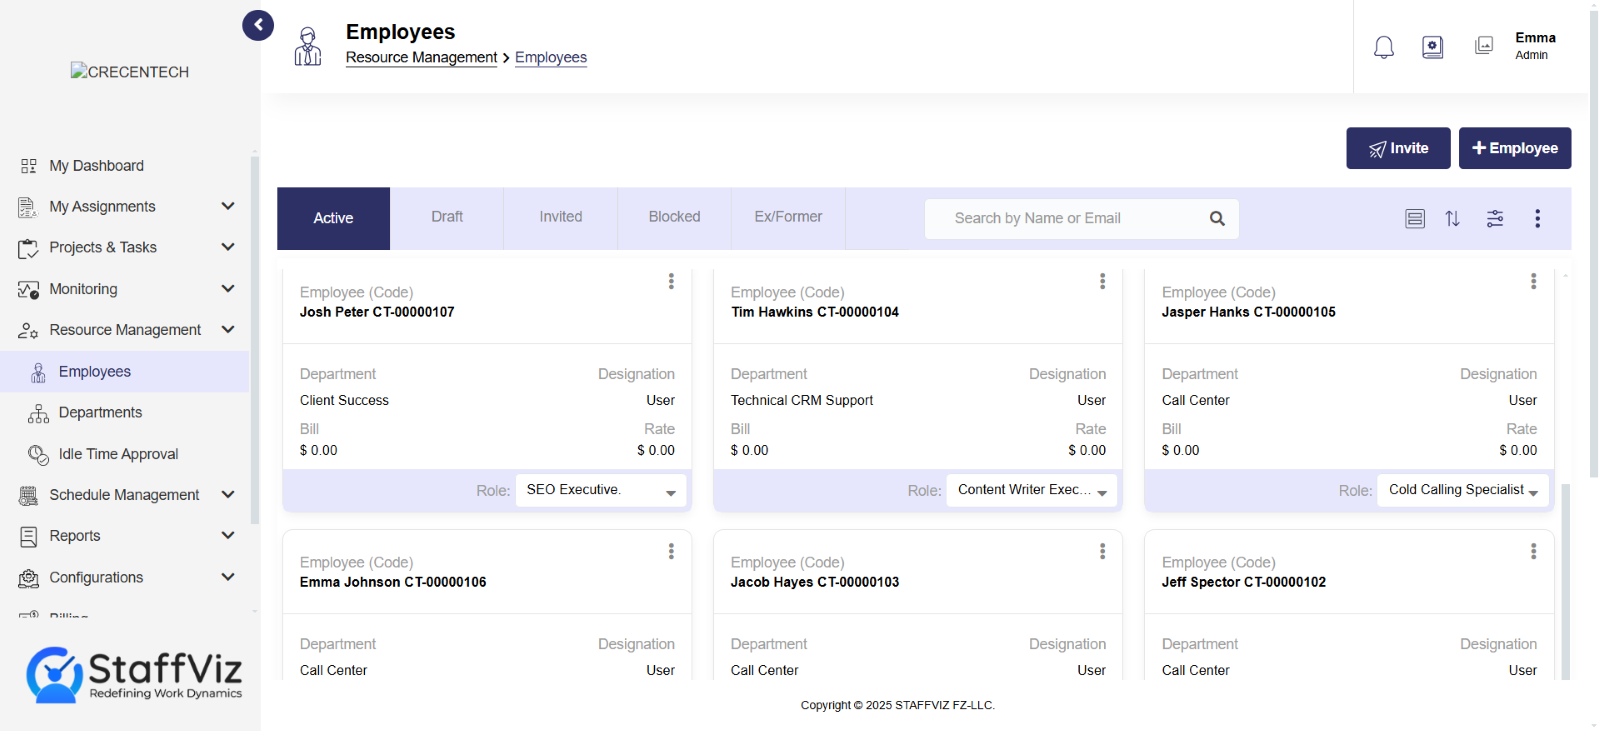
Employees Section Overview
The Employee section of StaffViz is the first section in the resources management module. This section is your main panel for information related to your employees including their credentials, job title, shifts information and more!
The following are the sections you should know about employee monitoring.
Section 1.1: How to Invite New Employee
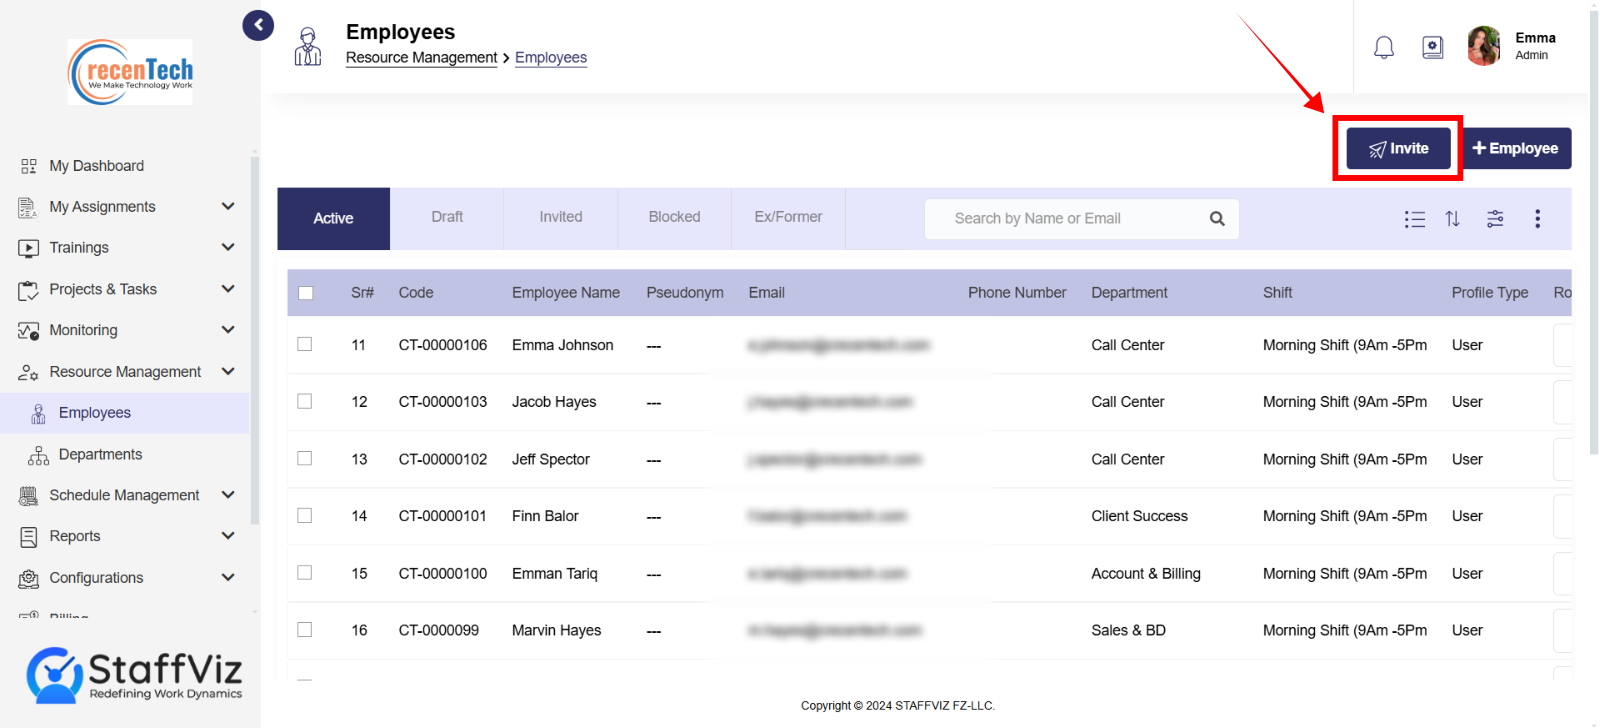
To invite a new employee to your company on StaffViz follow these steps.
Step 1: Click Invite
Click the Invite button on the top right corner of your screen.
Step 2: Fill “Invite Employee” Form
This form allows you to invite a new employee to StaffViz and configure their tracking settings.
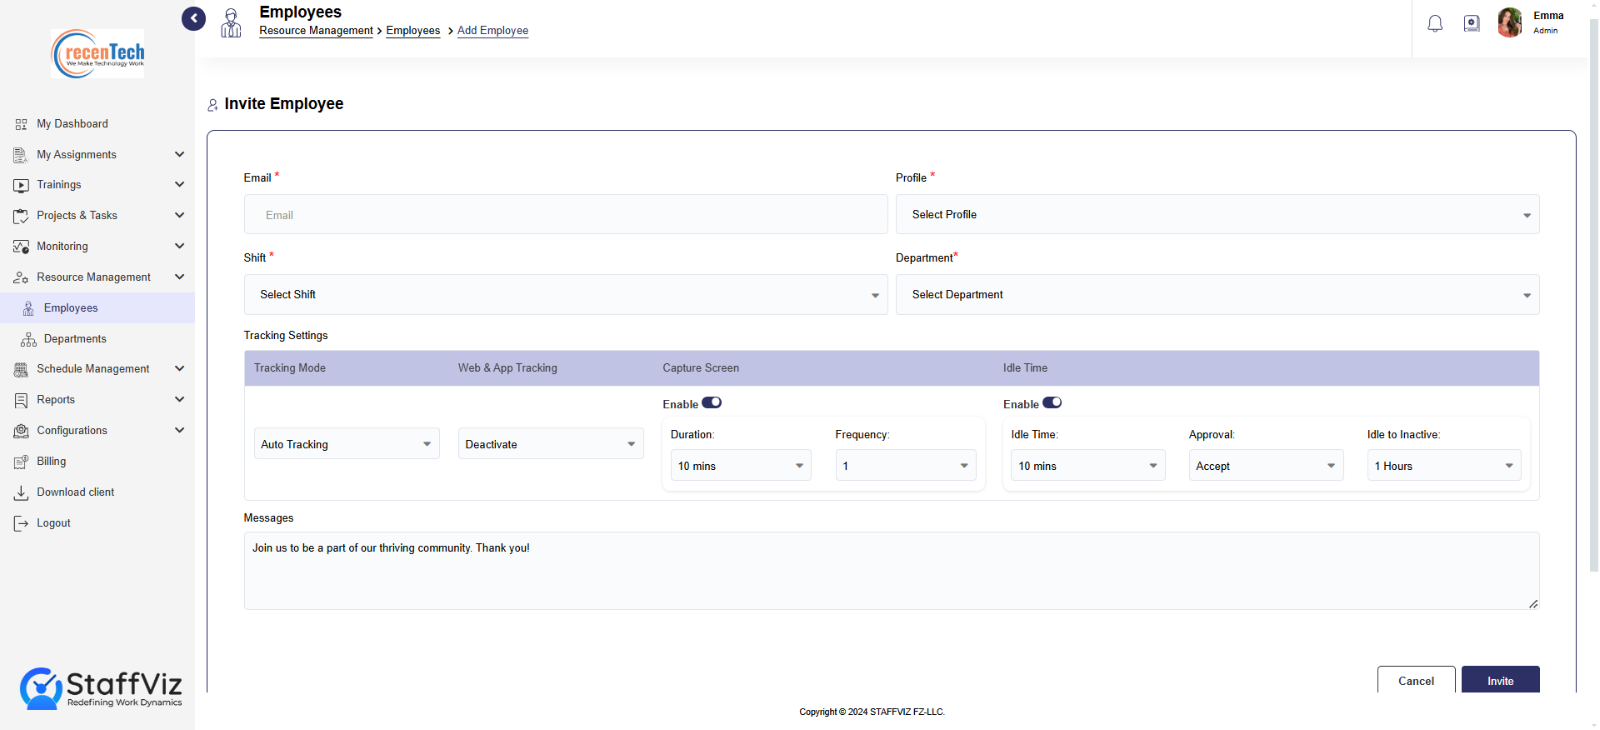
Required Fields:
To invite an employee the following information is required.

Email: Enter the employee's work email address. An invitation will be sent to this address.
Position: Select the employee's job title from the dropdown menu.
Shift: Select the employee's work shift from the dropdown menu (e.g., Morning Shift, Night Shift).
Department: Select the employee's department from the dropdown menu (e.g., Sales, Marketing, Engineering).
Tracking Settings:
The following option allows admins to preset tracking setting before the invitation is sent.
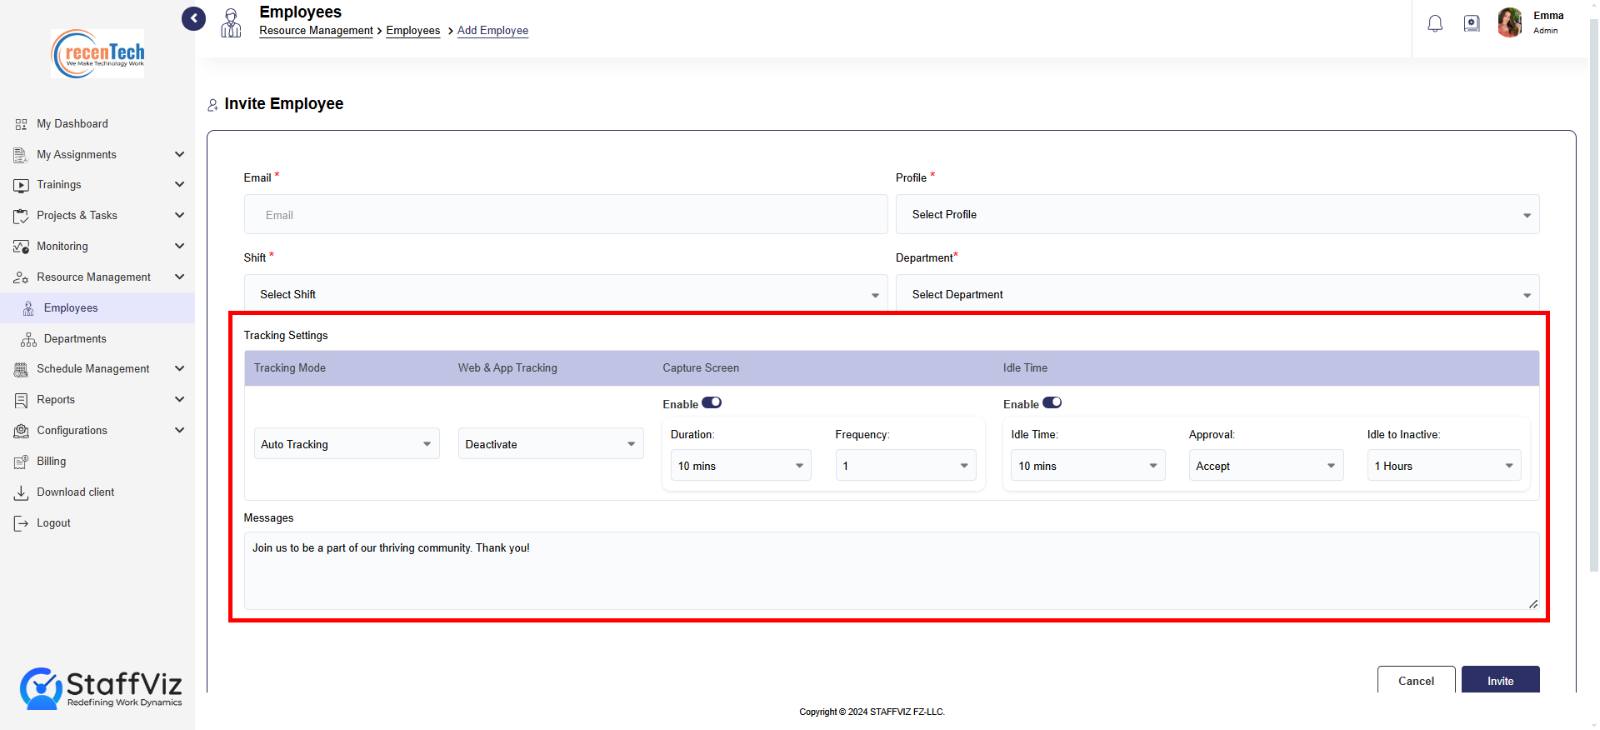
Tracking Mode: Choose how employee activity will be tracked:
Auto-Time Tracking: Automatically tracks time for projects, tasks, and courses.
Manual Timesheet: Users need to add time manually for each task, project, and course.
Web & App Tracking: Activate or Deactivate activity monitoring on web browsers and applications.
Capture Screen: Enable or disable capturing screenshots. Users can also set the time duration for screenshot capture and set frequency for that.
Idle Time: Define the time with no activity after which this user will be considered idle.
10 mins: Employee is considered idle after 10 minutes of inactivity.
20 mins: Employee is considered idle after 20 minutes of inactivity.
Note: Idle time options may differ depending upon your currently subscribed plan.
Approval:
Accept: Idle time for the employee will be automatically accepted.
Reject: Employee idle time will be automatically rejected.
Idle to Inactive: This defines how long an employee can be idle before their status changes to "inactive" within StaffViz.
Section 1.2: Navigation Tab
The Navigation Section contains filters that allow you to manage employes using various filters.
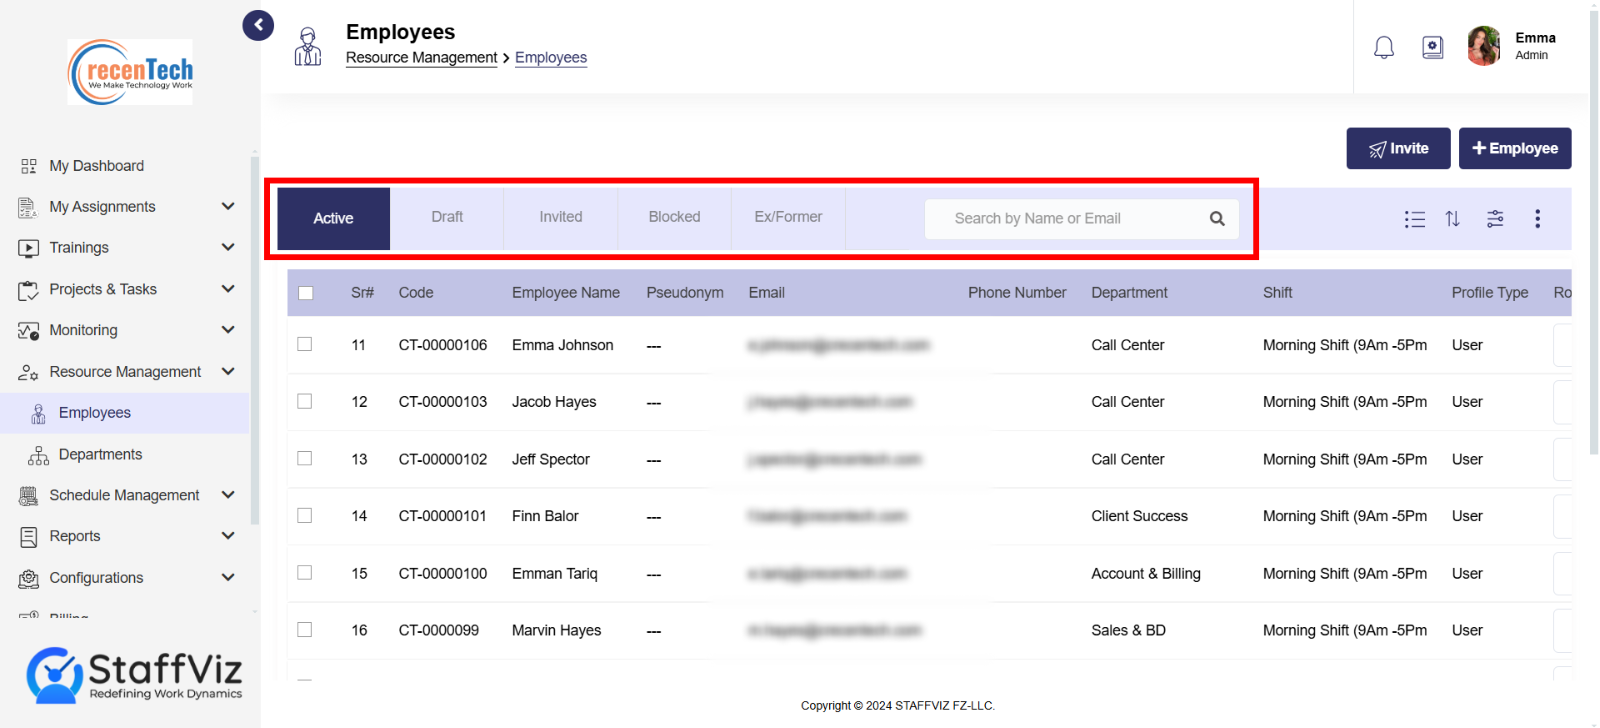
Here's a breakdown of the available filters:
1. Active
Shows employees who are currently working within the organization. You will be charged per seat for each employee added to the company.
2. Draft
List of employees for whom the data is incomplete and saved to draft to be completed later. You’ll not be charged for the Employees in draft.
3. Blocked
Shows employees whose invitations have been accepted but tracking is currently disabled. Admins can also unblock this user. You’ll be charged for the blocked users as they are not permanently blocked and can be unblocked anytime.
4. Ex/Old
This refers to "Ex" or "Old" employees. Employees who were previously active but no longer are part of the organization. Note that their StaffViz access is revoked when they leave the organization. The company will not be charged for these users.
5. Invited
Shows employees to whom invitations have been sent but the employee has not yet responded (accepted or rejected).
The number of invitations varies based on your StaffViz plan. In case the limit is reached, you can add an invitation bucket from the billing section to send further invitations.
6. Search Bar
Locate employee(s) instantly by name or email, saving time compared to browsing through long lists.
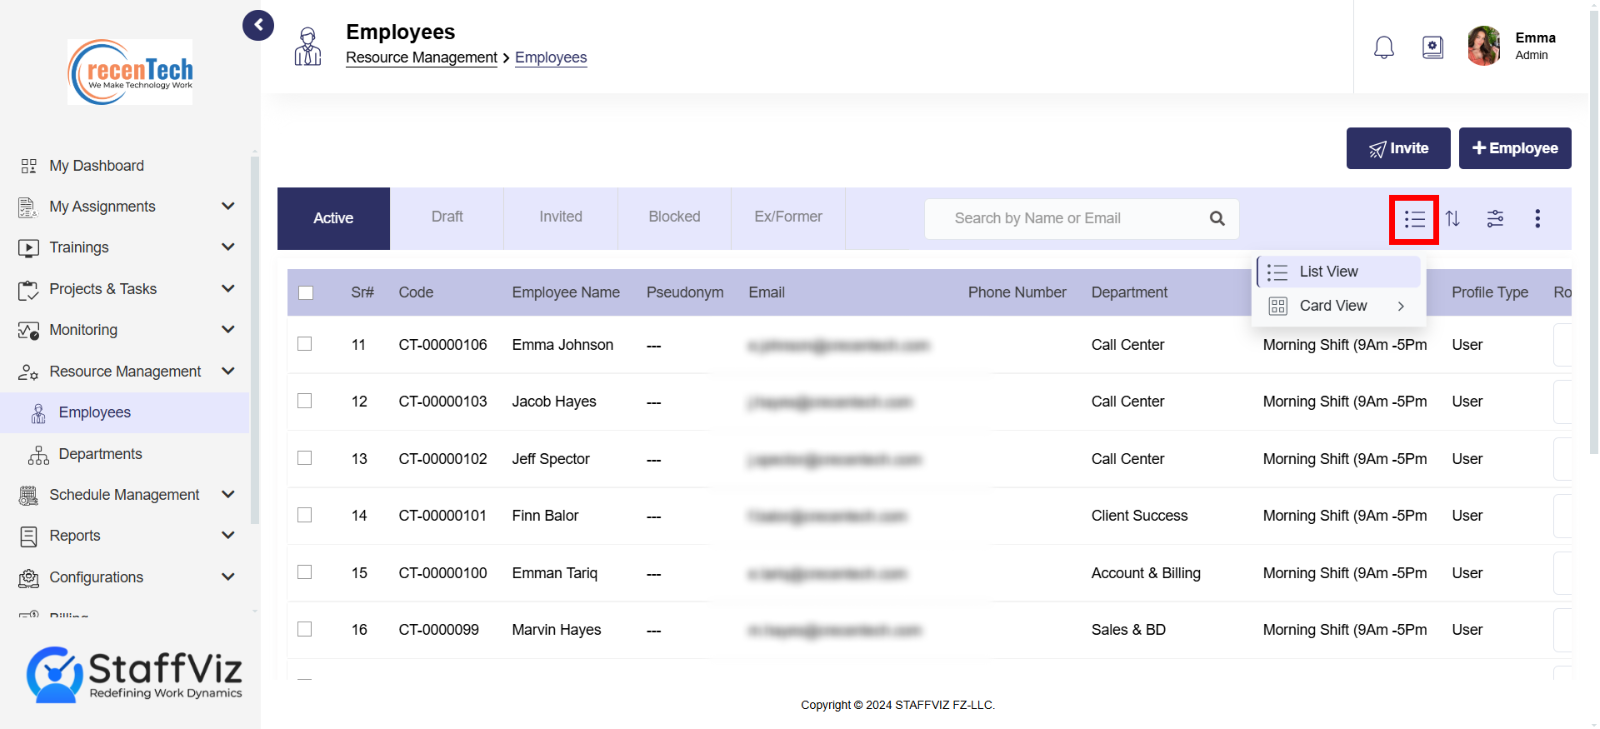
7. List/Card View
List views and card views are both methods for displaying information. These options offer different visual presentations. We’ll further discuss both lists and card views in section 1.3.
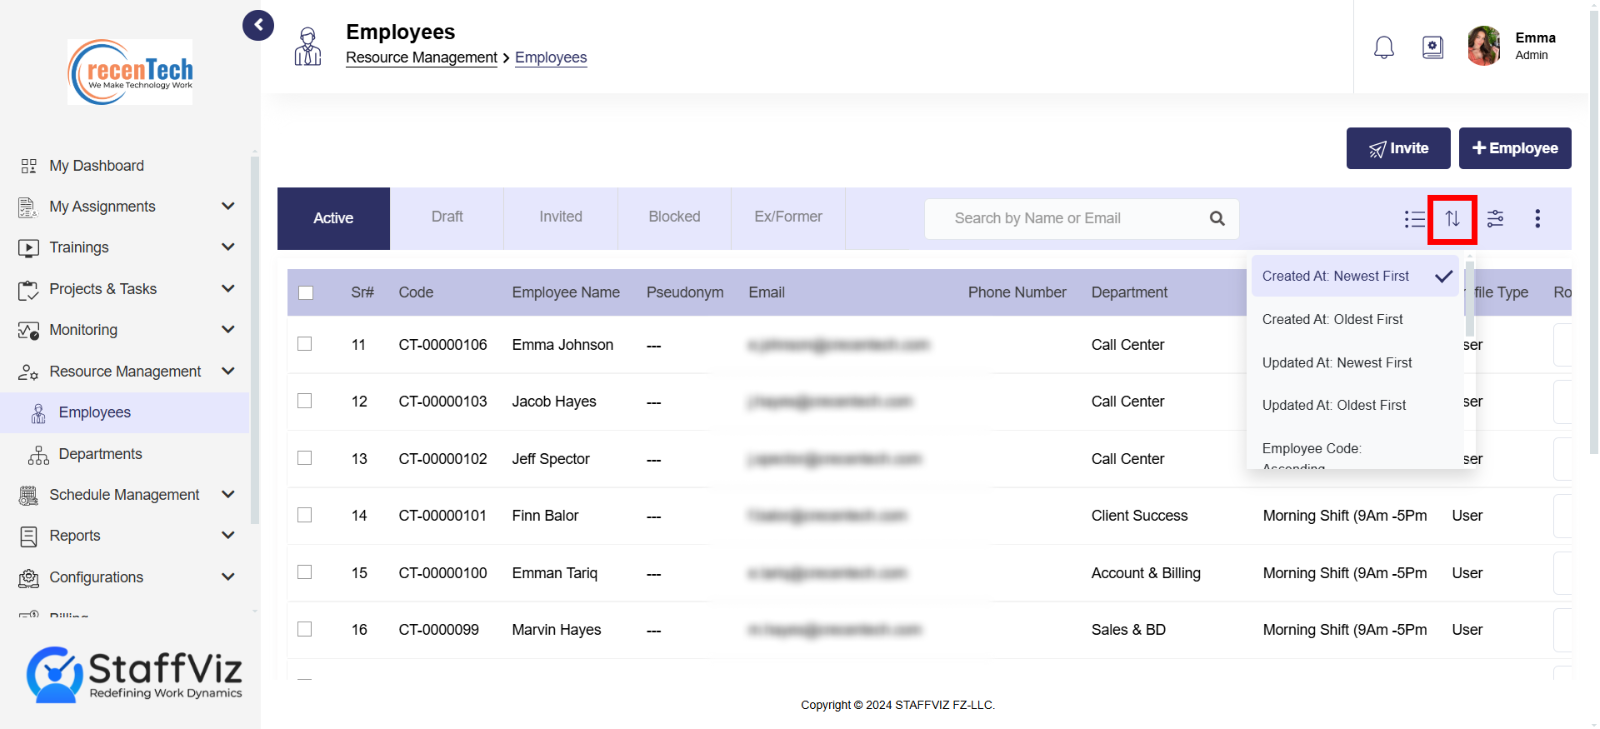
8. Sorting Options:
Created At: Sorts employees by the date and time they were initially created.
Updated At: Sorts employees by the date and time they were last modified.
Employee code: Sorts employees by their associated code.
9. Filter Panel:
The filter panel on the left-hand side of the screen allows you to narrow down the list of employees displayed on the main screen according to various criteria. This helps you quickly find the specific employees you are looking for. You can also manage filters using this panel.

This feature has 3 main sections. The first section shows the list of filters to be applied to, the section next to it shows the filter applied along the search bar to search for the filters applied, finally two buttons to apply and clear the filters.
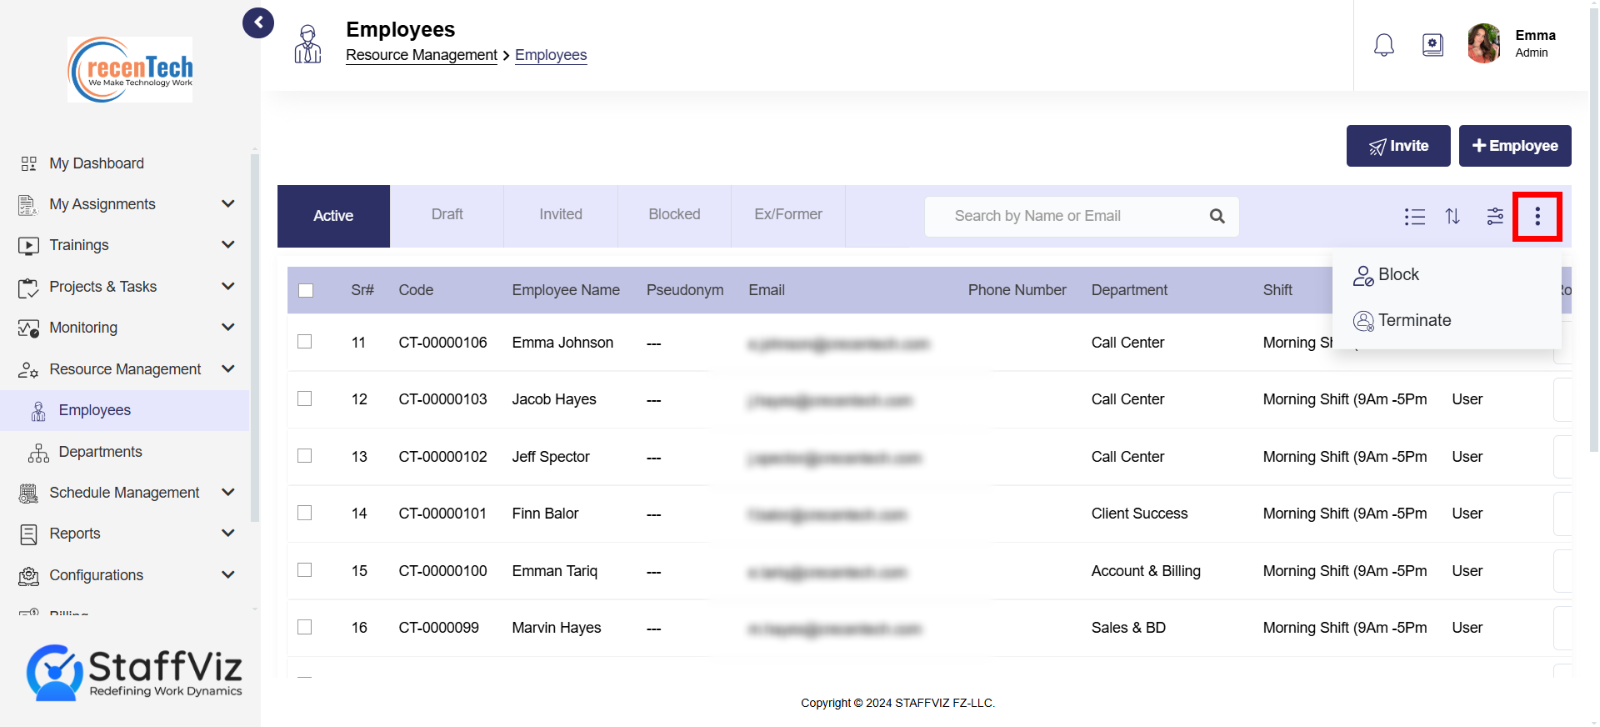
10. More Options
Clicking (three dots) More button further offers two more options.
Block: Blocks the selected user/s temporarily and these users can be unblocked.
Terminate: Permanently remove selected user/s from the organization and this action is irreversible. In case you wish to add the same user again, you’ll need to resend the invitation to the organization.
Section 1.2.1: How to Block or Terminate an Employee
Follow the provided instructions to block or terminate single or Mutiple employees.
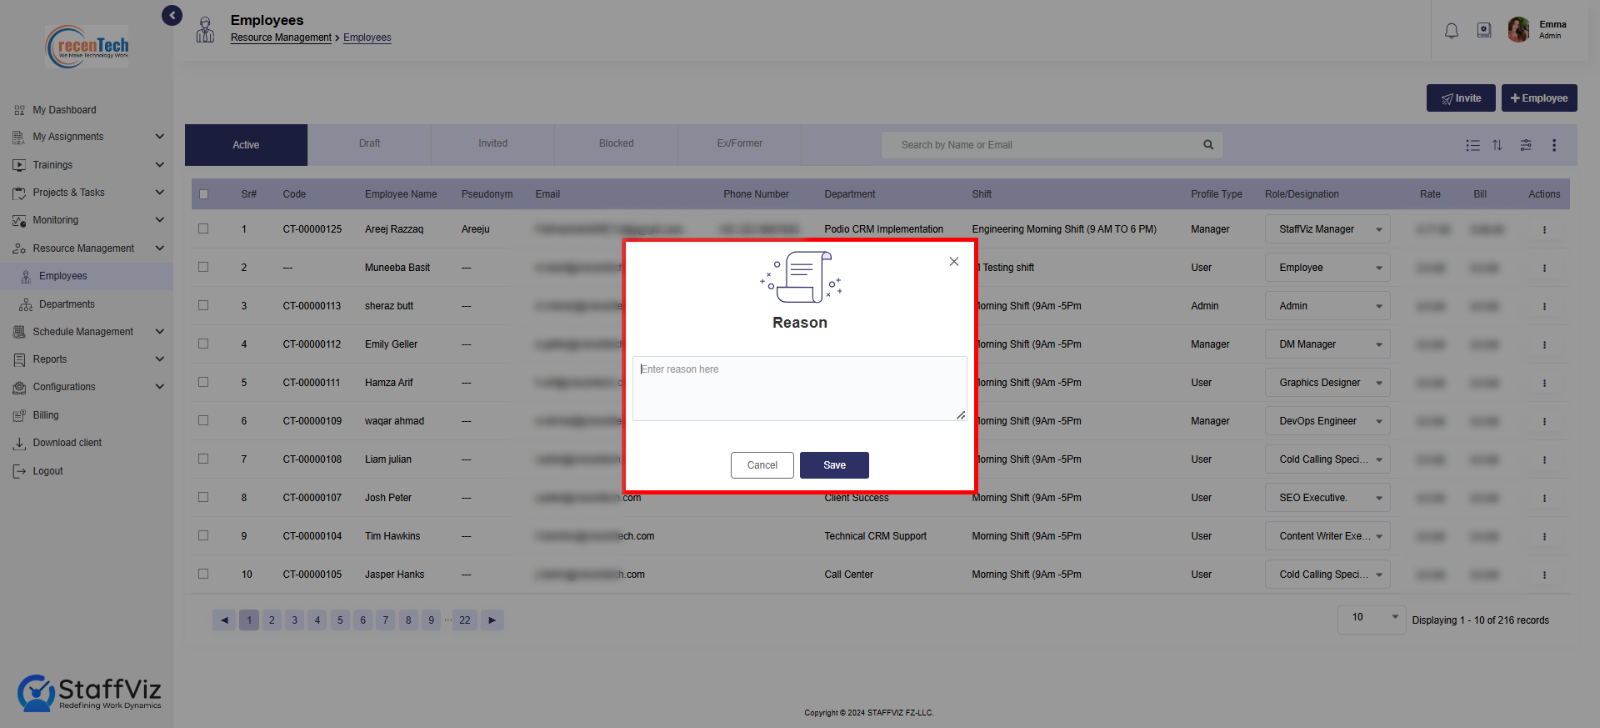
Block Employee
Restricts an employee's access to the StaffViz temporarily without terminating their employment.
Step 1: Select Employee/s
To block employee/s, in the Resource Management > Employee section, select the employee/s you want to block.
Step 2: Click Block Option
Click the (three dots) More option and select Block.
Step 3: Give Reason
Give a detailed description in the reason section to block an employee and click the submit button.
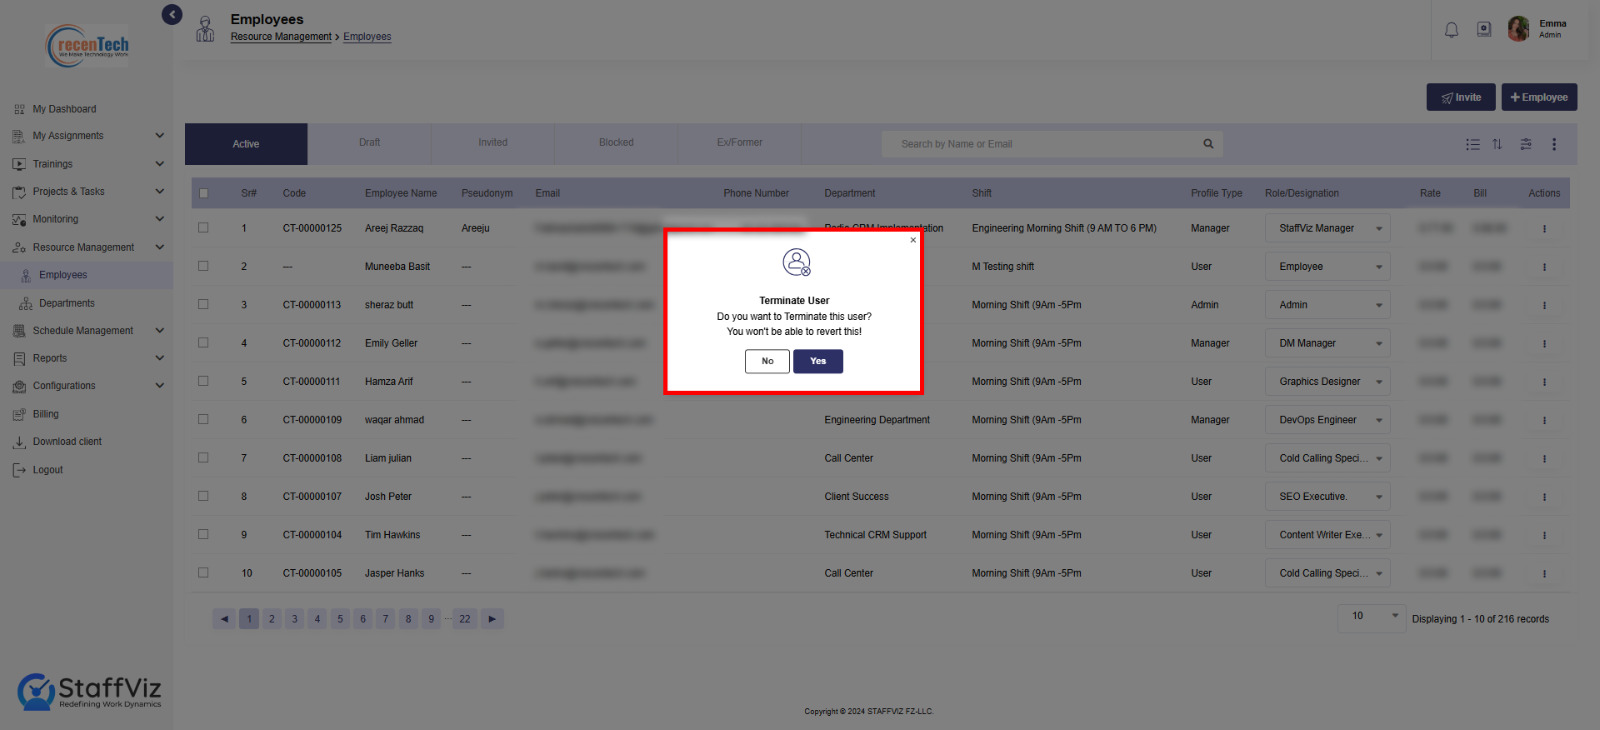
Terminate Employee
Permanently ends an employee's job, revoking all access to company systems and resources.
Step 1: Select Employee/s
To block employee/s, in the Resource Management > Employee section, select the employee/s you want to terminate.
Step 2: Click Terminate Option
Click the (three dots) More option and select Terminate.
Step 3: Confirm Termination
Confirm the termination by clicking the Yes button.
Here’s how you can block or terminate employees in StaffViz.
Section 1.3: List And Card View
List View Overview
The StaffViz employee table provides a comprehensive overview of your employees and their information, along with various actions you can perform on their records. Let's break down the meaning of each field and the available actions:
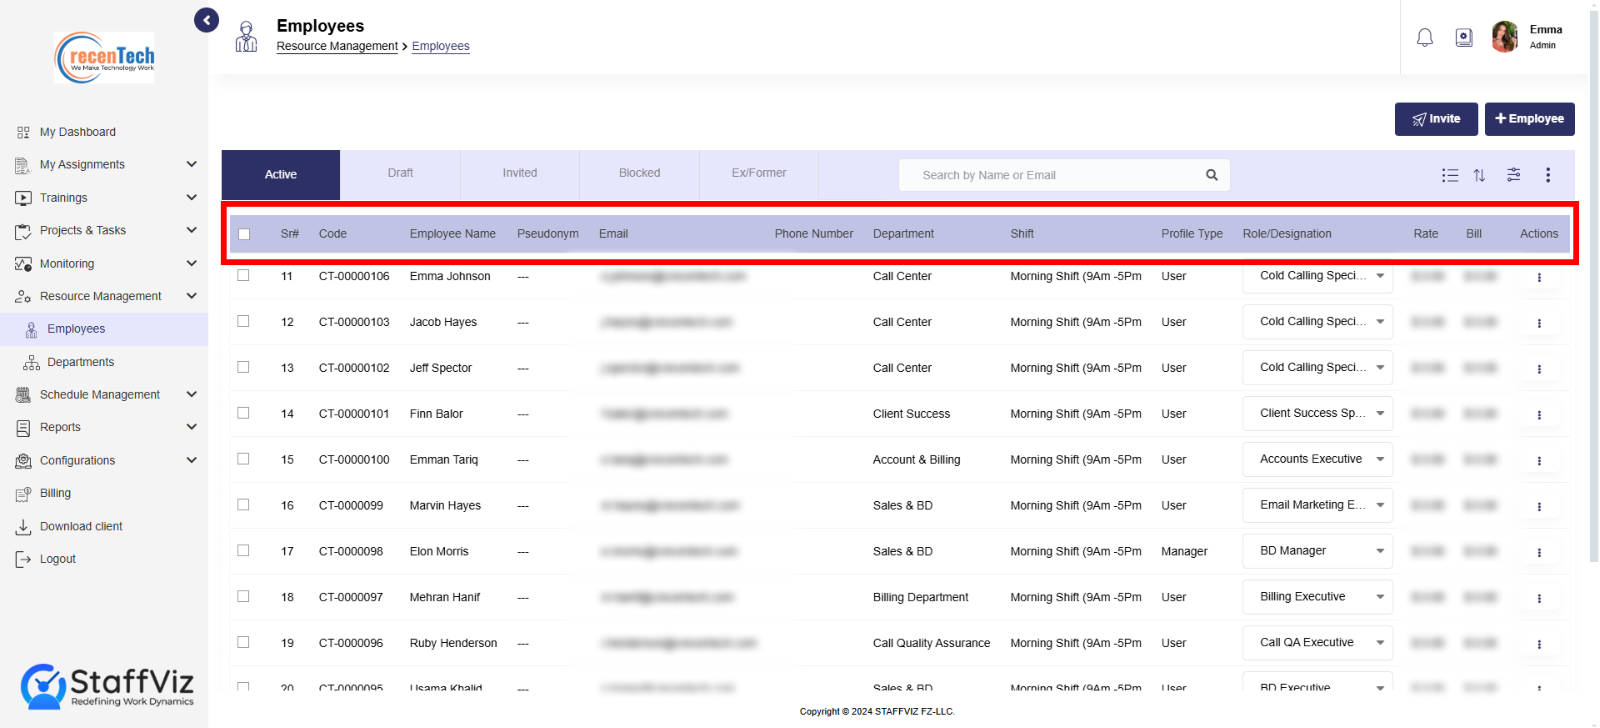
Sr#: This column refers to a sequential "Serial Number" assigned to each employee within the system. It's typically used for basic identification and sorting purposes.
Employee Code: This is a unique employee identification code assigned by your company.
Name: This field displays the employee's full name.
Pseudonym: A name assigned to your employee besides their real name.
Email: This column contains the employee's work email address.
Phone Number: This section has the employee's personal contact number.
Department: This section specifies the department the employee is assigned to.
Shift: Shift columns offer information about the employees' current defined shift.
Profile Type: This refers to the employee's access type within the StaffViz.
Role: This field specifies the employee's role within their department or project. (e.g., Team Lead, Manager.)
Rate: This section indicates the employee's hourly pay rate.
Bill: This section calculates the total bill for the client(customer) by multiplying the hourly rate with the total number of working hours.
Action: Action options further provide options that we’ll discuss in the section 1.3.1.
Card View Overview
Card view offers the same information as the list view but in cards format. StaffViz lets users choose between different options, allowing them to customize how they want to view or present data.
Section 1.3.1: Action Options
This section provides options for managing the employee's record. Here's a breakdown of the available actions you can perform.
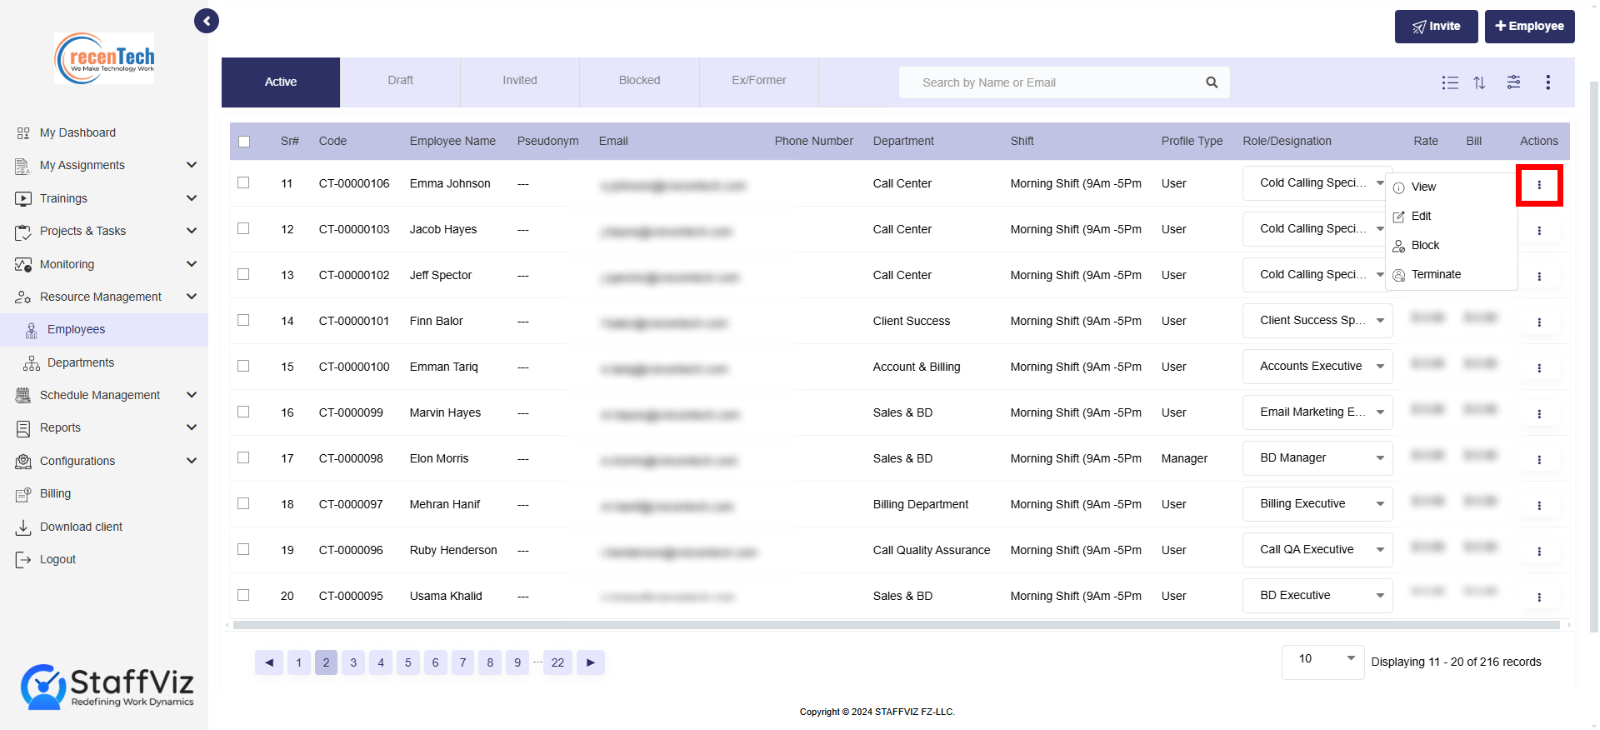
View: Allows you to access and view the employee's detailed information.
Edit: Enables you to edit the employee's information, such as contact details, job title, or department.
Block: This action suspends the employee's access to StaffViz. They might not be able to log in or use the system's functionalities.
Terminate: This option marks the employee's status as terminated within the system. Their access to StaffViz will be disabled.
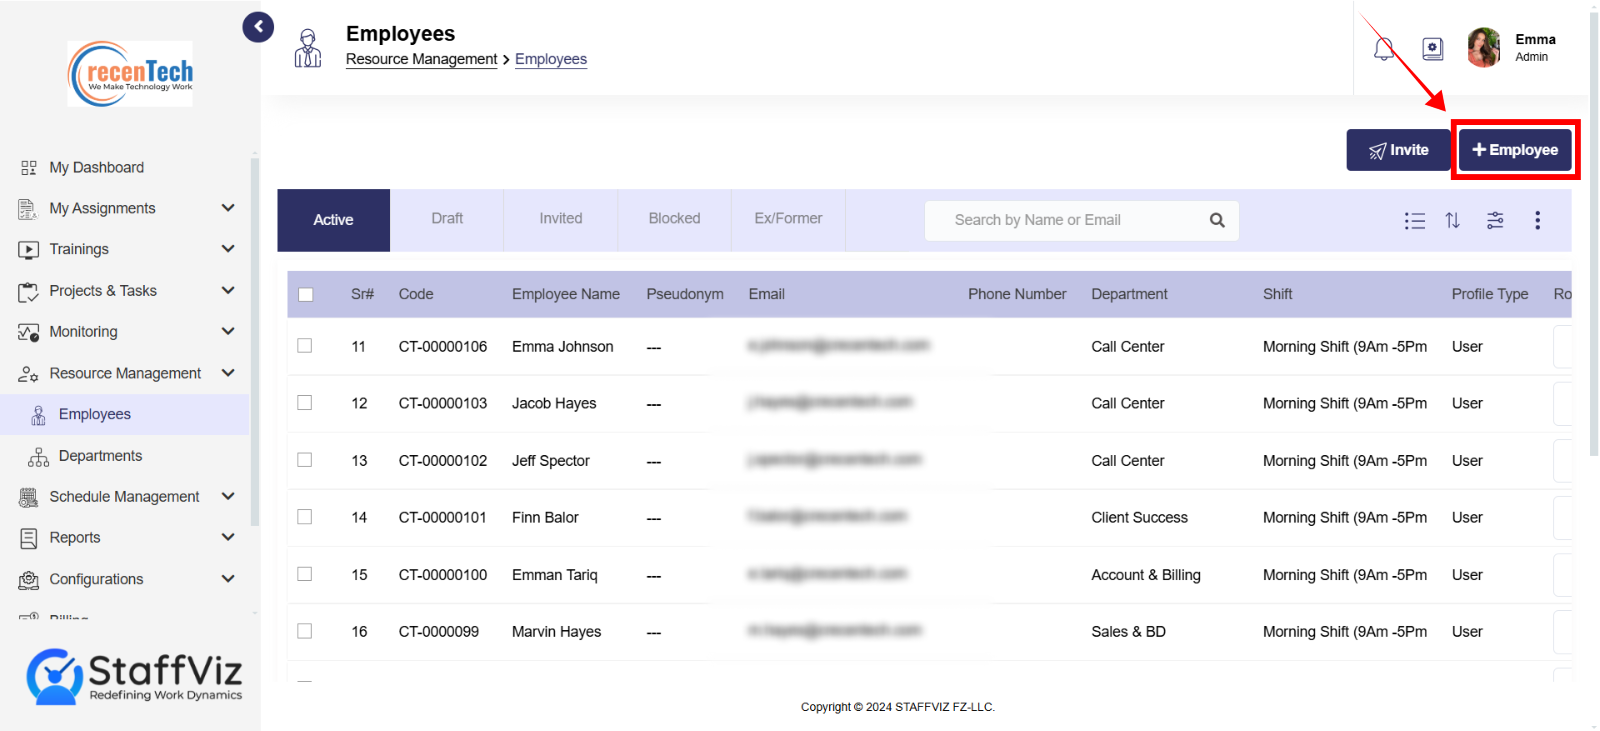
Section 1.4: How to Add Employee to StaffViz
To add employees to StaffViz, it’s important to invite the employee by following instructions from section 1.1 . Once the employee accepts the invitation, you can start adding information in this section. This section holds all the data about an employee including personal, additional, employment history, educational details, and documents. Let’s have a look at how human resource managers can add employees to their company on StaffViz.
Step 1: Click Add Employee
In the Resource Management > Employees section, click +Employee button.
Step2: The Add Employee Panel
This will open a new page on your screen.
This form is divided into five sections, each dedicated to capturing specific employee details.
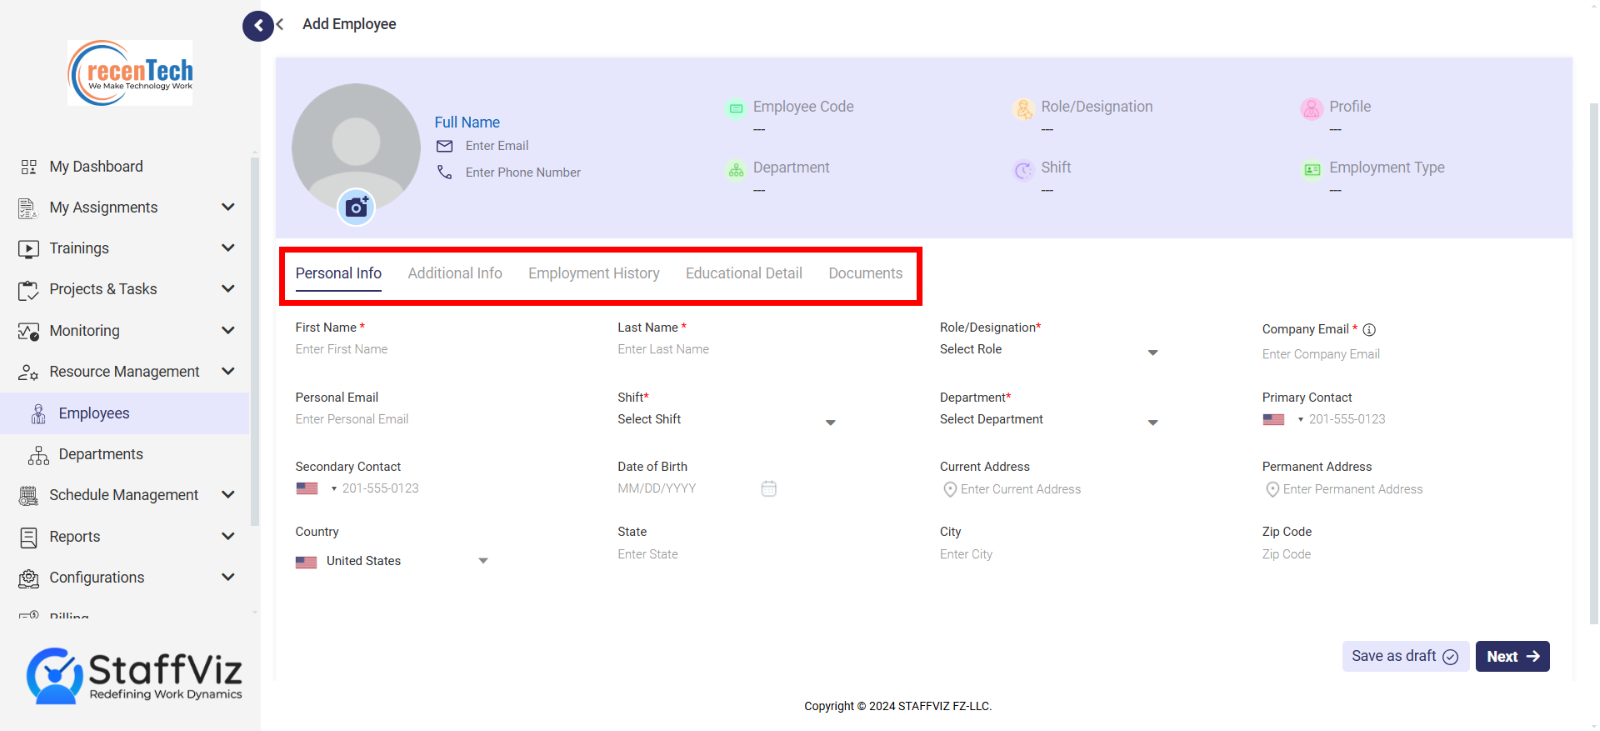
Step 3: Add Image
Before filling out the specific information form, click the cam icon to add the employee’s image.
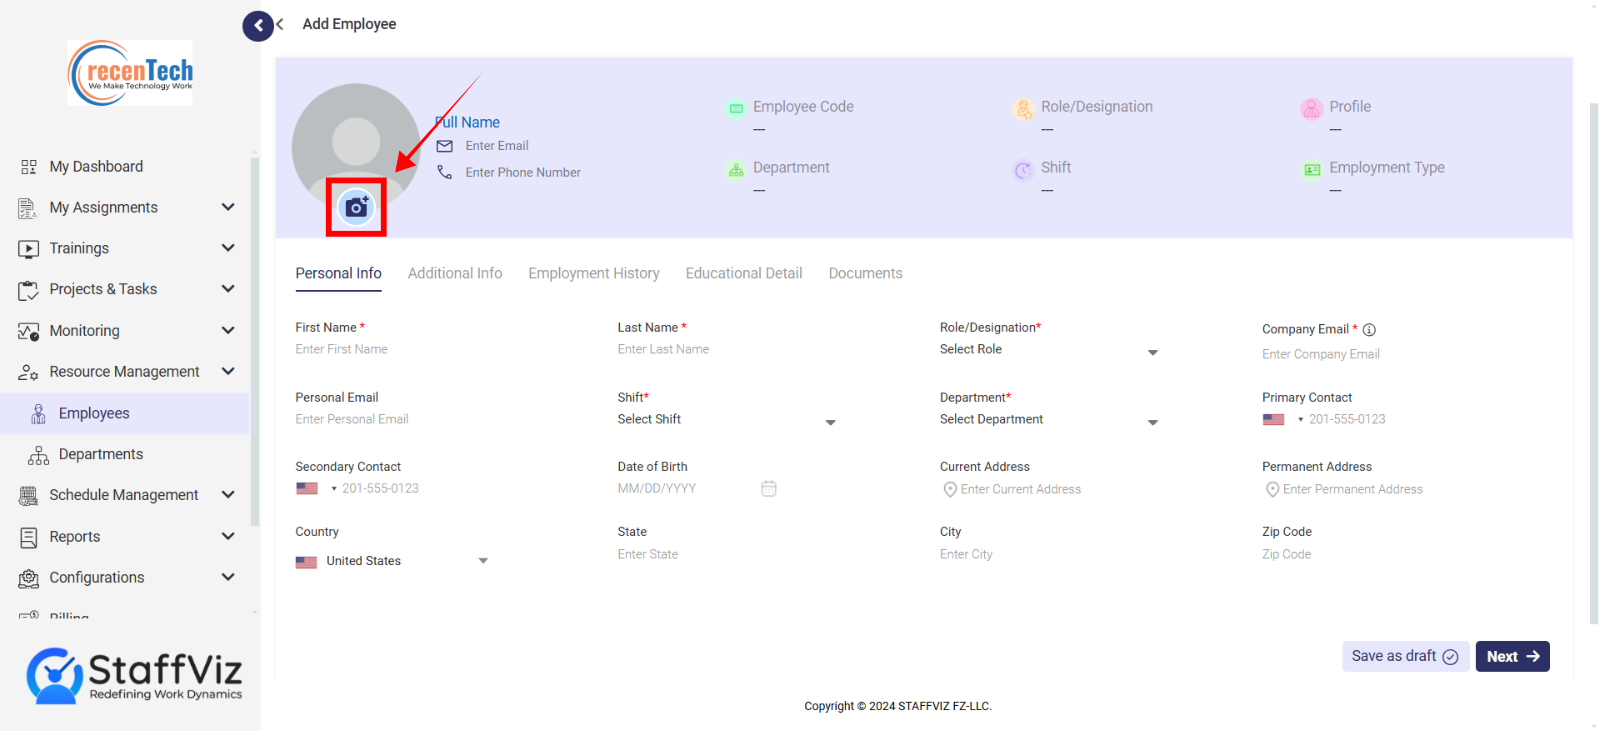
Section 1.4.1: Personal Info
Personal information form as the name suggestion is designed to keep all the personal information of an employee. Following are all the fields explained.
All fields with asterisks (*) are mandatory to fill out.

First Name: Enter the employee's first name.
Last Name: Enter the employee's last name or surname for identification.
Role/Designation: Select the employee's job title or position within the organization (e.g., Manager, Developer).
Company Email: Provide the official company email address assigned to the employee.
Personal Email: Enter the employee's personal email address for secondary communication.
Shift: Select the employee's assigned work schedule (e.g., Morning, Evening, Night).
Department: Choose the department the employee belongs to (e.g., Sales, HR, Engineering).
Primary Contact: Enter the main phone number used to reach the employee.
Secondary Contact: Provide an alternate phone number for backup communication.
Date of Birth: Input the employee's date of birth in the specified format.
Current Address: Enter the employee's current residential address.
Permanent Address: Provide the employee's permanent or home address, if different from the current address.
Country: Select the country where the employee resides.
State: Specify the state or province of the employee's residence.
City: Enter the city where the employee is currently located.
Zip Code: Provide the postal or zip code for the employee's address.
Verify if all the information provided is correct and click the next button.

Section 1.4.2: Additional Info
This form gathers key employment details, including the type of employment, salary structure, and important dates like the offer and joining dates. It also tracks preferred contact methods and contract duration, ensuring efficient management and clear communication for each employee.
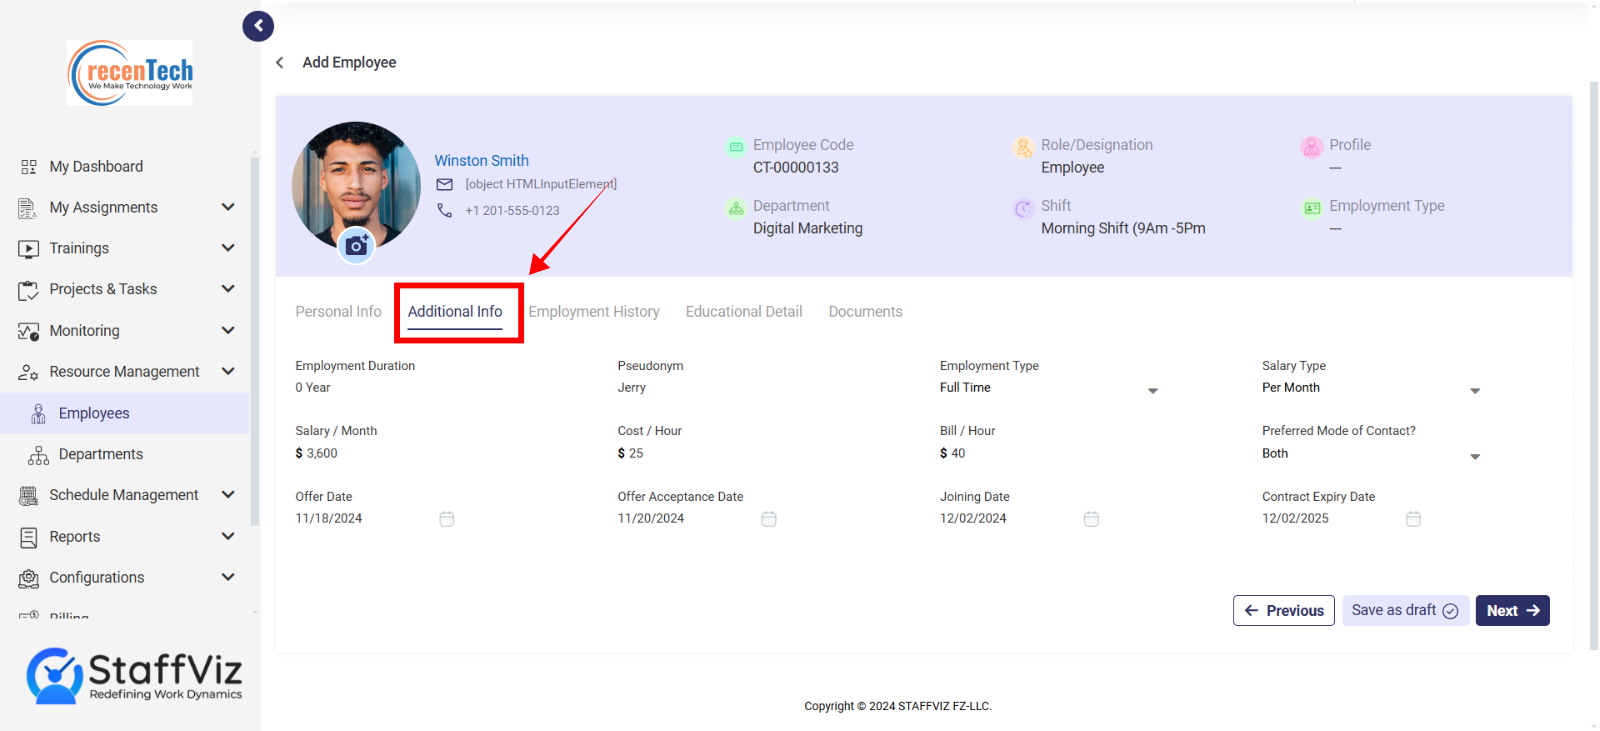
Employment Duration: Automatically calculated based on the employee’s joining and contract expiry dates. No input needed.
Pseudonym: Enter an alternative assigned to the employee, if applicable.
Employment Type: Select the employee's employment status from the options: Contractual, Part-time, Full-time, or Project-based.
Salary Type: Choose the payment frequency for the employee: Per Month, Per Week, or Per Hour.
Salary: Enter the employee's agreed-upon salary amount based on the selected salary type.
Cost/Hour: Specify the hourly cost associated with the employee's work, if applicable.
Bill/Hour: Enter the hourly billing rate for the employee, typically used for client-facing roles.
Preferred Mode of Contact: Choose the primary method of communication for the employee: Phone, Email, or Both.
Offer Date: Enter the date the job offer was made to the employee.
Offer Acceptance Date: Enter the date the employee formally accepted the offer.
Joining Date: Specify the date the employee started working with the company.
Contract Expiry Date: Enter the date when the employee’s contract ends, if applicable.
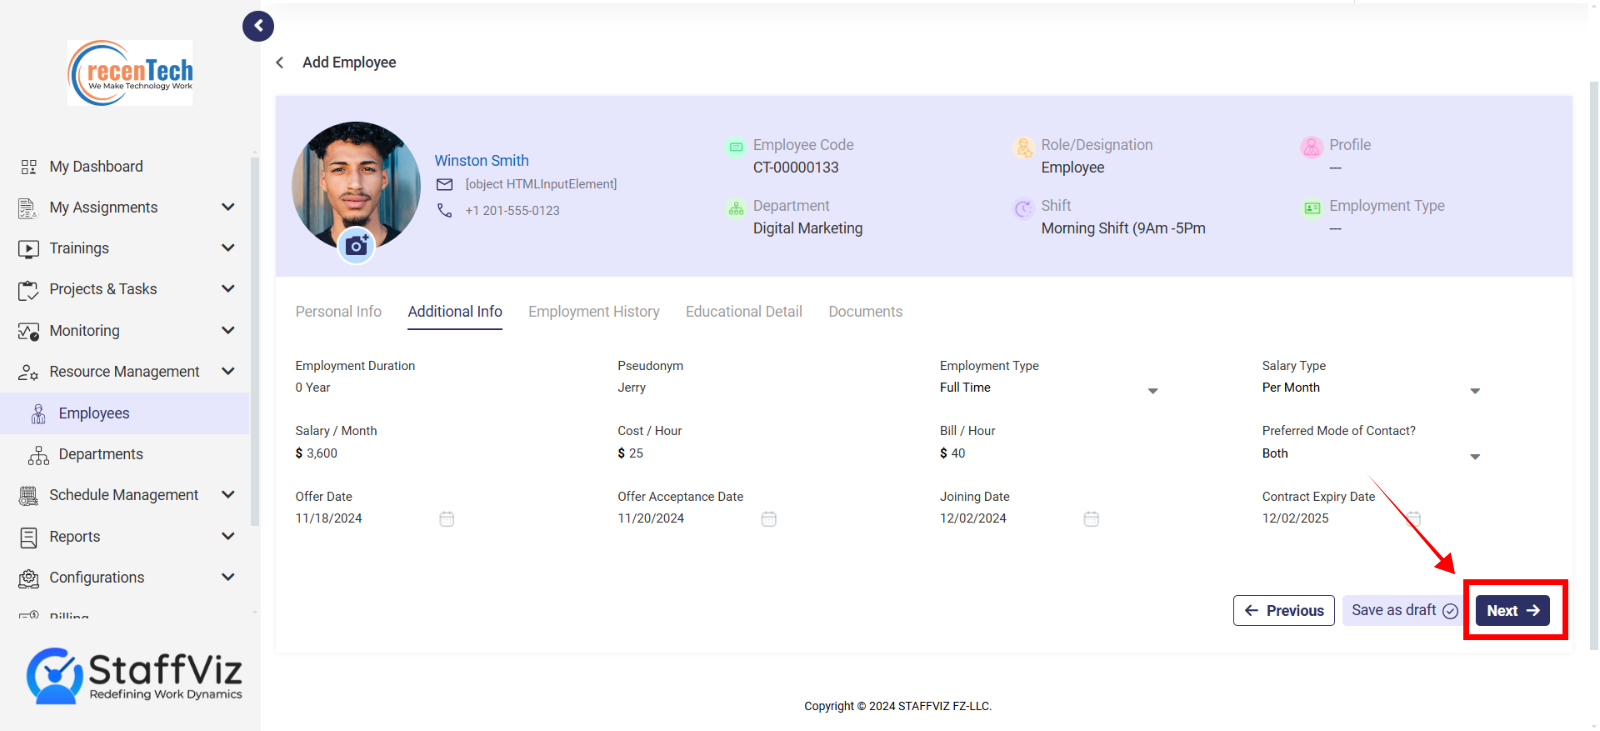
Verify the added information and click the next to move to the other form.
Human Resource managers can click the draft button at any stage and all the added information will be saved in the draft section.
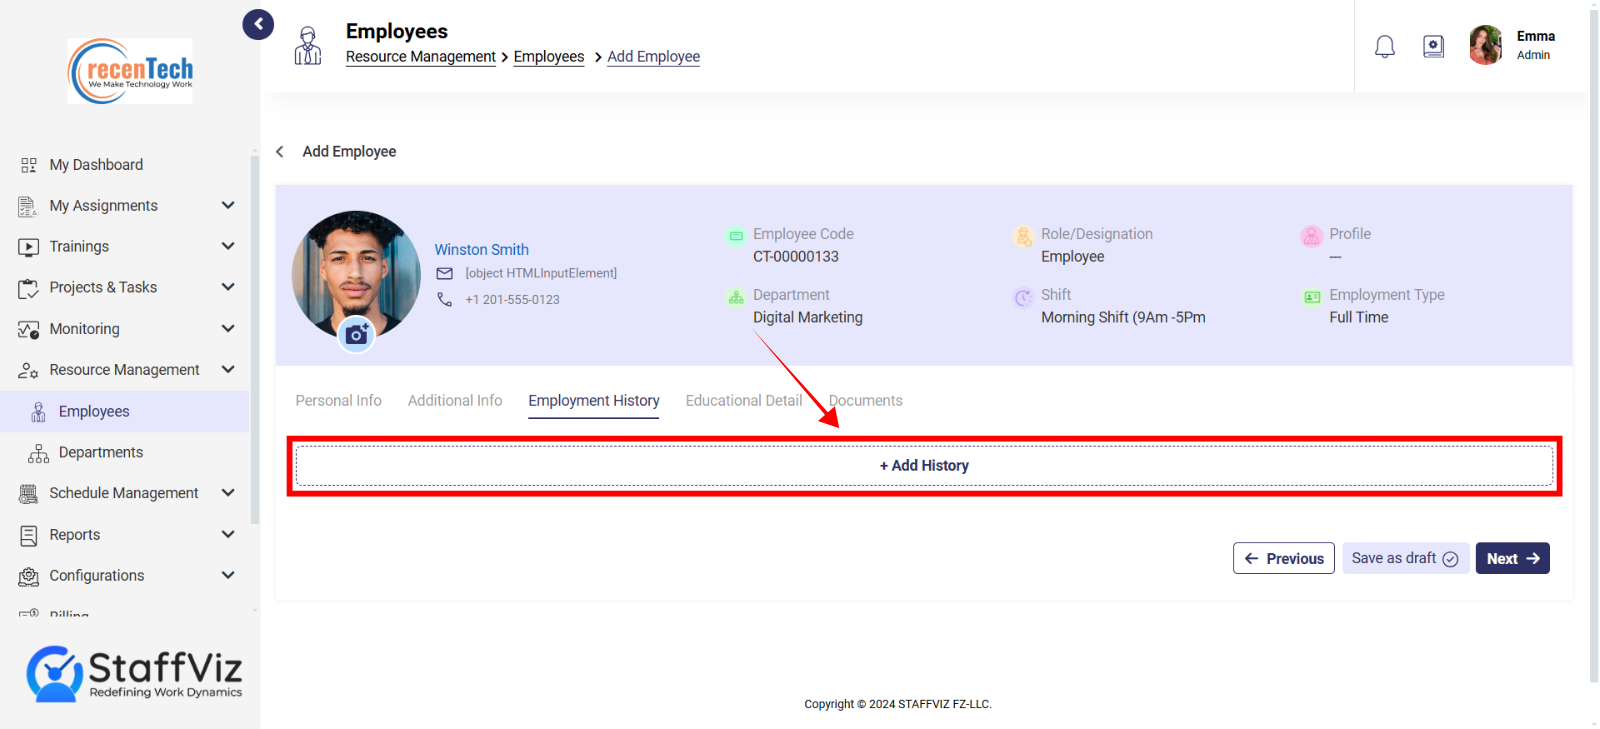
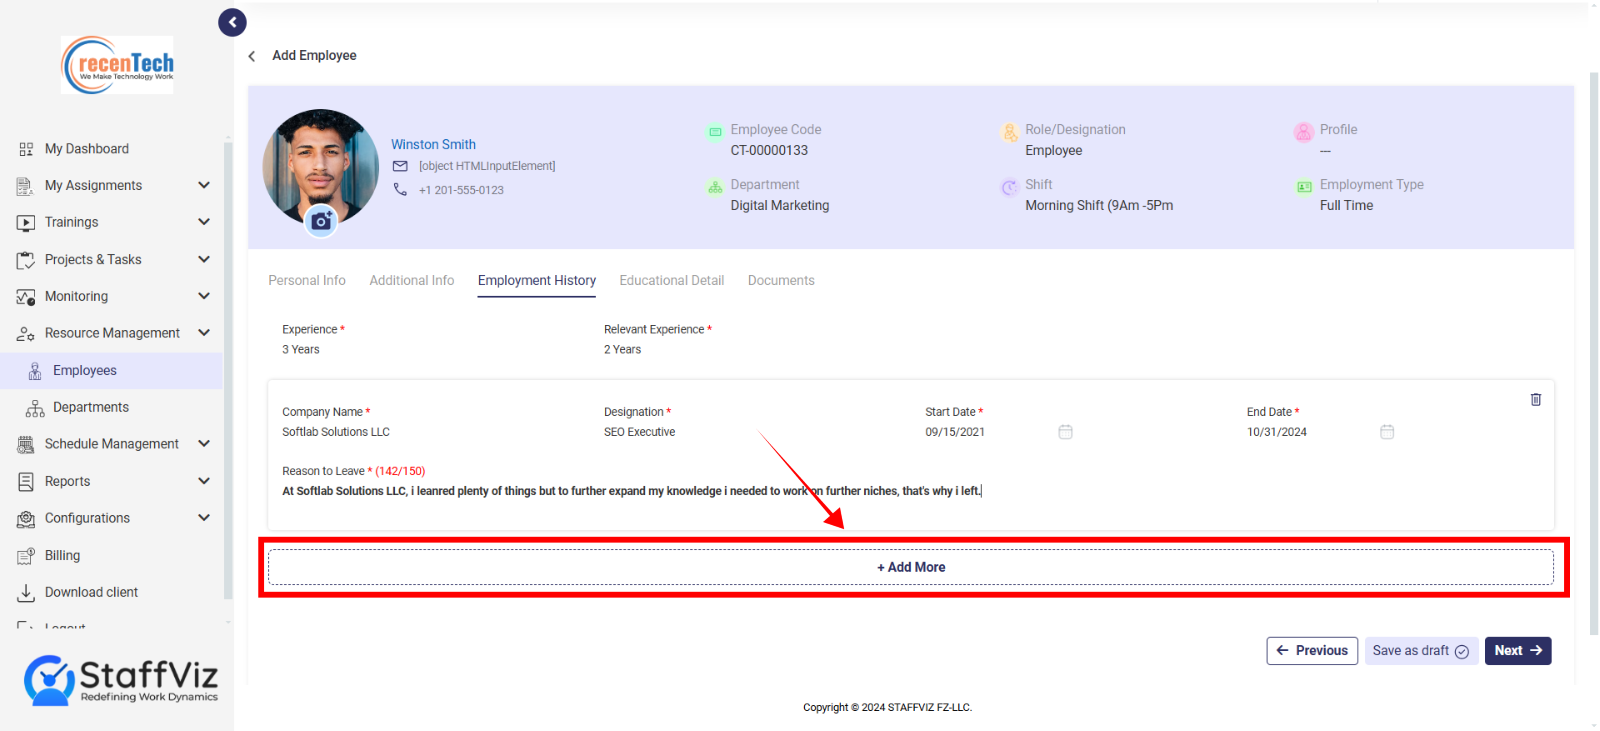
Section 1.4.3: Employment History
This form records an employee’s previous work experience, including roles, durations, and reasons for leaving. It helps provide a clear background to their professional journey.
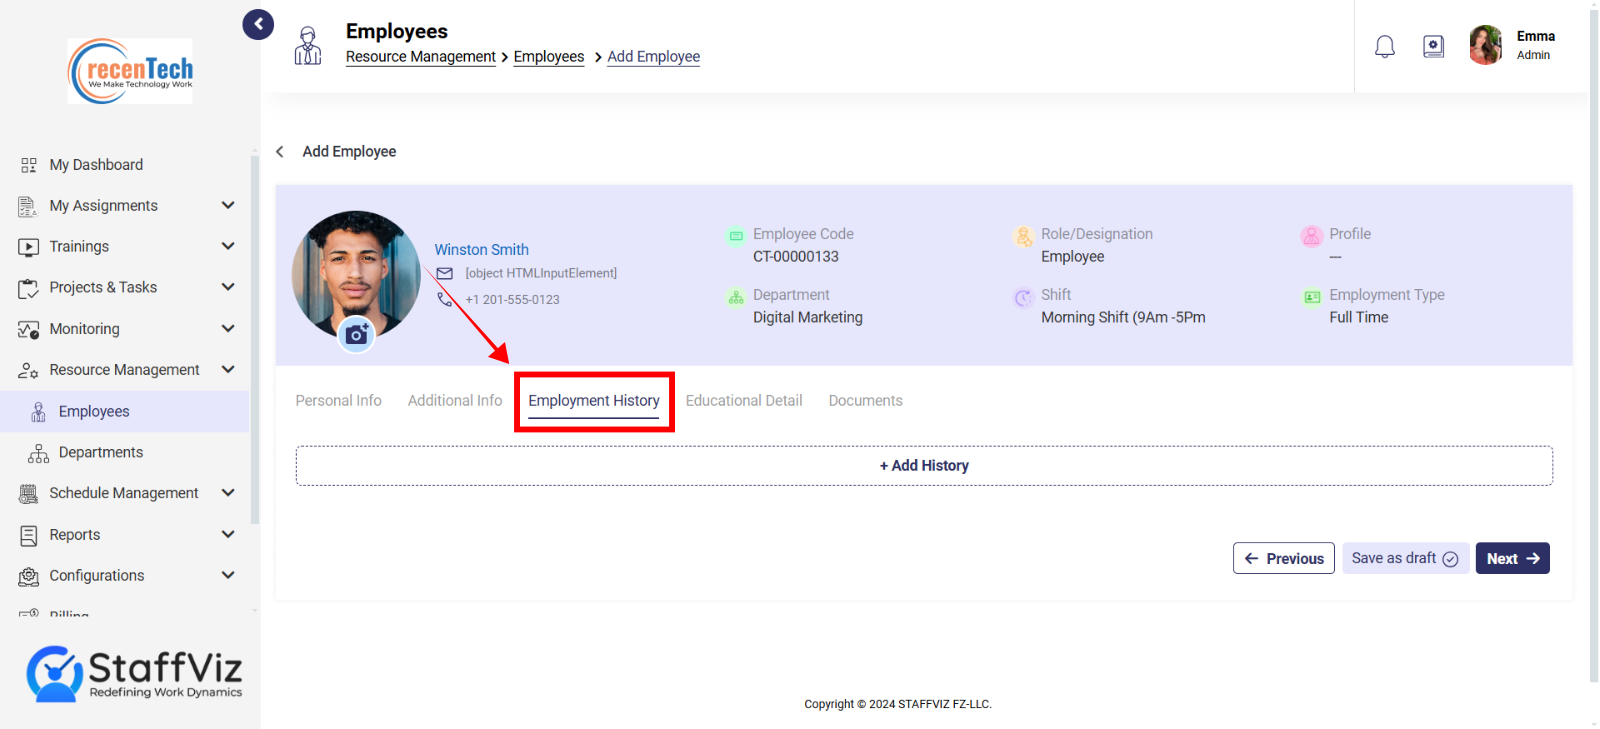
Step 1: Click Add History
To Add employment history, click the +Add History button.
Step 2: Fill Out the Feilds
A form will appear on screen, where you need to fill out the following fields.
Experience: Enter the total years of professional experience the employee has.
Relevant Experience: Specify the years of experience related to the employee’s current role or field.
Company Name: Provide the name of the company where the employee previously worked.
Designation: Enter the job title or position held by the employee at their previous company.
Start Date: Specify the date when the employee began working at the previous company.
End Date: Enter the date when the employee left the previous company.
Reason to Leave: Provide a brief explanation for why the employee left their previous job.
Step 3: Add Multiple Experiences
Click +Add More in case you need to add multiple experiences.
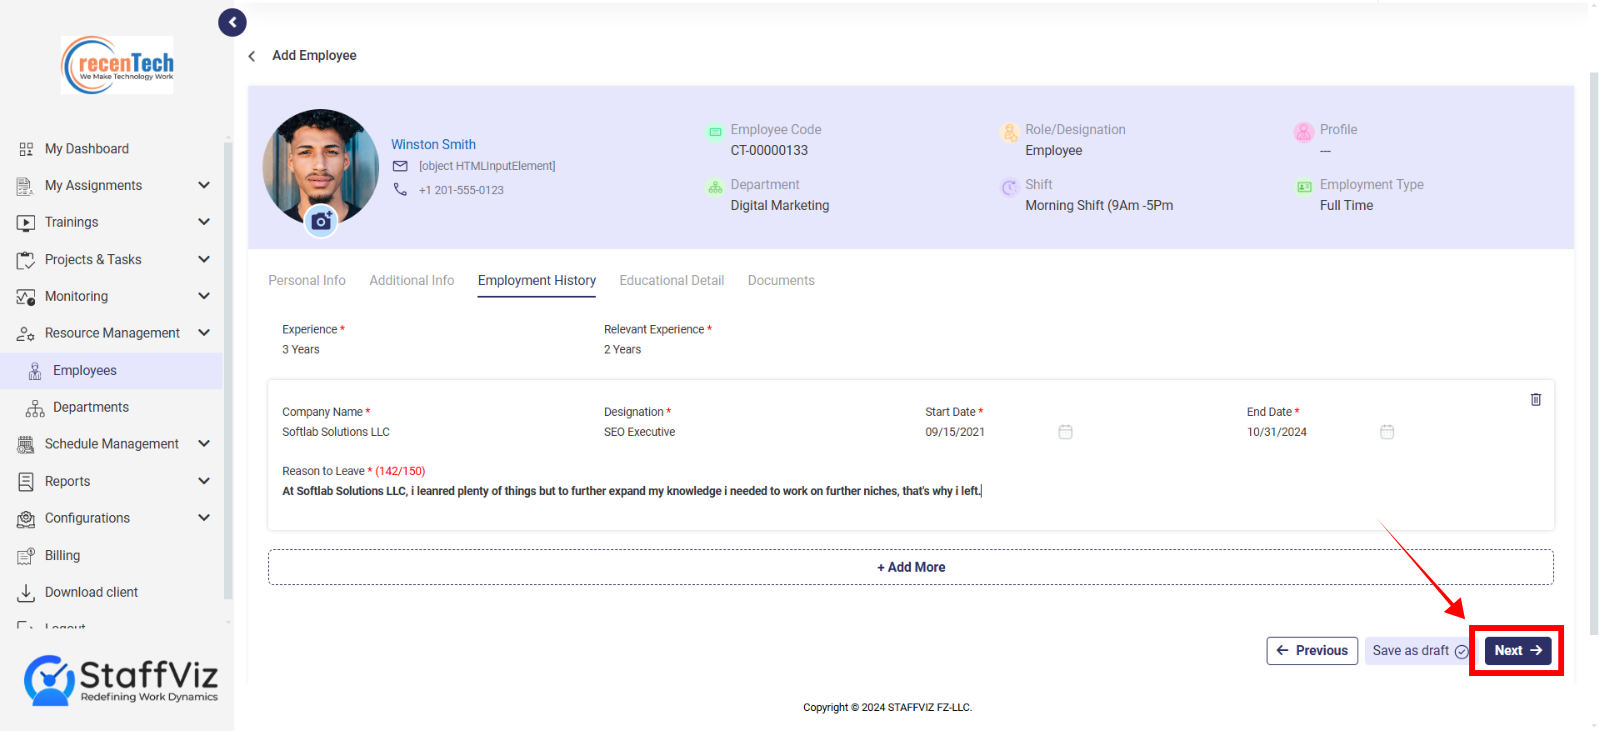
Step 4: Completion
Once the field is complete, click next to move the education details form.
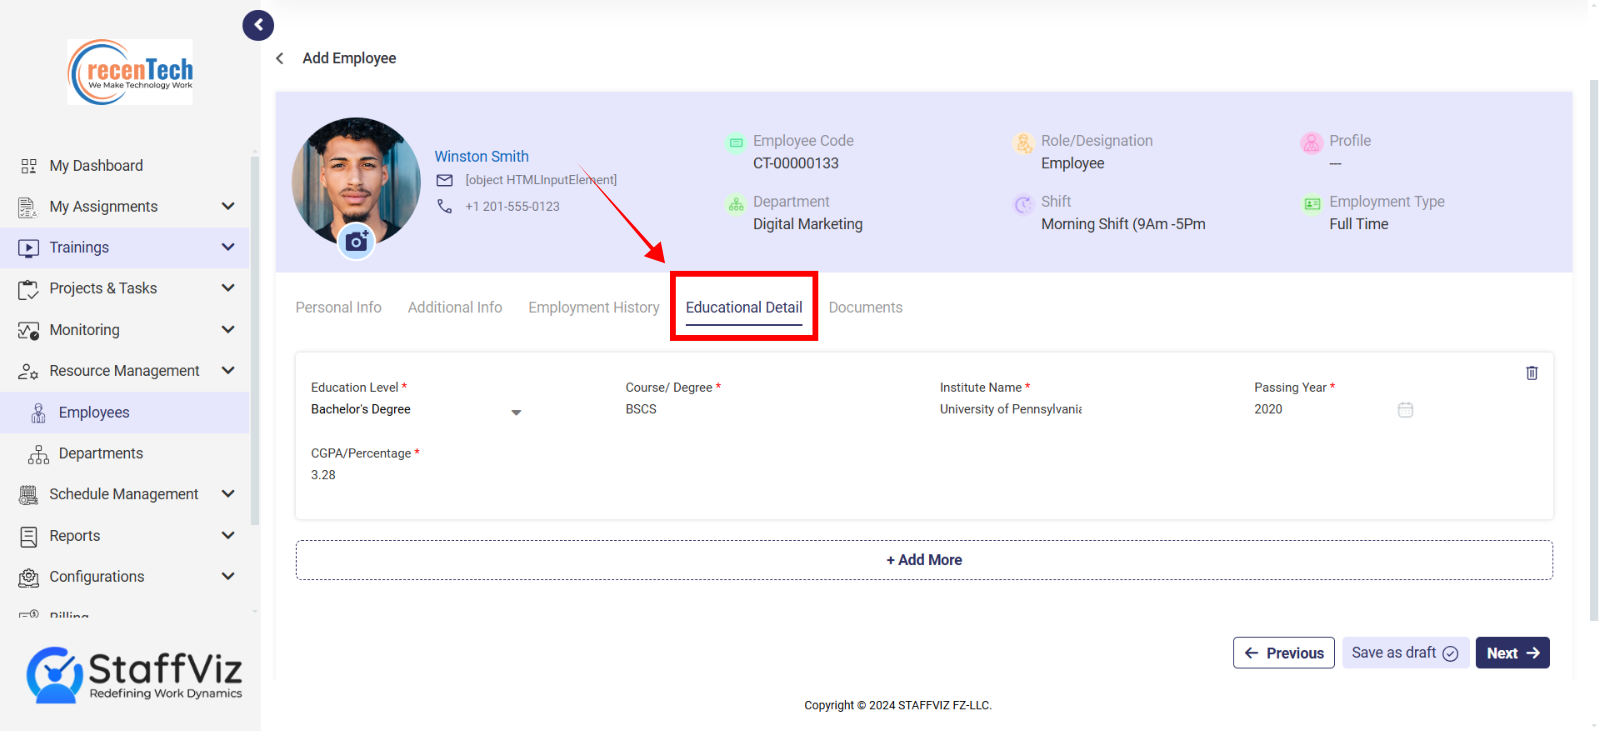
Section 1.4.4: Educational Detail
This form collects the educational background of the employee, including the highest level of education, course or degree completed, institution attended, and academic performance.
Step 1: Add Details
On the educational detail form, click the Add Details button.
Step 2: Fill Out Education Data
Fill out the following fields that are required.
Educational Level: Select the highest level of education completed from the dropdown menu (e.g., High School, Bachelor's, Master's, etc.).
Course/Degree: Enter the name of the course or degree the employee completed (e.g., B.Sc. in Computer Science, MBA in Marketing).
Institute Name: Provide the name of the educational institution where the course or degree was completed.
Passing Year: Select the year of completion from the calendar.
CGPA/Percentage: Enter the employee's final CGPA or percentage score achieved upon graduation.
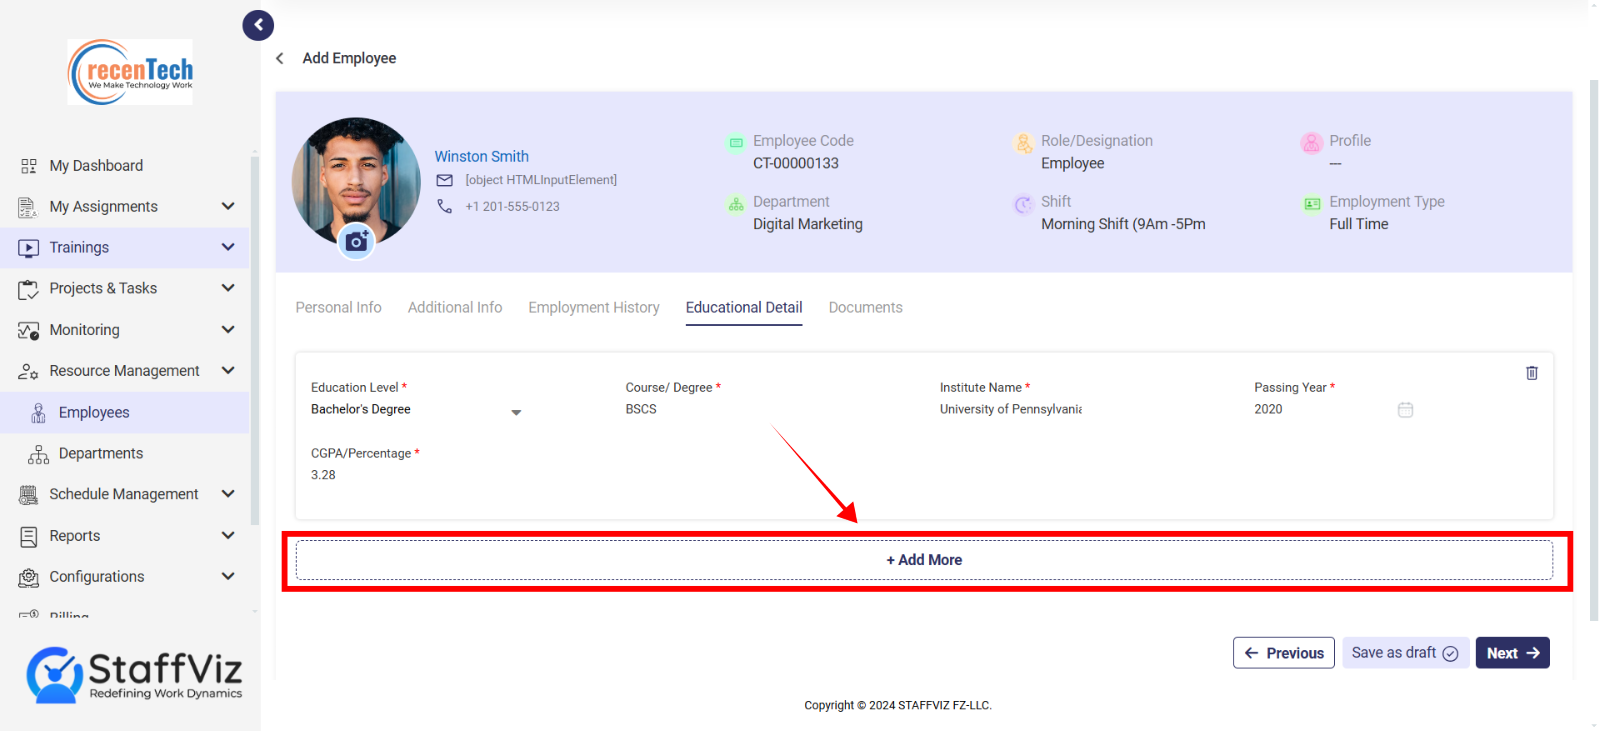
Step 3: Add Multiple Education Levels
HR managers can add multiple education levels for an employee by simply clicking the +Add More button and filling out the relevant data.
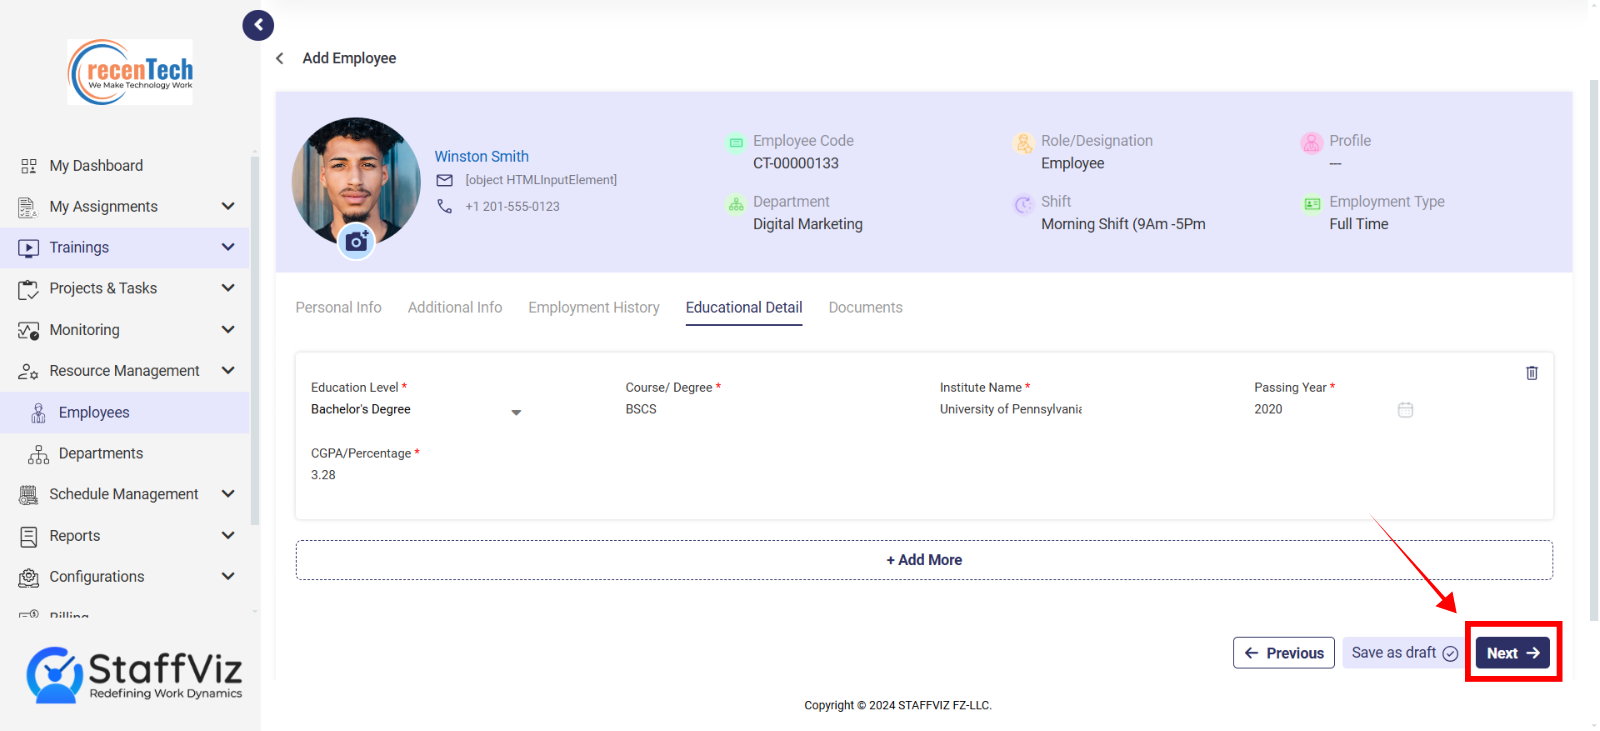
Step 4: Completion
Once you are done adding the educational details, verify if the data is correct and click the Next button to move forward to the documents section.
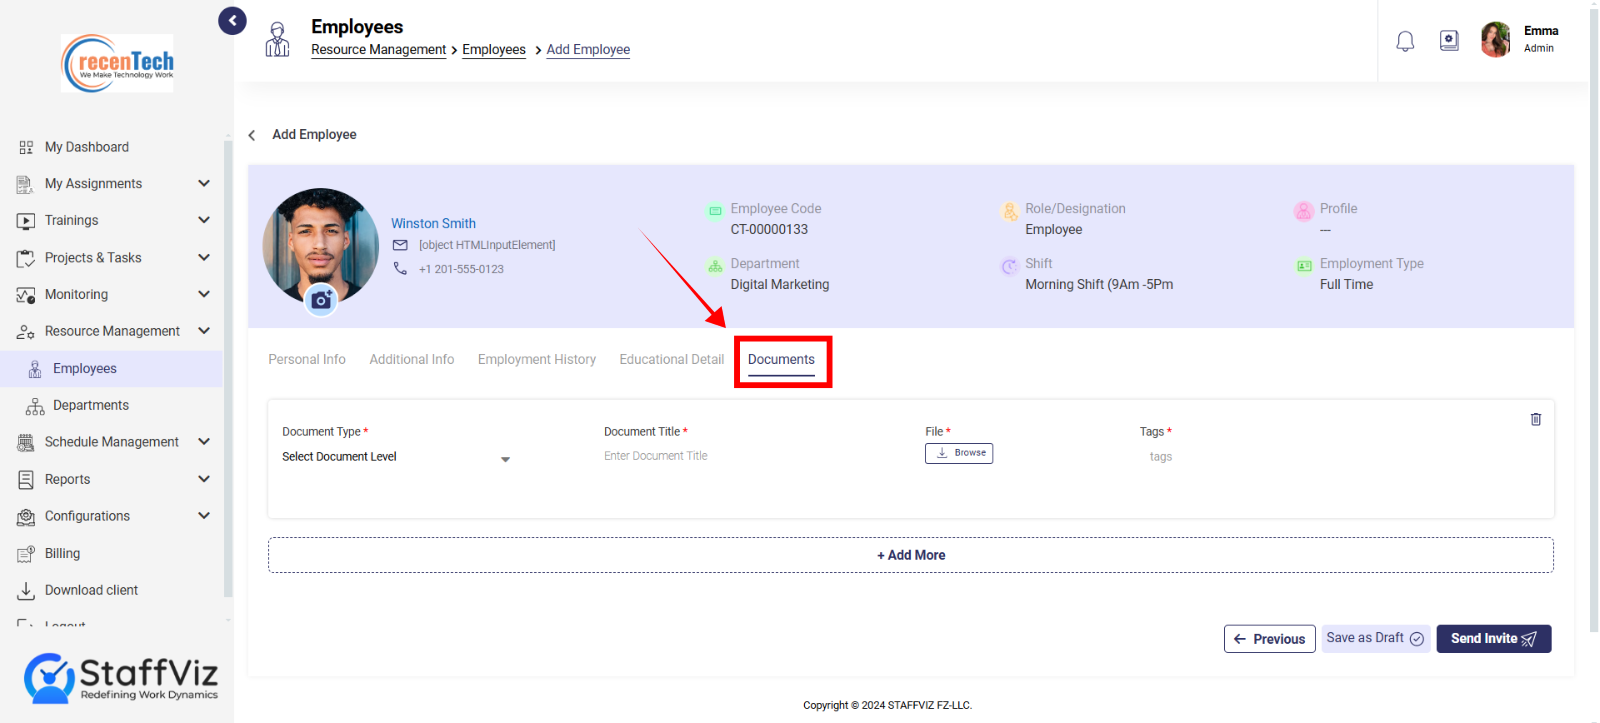
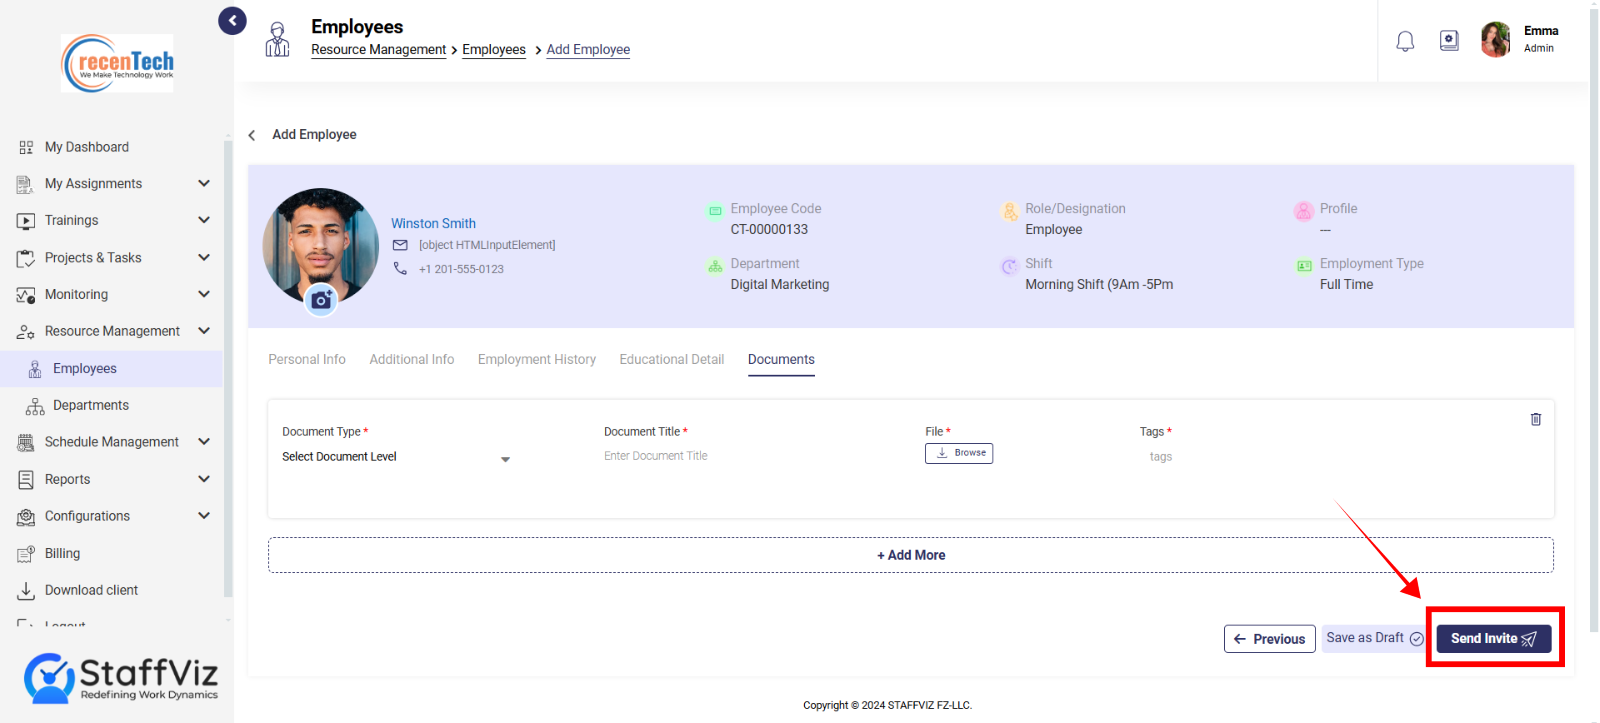
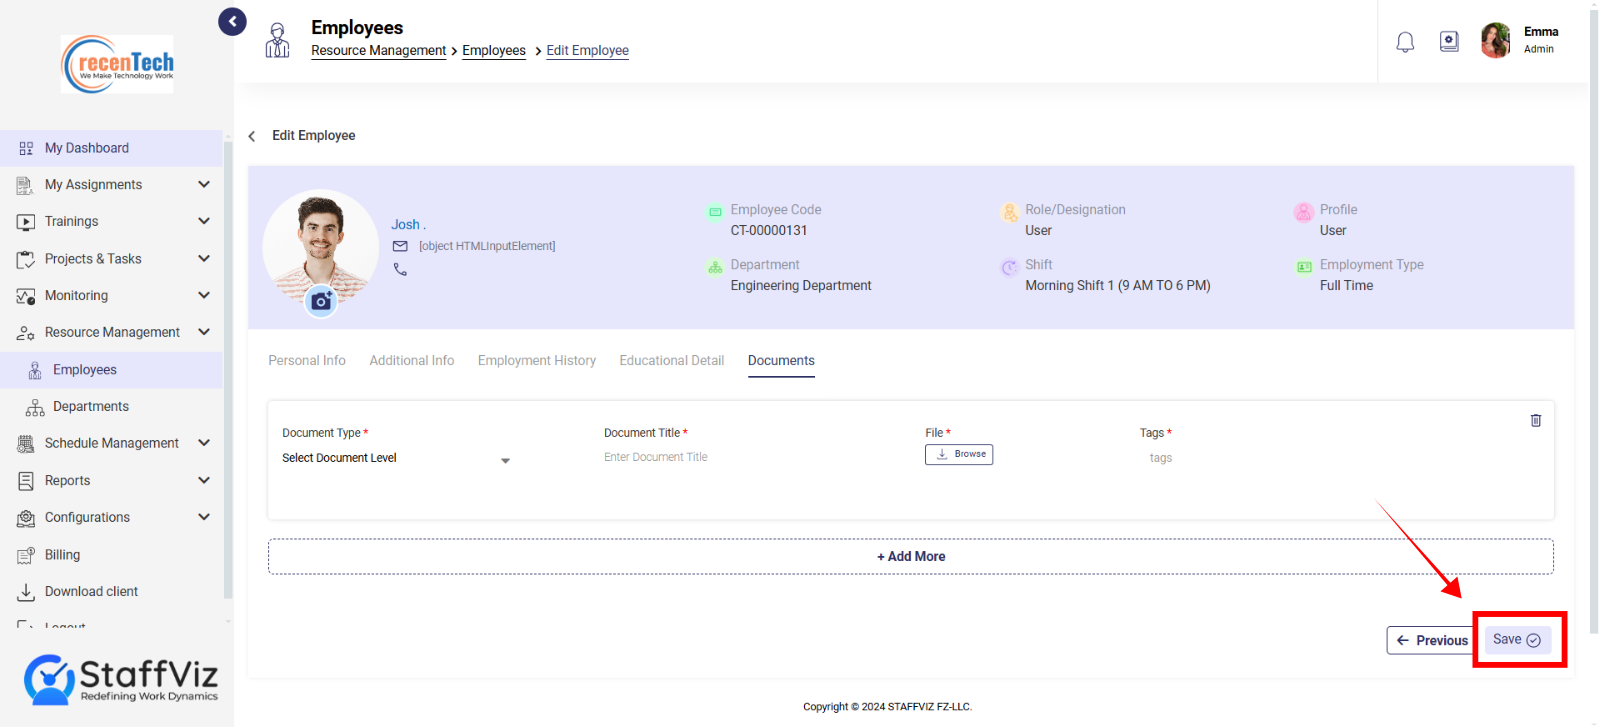
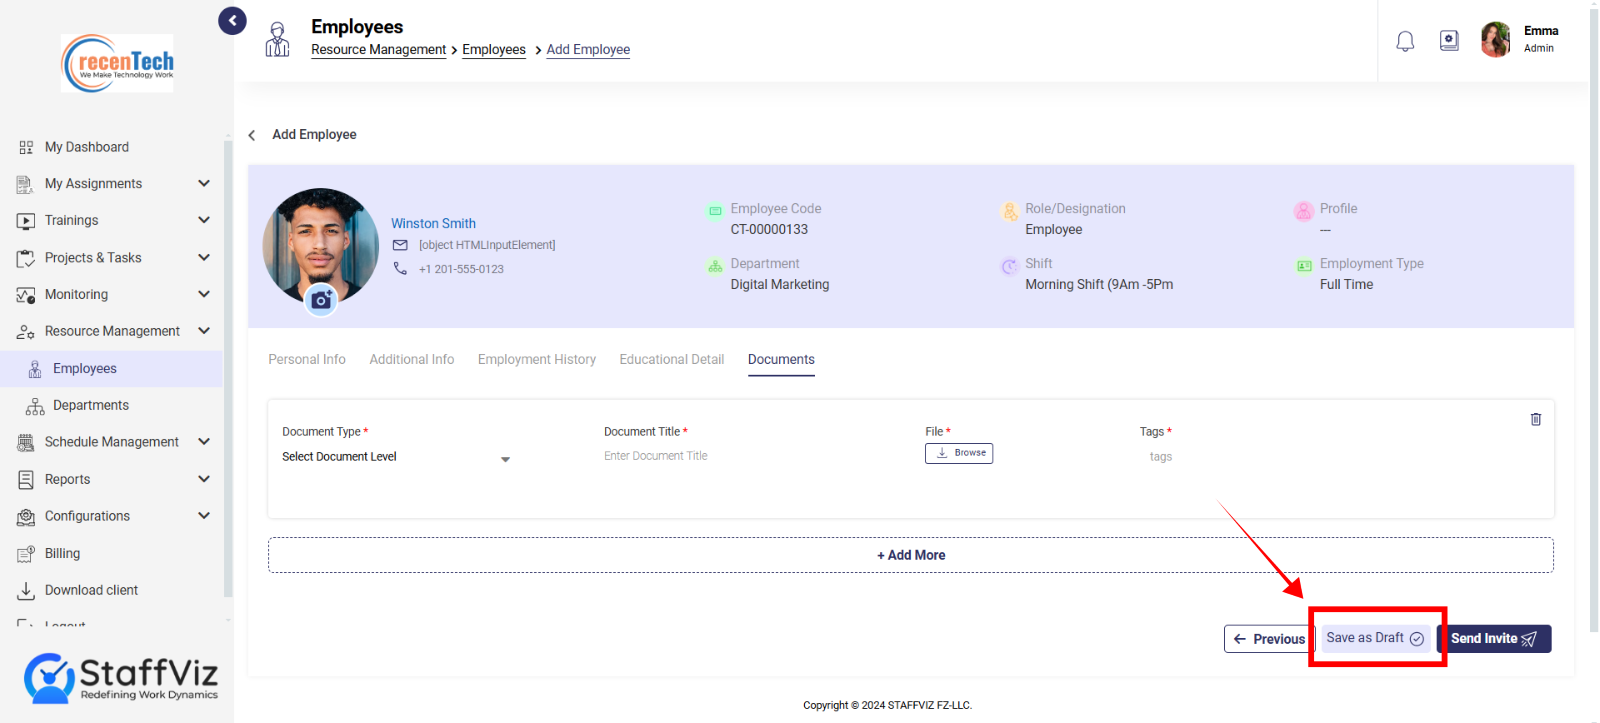
Section 1.4.4: Documents
StaffViz allows you to store and manage important employee documents within their profiles. This section explains how to upload and manage employee documents.
Step 1: Click Add Document
On the documents panel, click the +Add Document button.
Step 2: Fill out the Fields
To add employee’s document, fill out the following fields
Document Type (Required): Select the type of document you're uploading from the dropdown menu. This might include options like: Resume Contract Passport/ID Performance Review Certificate (e.g., training certificate) Other (custom document type)
Document Title (Required): Enter a clear and descriptive title for the uploaded document (e.g., "John Smith_Contract_2024"). Tags (Optional): Add relevant keywords or tags to categorize the document for easier searching (e.g., "confidential," "probation").
Upload Document (Required): Click the "Browse" or "Upload" button and select the document file from your computer. Supported file formats will depend on your StaffViz configuration (e.g., PDF, DOCX, JPG)
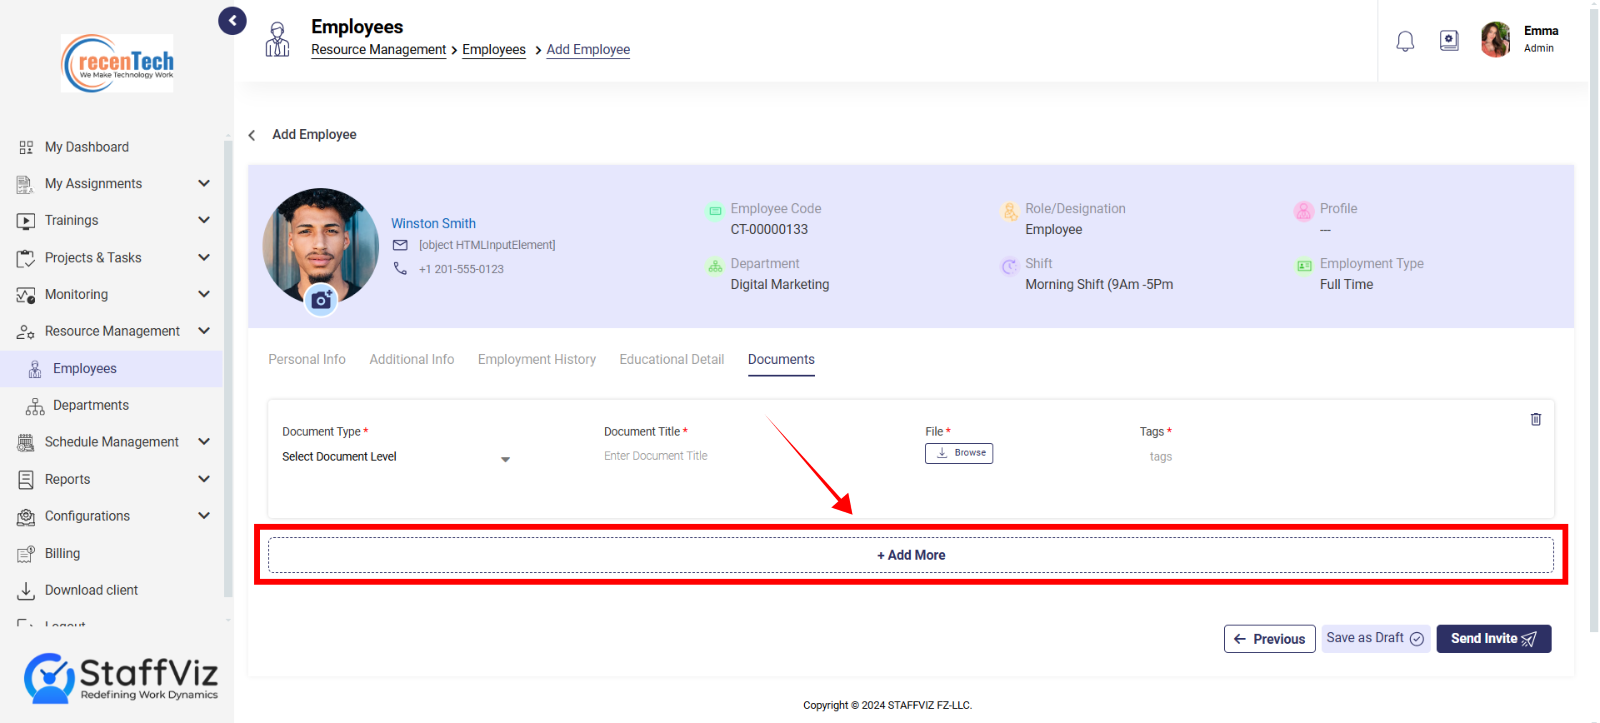
Step 3: Add Multiple Documents
Click +Add More buttons in case you want to add more documents.
Step 4: Process Completion
In case the employee is not currently on StaffViz, you’ll need to click the Send Invite button. With this an invitation will be sent to employees and all the information will be saved within the StaffViz.
In case the employee has already accepted the invitation to StaffViz you will need to click the Save button to complete the process.
HR managers can add the employee data to draft at any stage of this Add Employee process with just a click.
By following all the above instructions HR managers can add and manage the employee data within StaffViz.
Additional Notes: Required fields are marked with an asterisk (*). The availability of some fields and functionalities might depend on your specific StaffViz configuration and user permissions. Refer to your StaffViz documentation or consult your administrator for further details or assistance with the employee editing form.
Or
Contact support@staffviz.com for any further assistance.