Section 2: Break Scheduling
StaffViz helps you define and manage employee breaks within your shift schedules. This guide explores functionalities for creating a break schedule that balances employee well-being with operational needs.

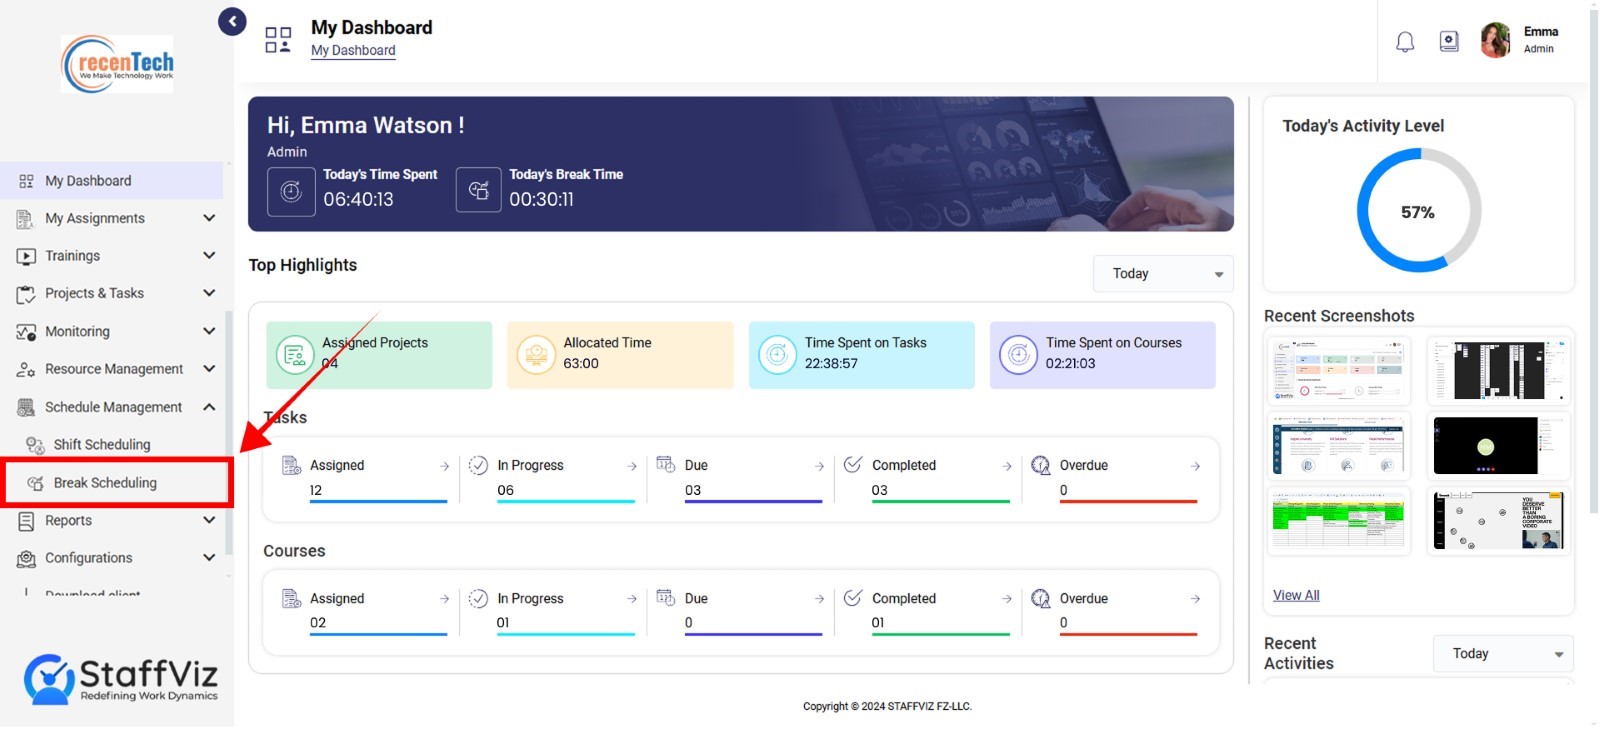
Step – 1: Navigate to Break Scheduling Section
Select Scheduling Management > Break Scheduling from the main navigation menu.
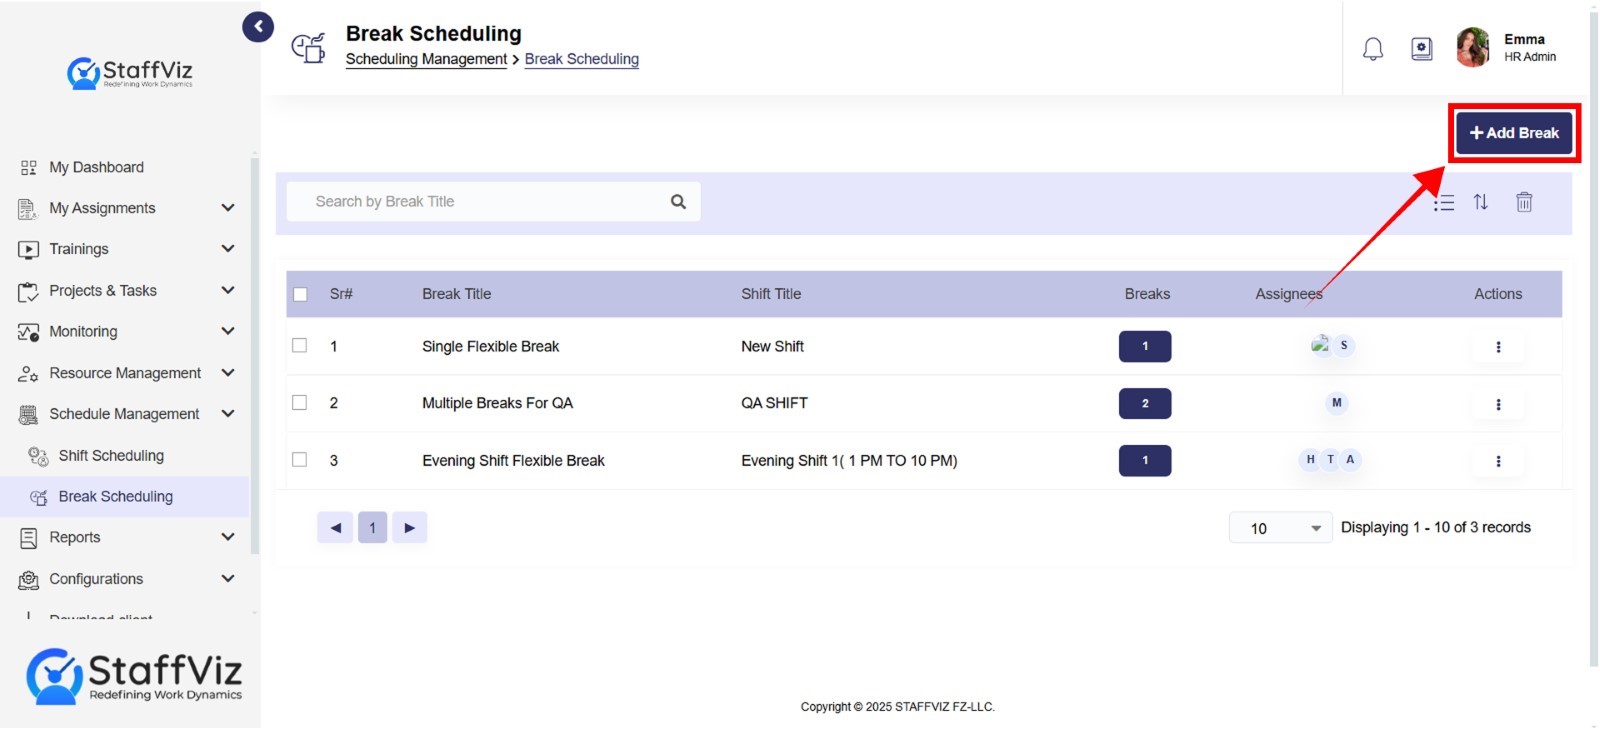
Step – 2: Click Add Break
Click the add break button.
Section 2.1: Add a Shift
The add-a-break button leads to a form that is well-structured for defining break schedules within StaffViz. Here is a breakdown of the fields:
Break Title (Required): Assign a clear and descriptive name to the break.
Shift (Required): Select the specific shift to which you assign this break schedule. A dropdown menu displays all available shifts within StaffViz.
Shift Slot: Based on the selected shift the shift slot automatically showcases the shift start and end time.
Users (Required): Indicate which employees this break schedule applies to by selecting employees from the dropdown.
Total Selected: This field displays the current number of employees selected to receive this break schedule.
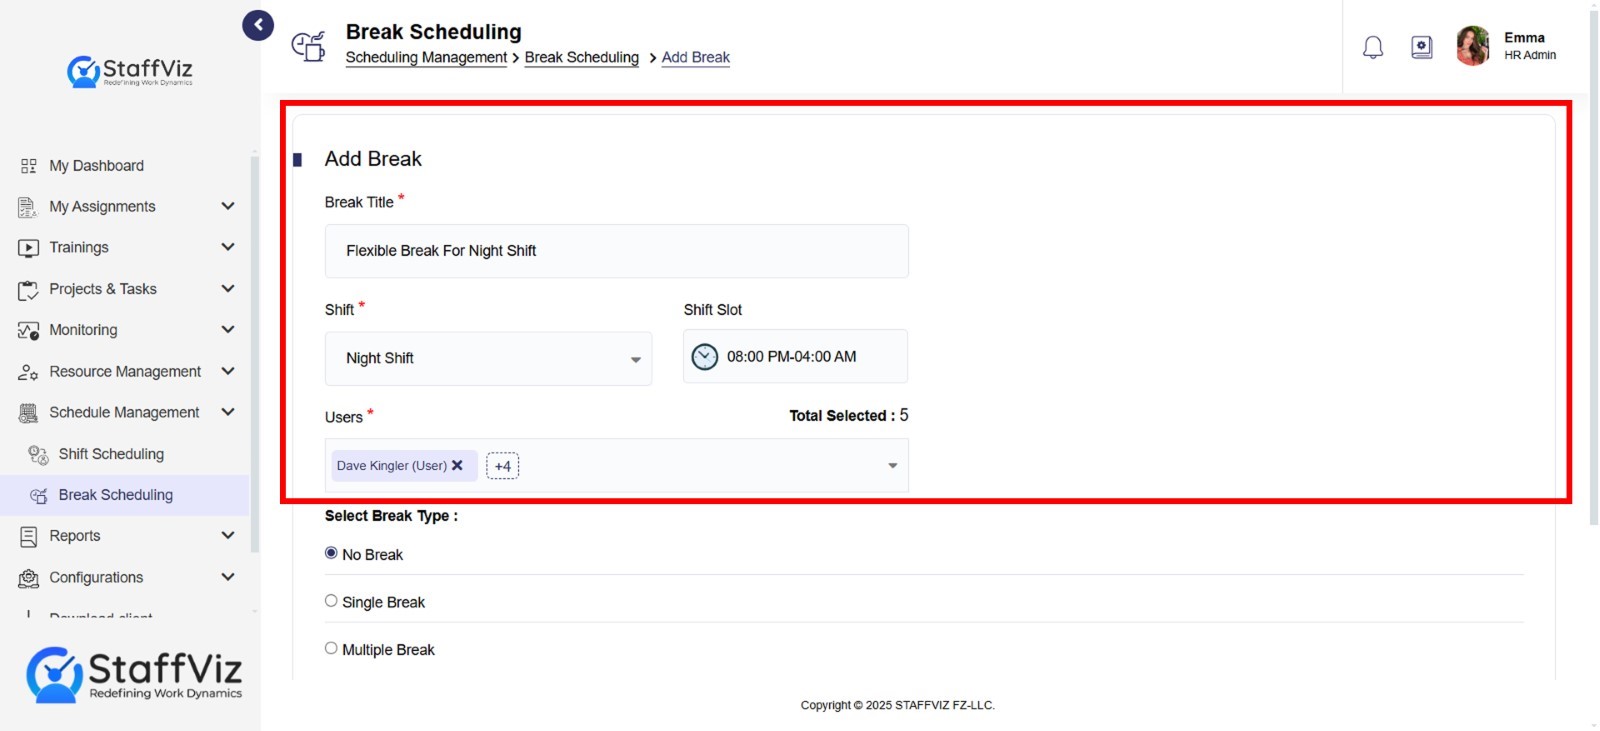
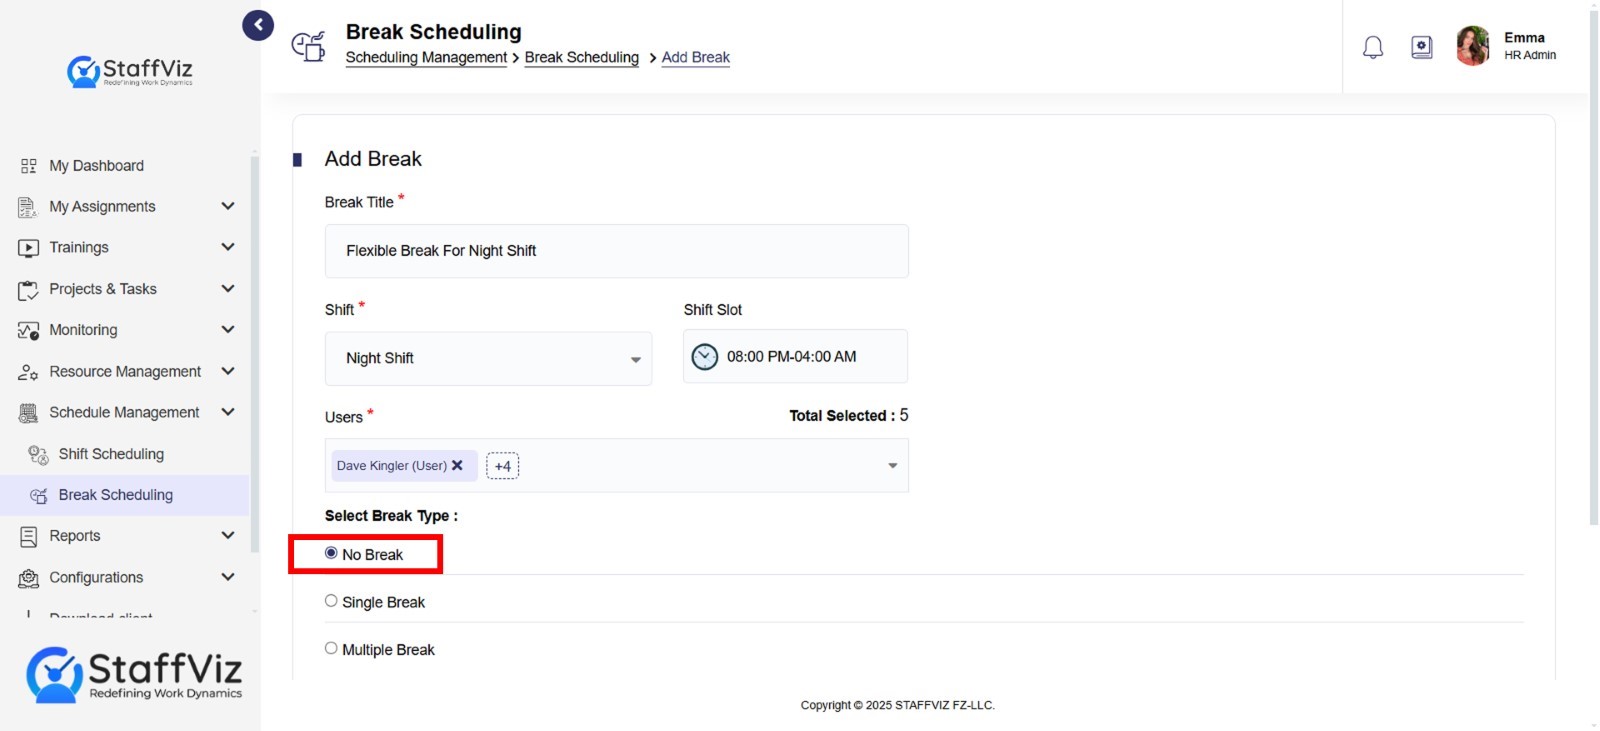
Select Break Type: Choose the type of break you want to define from the following options:
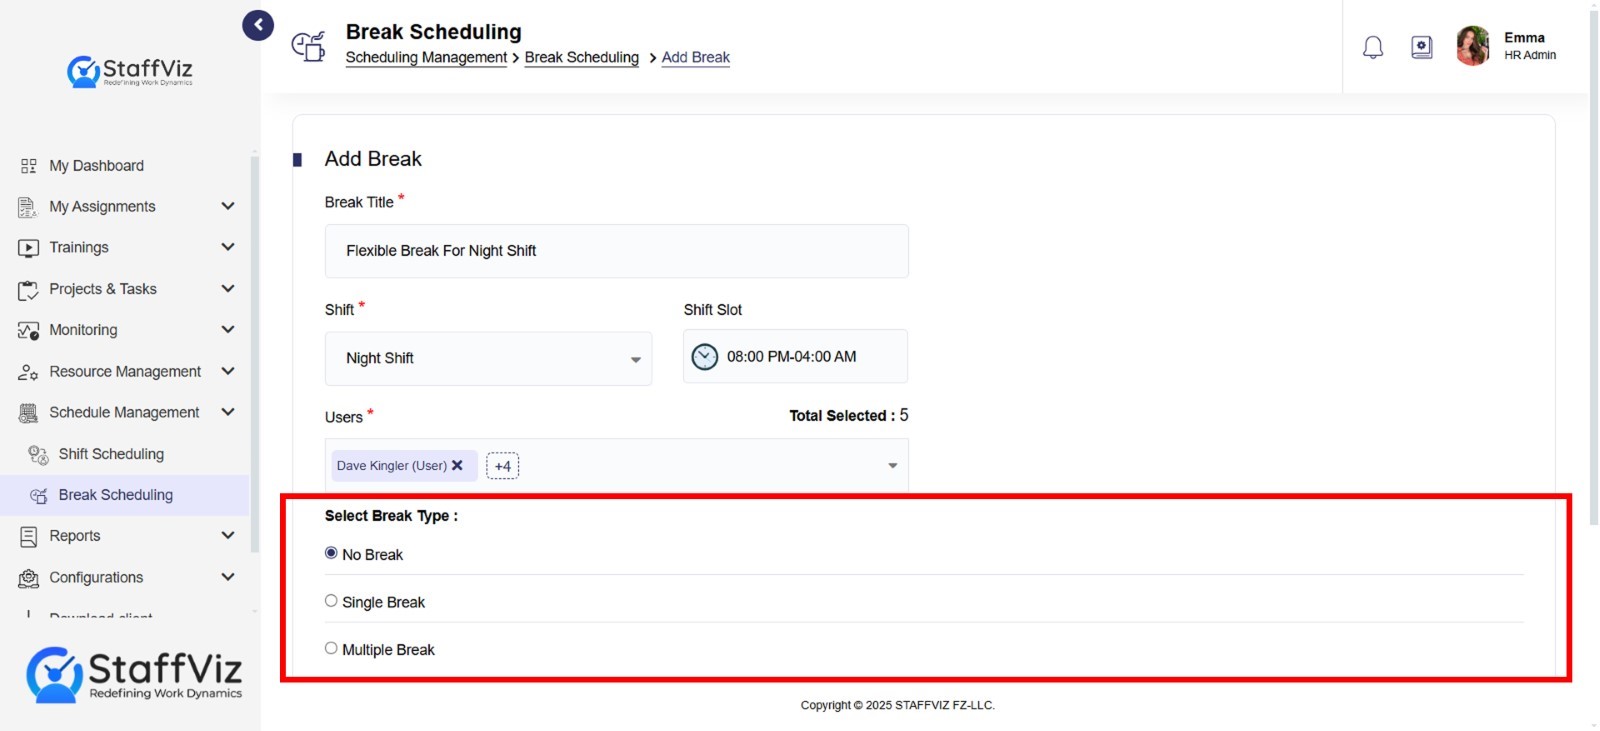
No Break: Employees will not have a scheduled break during this shift (or specific timeslot, if applicable).
Single Break: Employees can take breaks at their convenience, provided they stay within the allocated break duration.
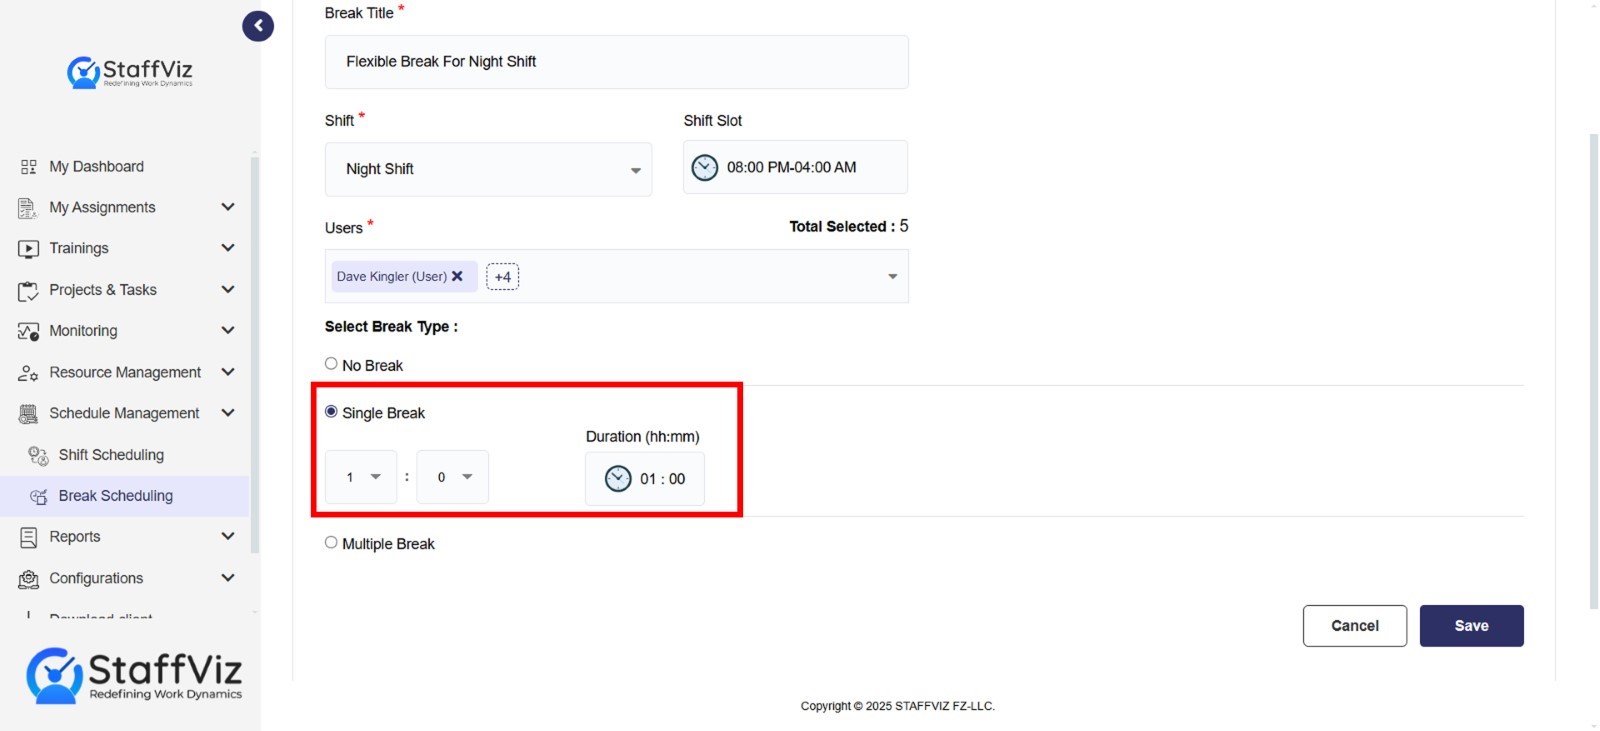
How to Setup a Single Break
Step 1: Navigation
Navigate to Shift Scheduling > Add Shift section.
Step 2: Select Single Break
Select the Sigle break options and setup the break duration using the hours and minutes option.
Multiple Breaks: Employees are assigned multiple fixed breaks with specific time slots. Which means the break buttons only activate for specified time slots.
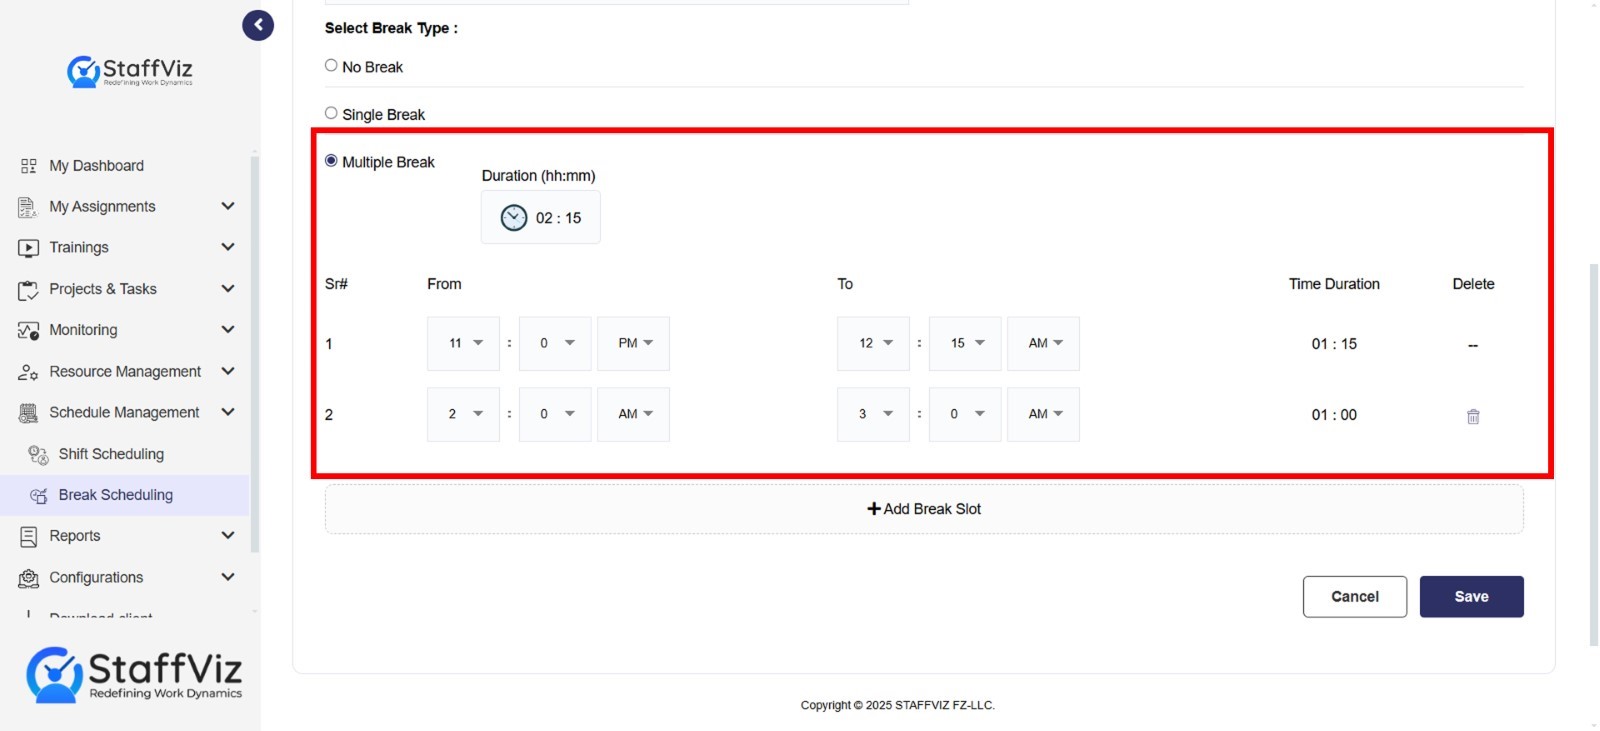
How to setup Multiple Breaks
Step 1: Navigation
Navigate to Shift Scheduling > Add Shift section.
Step 2: Select Multiple Breaks
Select multiple breaks in the shift break section.
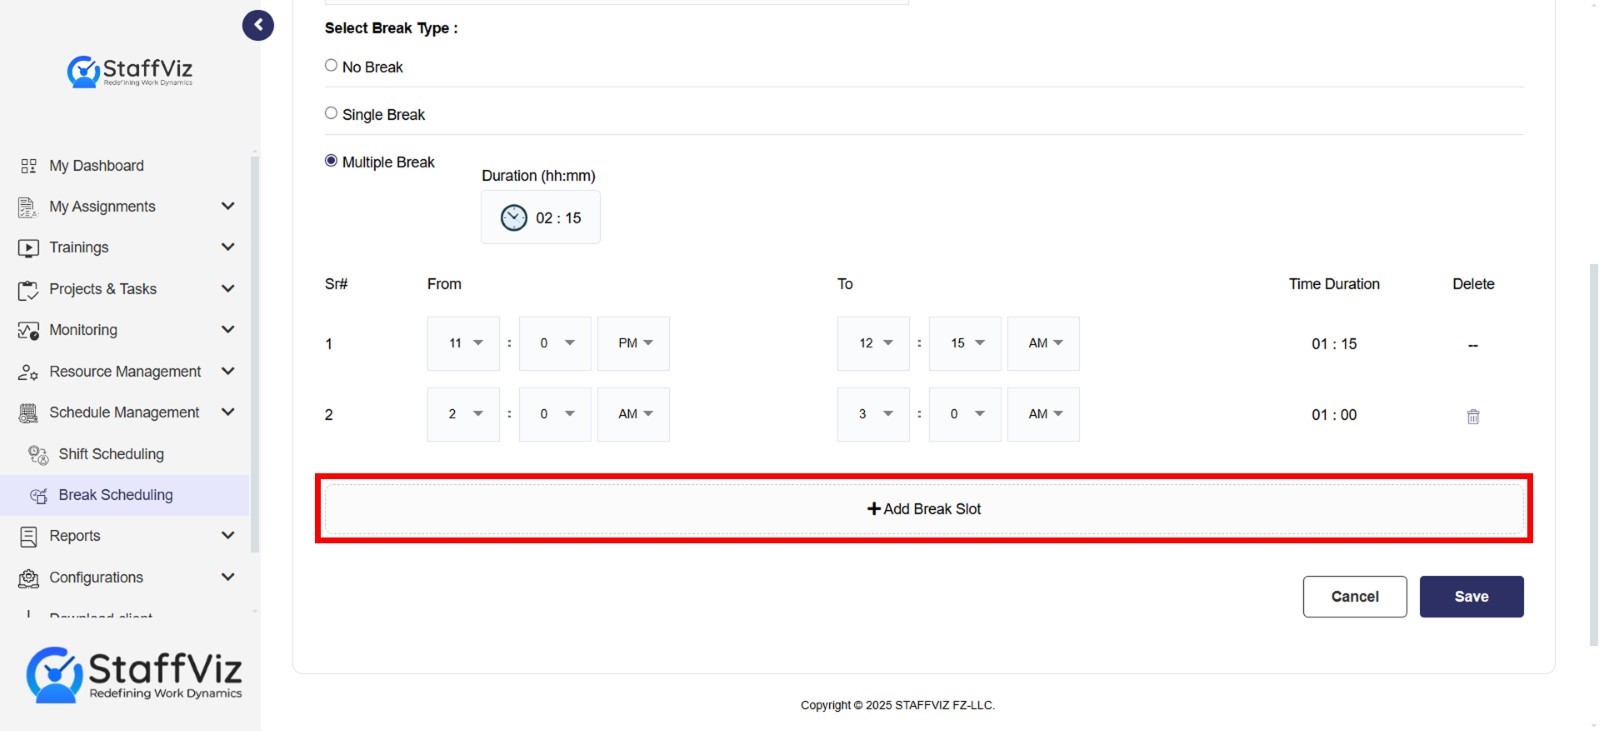
Step 3: Setup Specific Break Time
Unlike the Single break, Multiple breaks are fixed time breaks. So, you need to select the exact time using to and from options while keeping in mind that the break schedule must be within the shift hours. When you set up the to and from times the duration will be automatically calculated.
Step 4: Add Multiple Break Slots
To add multiple break slots, just click the Add Break Slot button and follow step 3 to set up the break schedule.
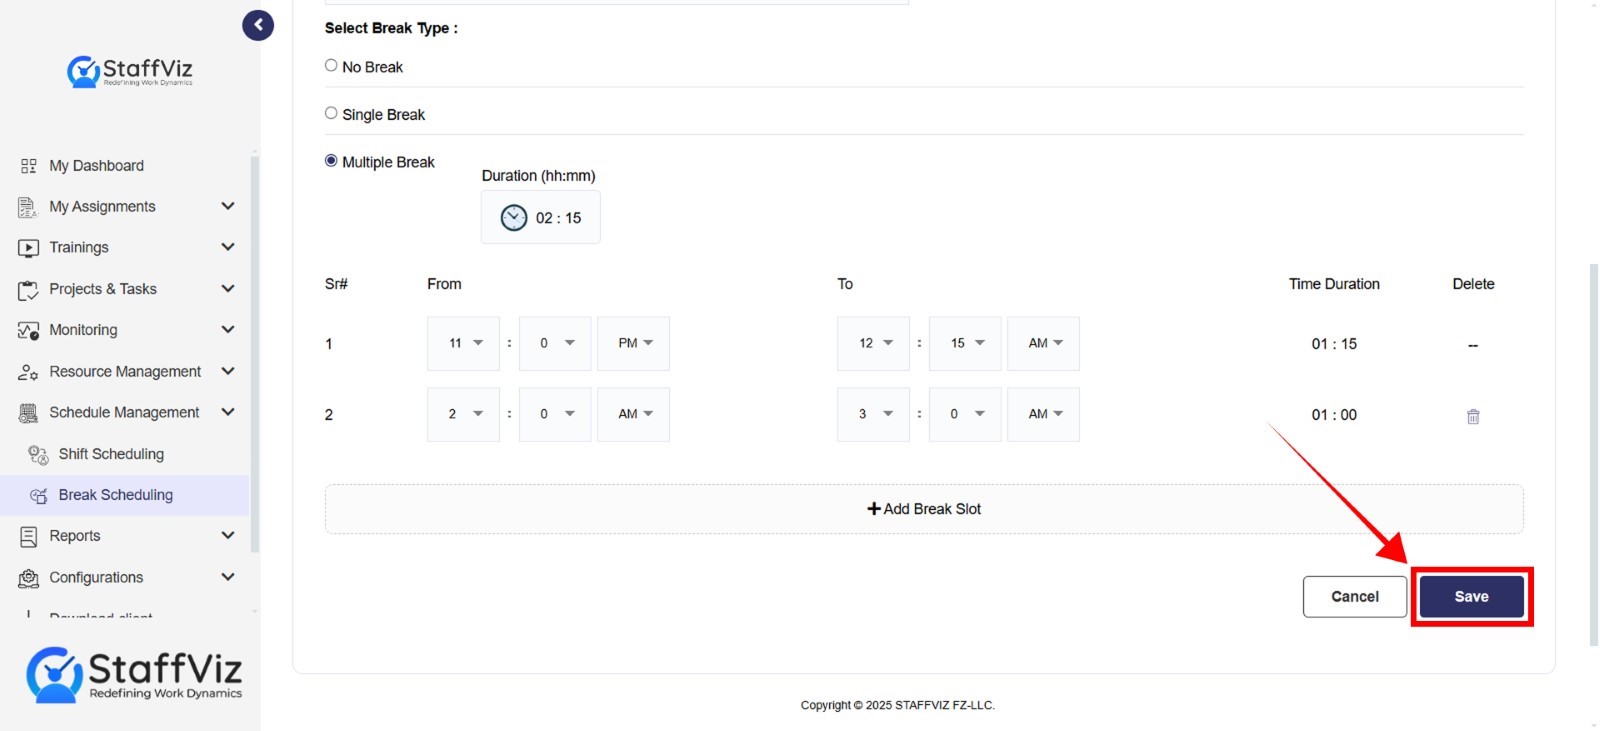
Step 5: Save Break Setting
Once all the settings are done, click the save button to add the break.
Section 2.2: Navigation Bar
The Navigation Section contains filters that allow you to manage shifts using various filters.
Here's a breakdown of the available filters:
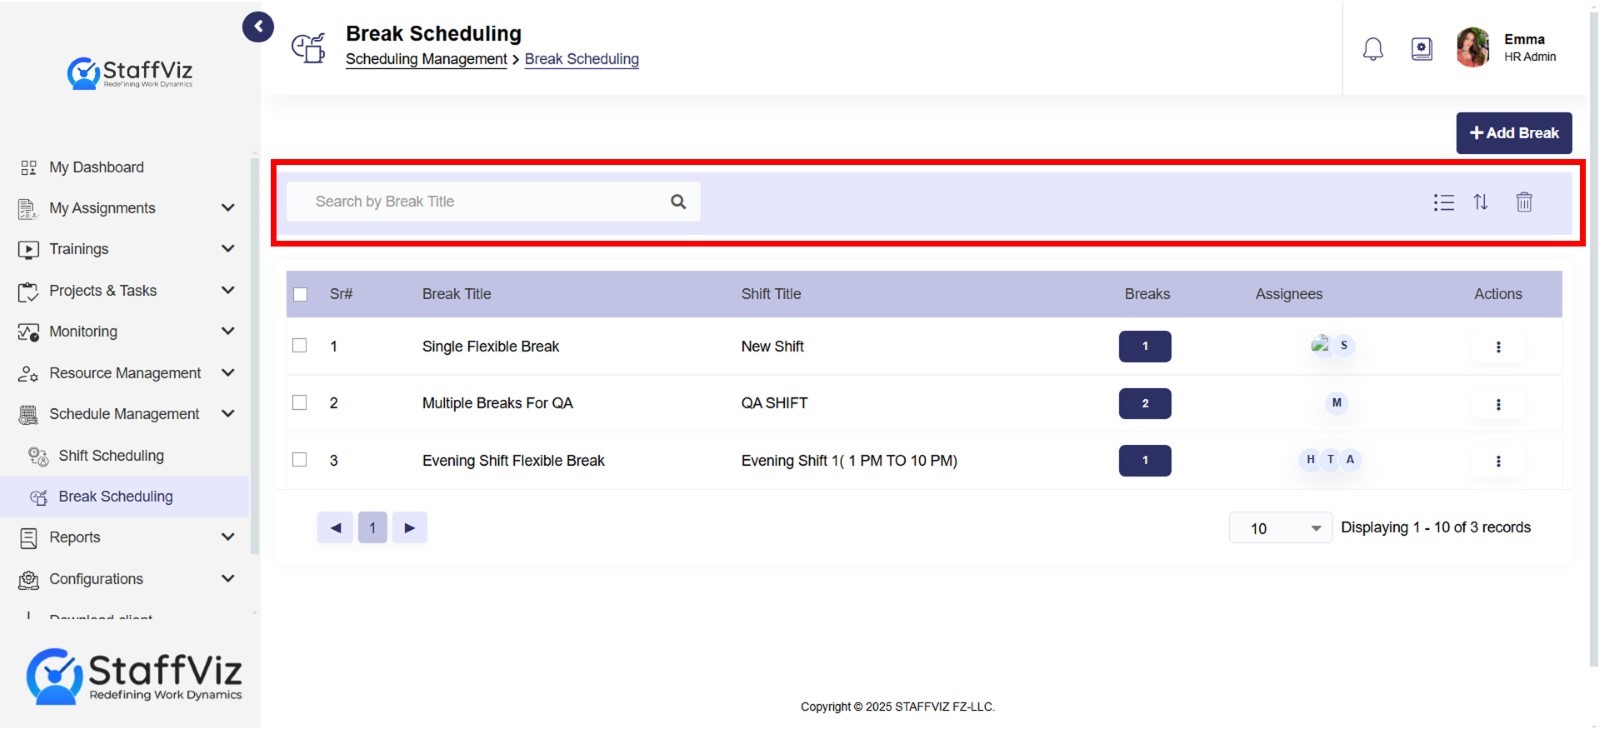
Search Bar
Locate break(s) instantly by title, saving time compared to browsing through long lists.
List/Card View
List views and card views are both methods for displaying information in a mobile app or on a website, they offer different visual presentations.
We’ll discuss the lists and card view in detail within section 2.3.
Sorting Options
Created At: Sorts breaks by the date and time they were initially created. This is a frequent sorting option, especially for chronologically tracking history.
Updated At: Sorts breaks by the date and time they were last modified.
Break Title (A-Z & Z-A): Sorts breaks in alphabetical order based on break titles.
Shift Title (A-Z & Z-A): Sorts breaks in alphabetical order based on shift titles.
Delete Breaks
The delete button on the navigation bar allows users to delete one or more breaks at once.
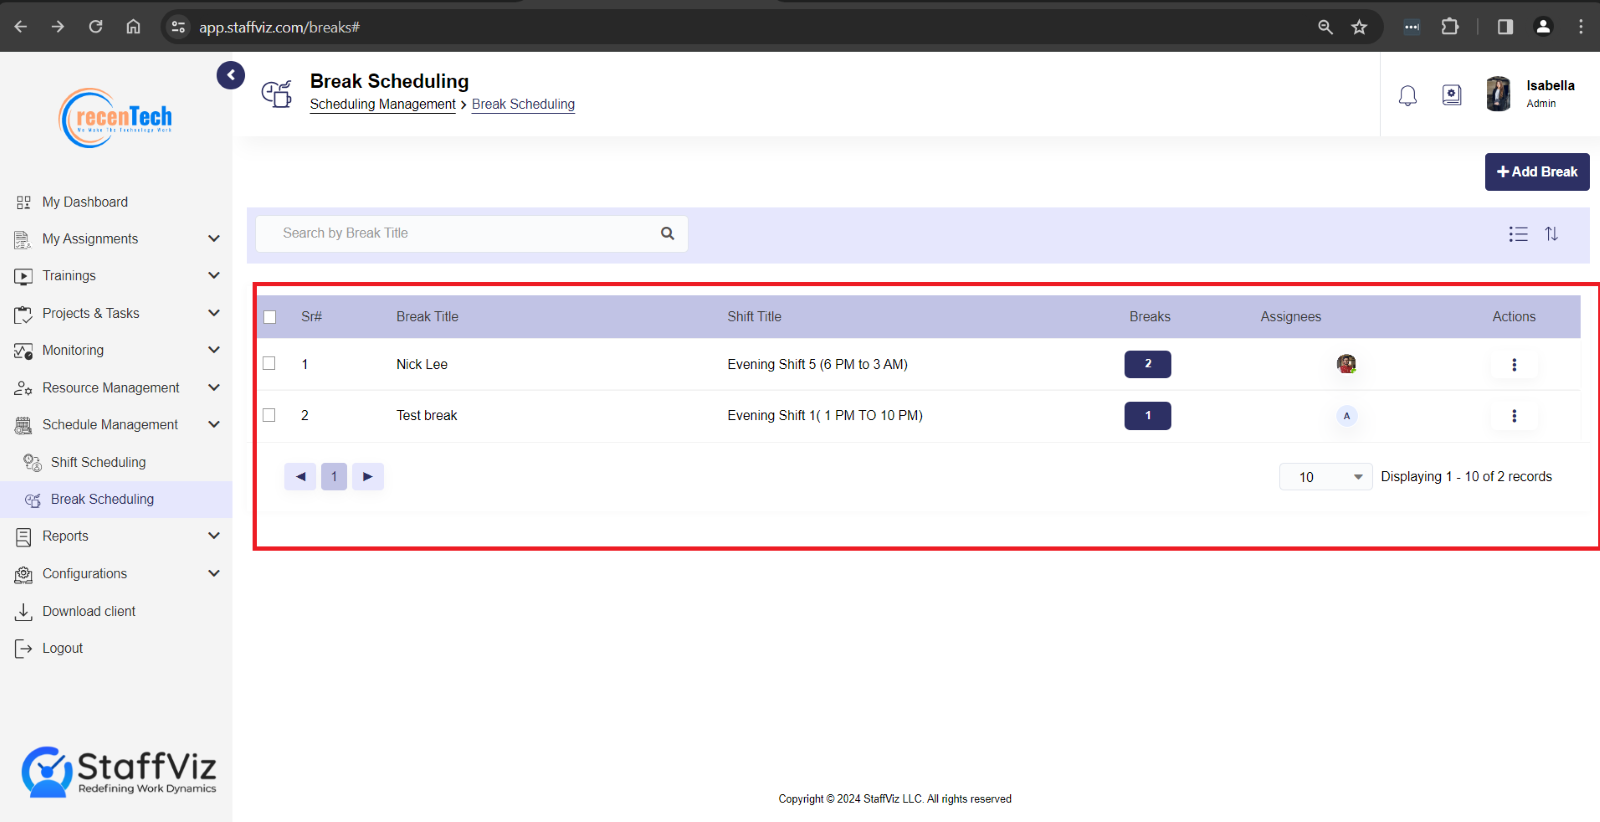
Section 2.3: List /Card View of Breaks
StaffViz allows users to change how they wish to view the breaks panel.
Following are details about the list and card view.
2.3.1: List View
The StaffViz list view breaks detail table provides a comprehensive overview of all break schedules defined within your system. Let us break down the meaning of each column:
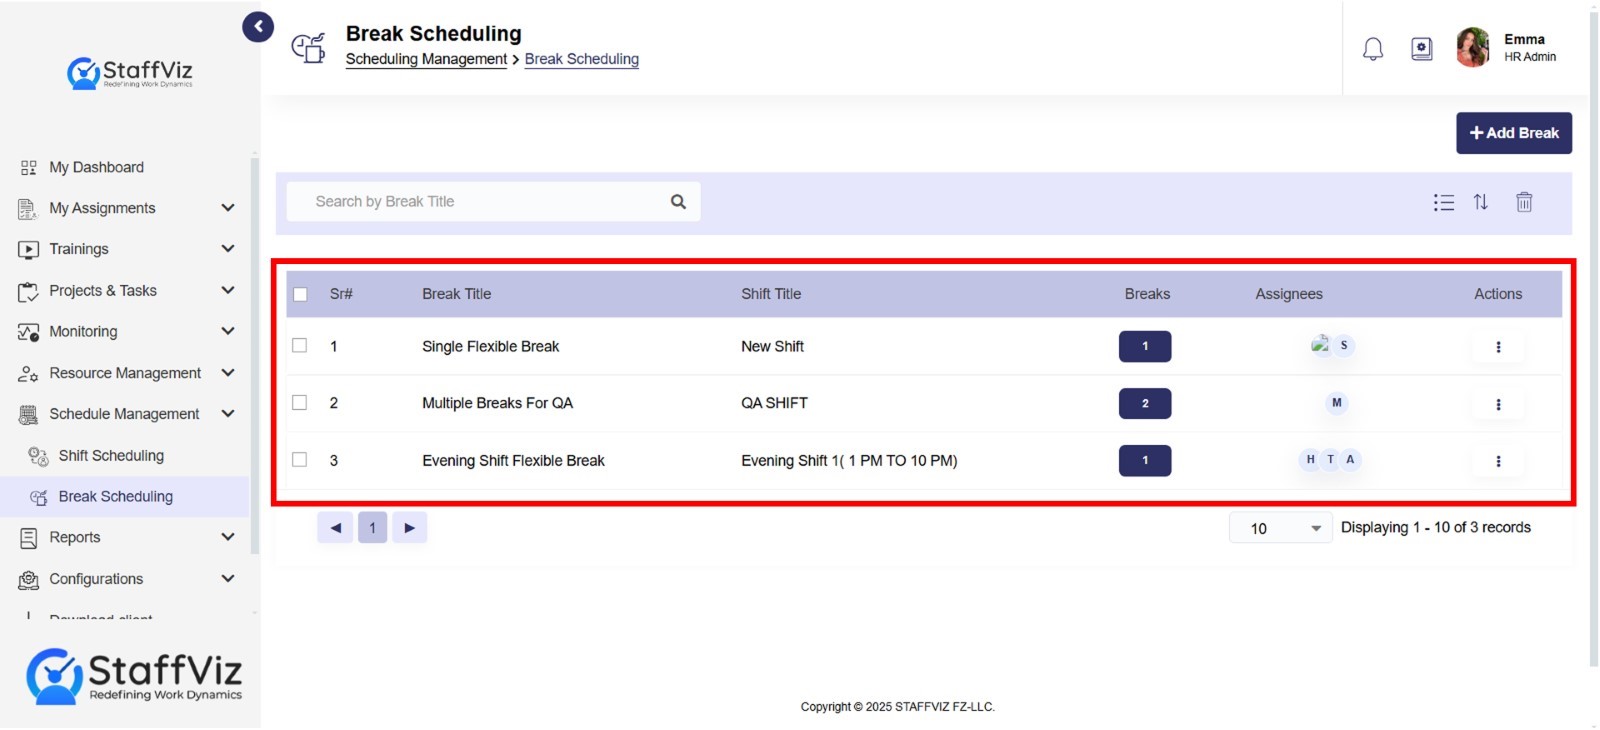
Sr#: This column represents a sequential number assigned to each break schedule for basic identification and sorting purposes.
Break Title: This field displays the name you assigned to the break schedule during creation (e.g., "Lunch Break," "Afternoon Coffee Break").
Shift Title: This column indicates the specific shift to which this break schedule is assigned.
Breaks: This section displays the designated number of break slots associated with the schedule.
Assignees: This column shows the number of employees currently assigned to receive the break schedule. Clicking on this number leads you to a list of those specific employees.
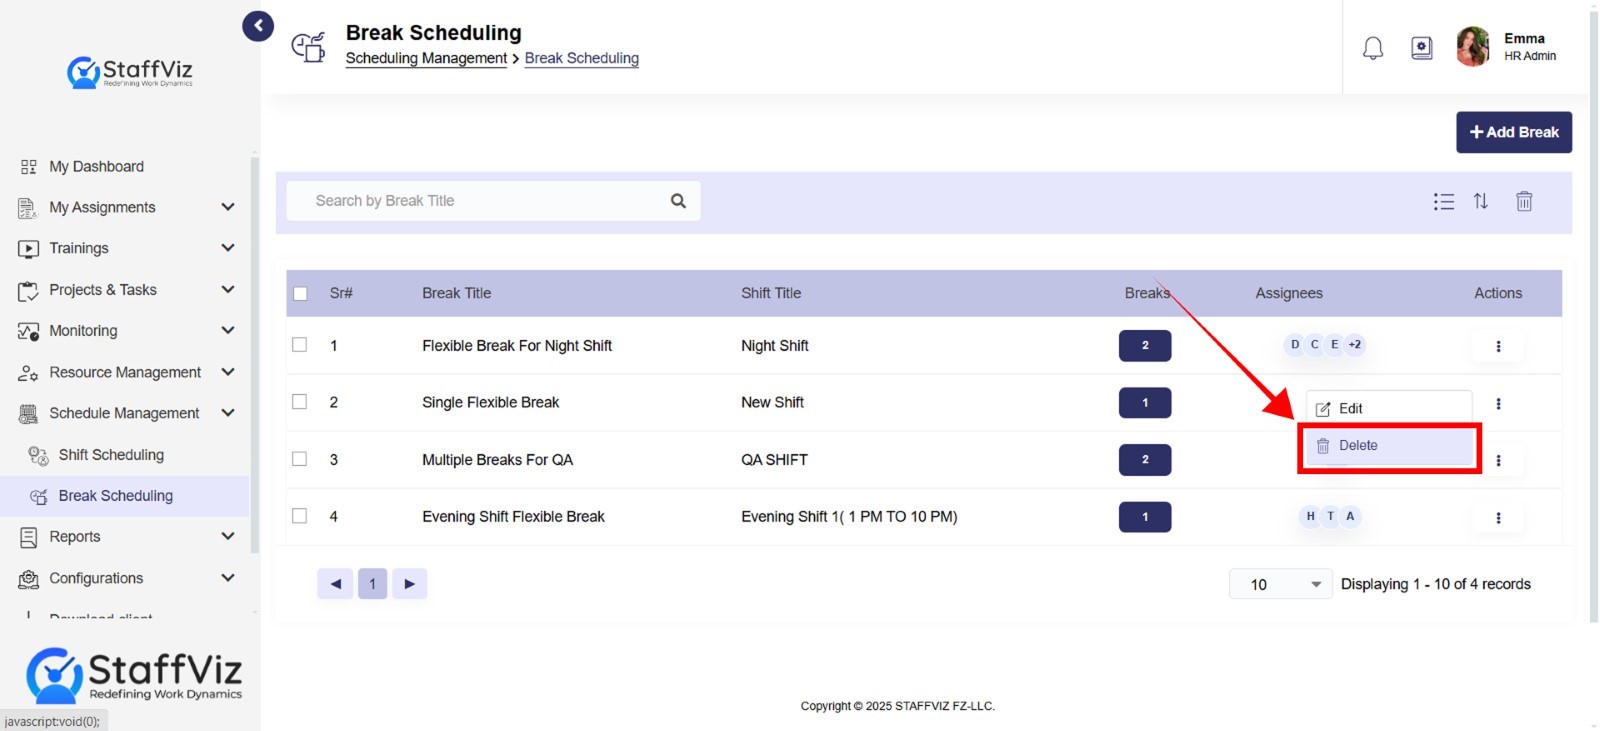
Actions: This section provides a dropdown menu or buttons with various actions you can perform on the break schedule, depending on your permissions within StaffViz. These actions include:
6.1. Edit: Modify the break schedule details, such as the break title, assigned shift, break type, or assigned employees.
6.2. Delete: Remove the break schedule from StaffViz if it is no longer required. This action might require confirmation and potentially impact assigned employees who were scheduled for the break.
All the action options are discussed in detail in section 2.4.
Note: The Edit and Delete options are available only to users with the necessary access permissions.
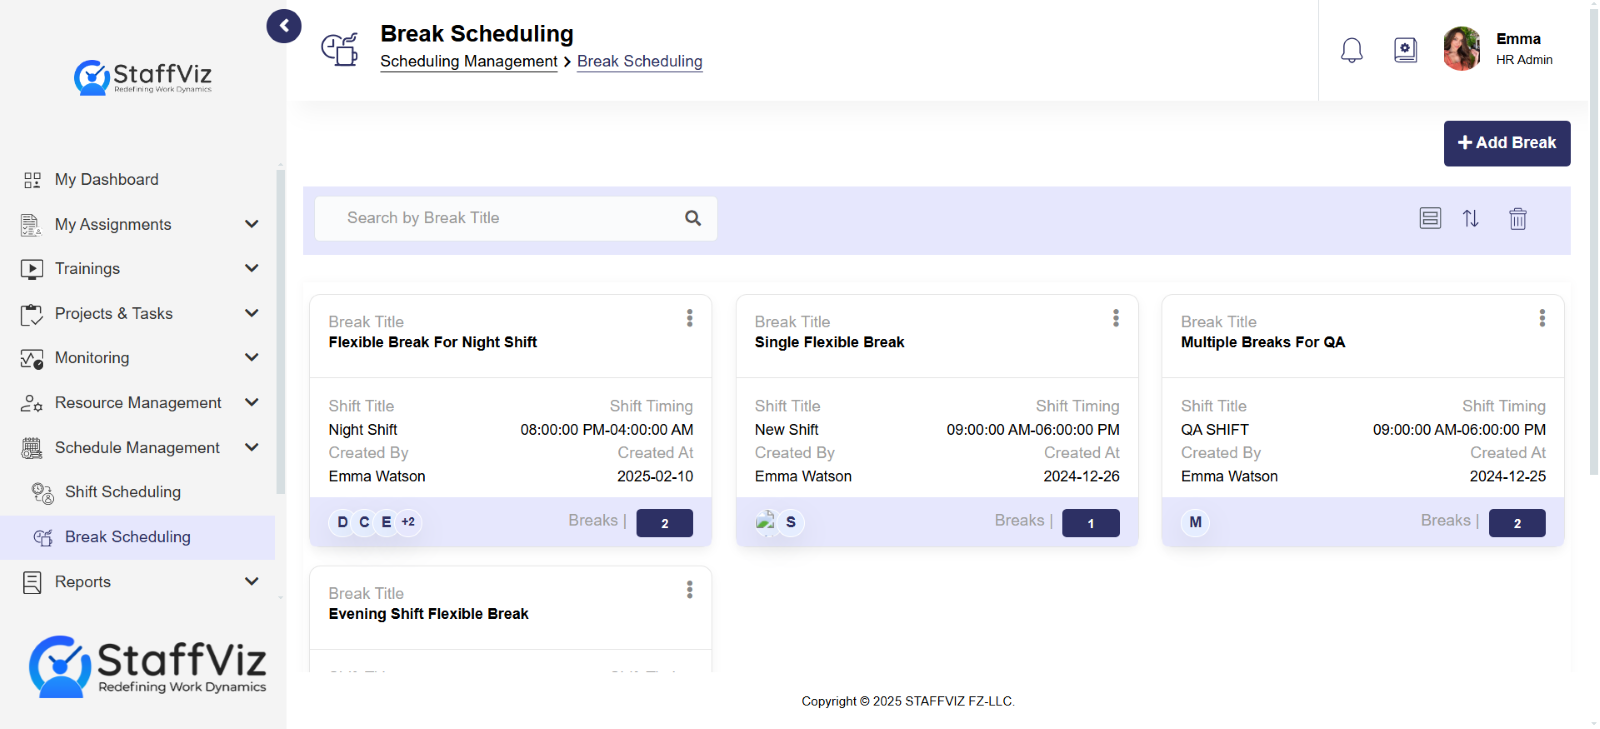
2.3.2: Card View
Card view for breaks offer the same information as the lists but in a different style. Visit list view section for details about all the entries.
Section 2.4: Action Options
Action option offers the following options that allow users to perform certain actions.
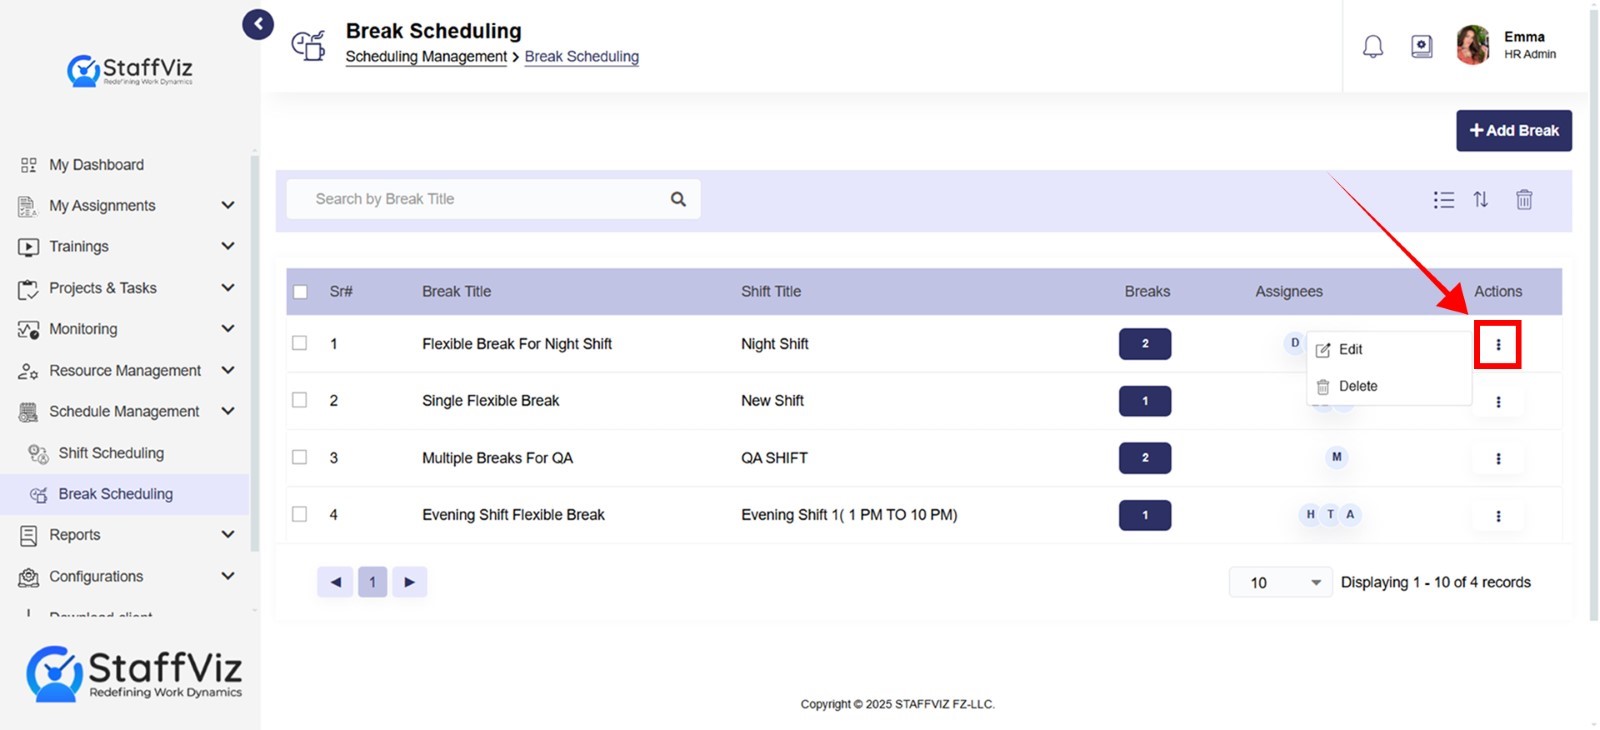
2.4.1: Edit Break
The "Actions" column allows you to perform updates in existing breaks directly from the table, saving time and effort.
Look for an "Edit" option within the "Actions" column for the chosen break. Clicking this button will open an edit form to modify the break details.
On the Edit break page, you can modify the following options.
Break Title (Required): This field pre-populates with the current name assigned to the break schedule. Modify it if needed for better clarity.
Shift (Required): Cannot be edited.
Shift Slot: Cannot be edited.
User/s: This section displays the number of employees currently assigned to this break schedule. Clicking on it will reveal a list of those employees, and you’ll be able to
Add additional employees to this break schedule
Remove employees from this break schedule
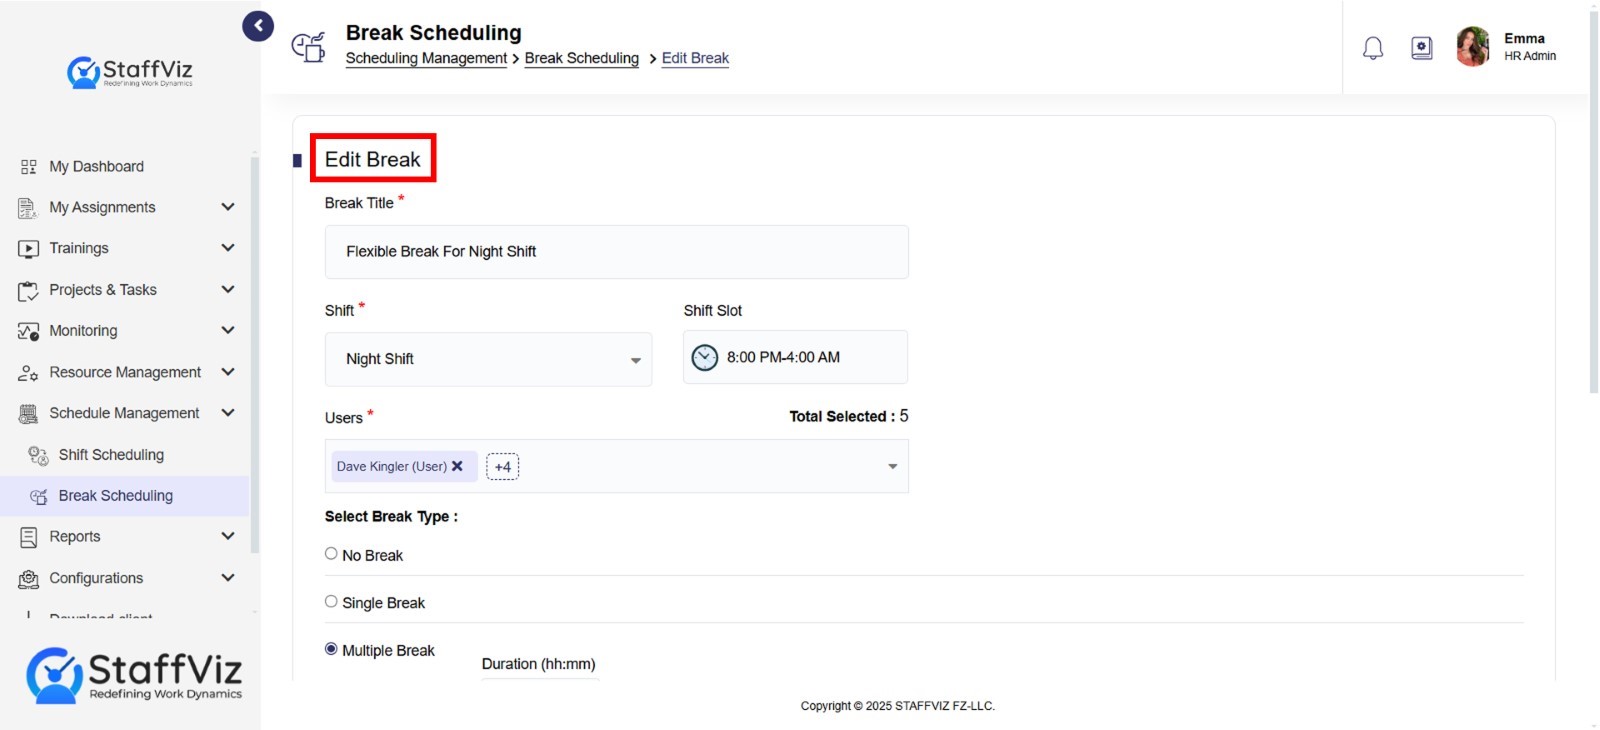
Select Break Type: Choose the type of break you want to define from the following options:
No Break: Employees will not have a scheduled break during this shift (or specific timeslot, if applicable).
Single Break: Employees can take breaks at their convenience, provided they stay within the allocated break duration.
Follow section 2.1 to setup single break
Multiple Breaks: Employees are assigned multiple fixed breaks with specific time slots. This means the break buttons only activate for specified time slots.
Follow section 2.1 to setup multiple breaks
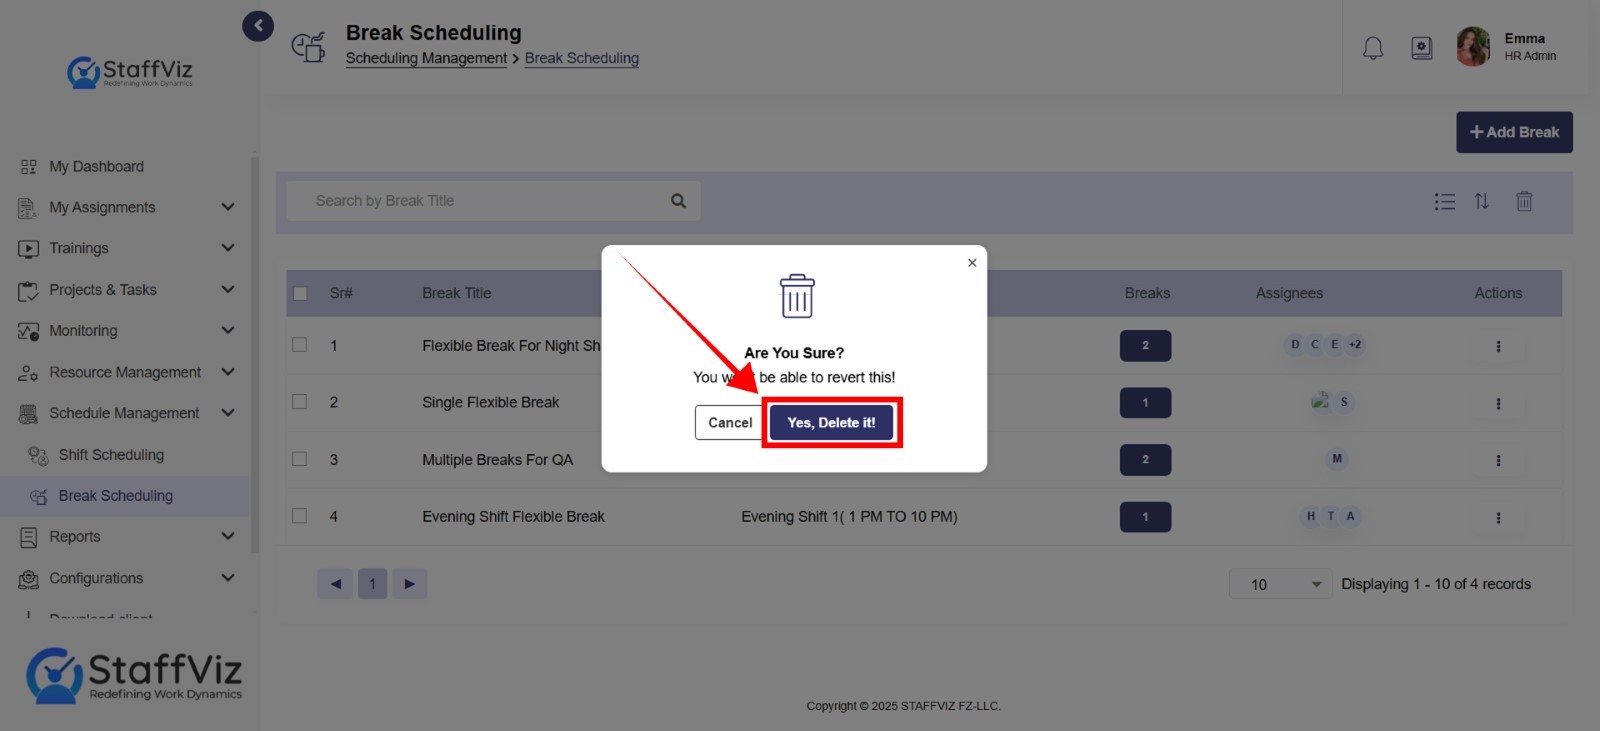
2.4.2: Delete Break
Click the action option and select deleted for the specific break schedule you wish to remove.
A pop will appear where you can select the confirmation option to delete the break.