Tasks are the fundamental elements that drive any project
forward. They represent specific actions, deliverables, or milestones that need
to be completed to achieve the overall project goal.
Select Project & Tasks > Task from the main navigation menu.
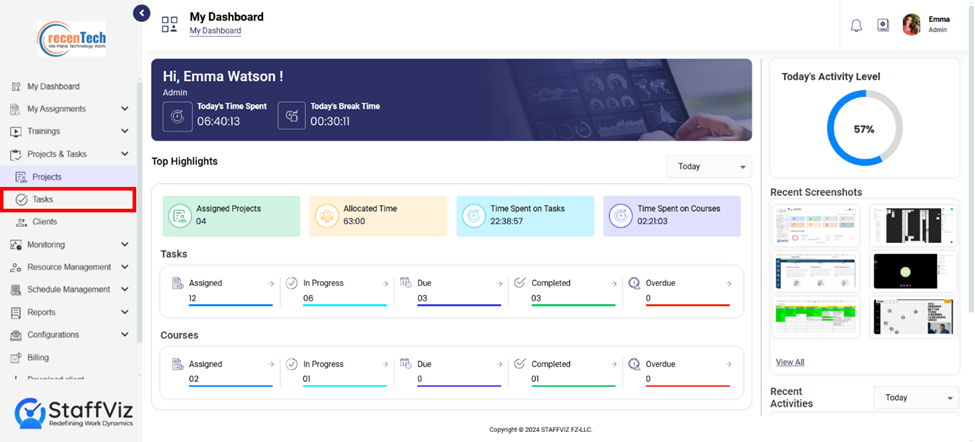
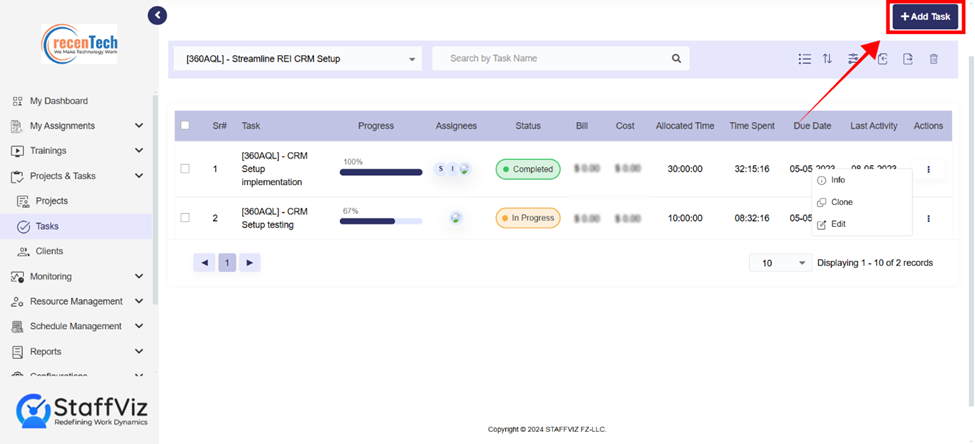
Click Add task.
Section 2.1: How to Add a Task
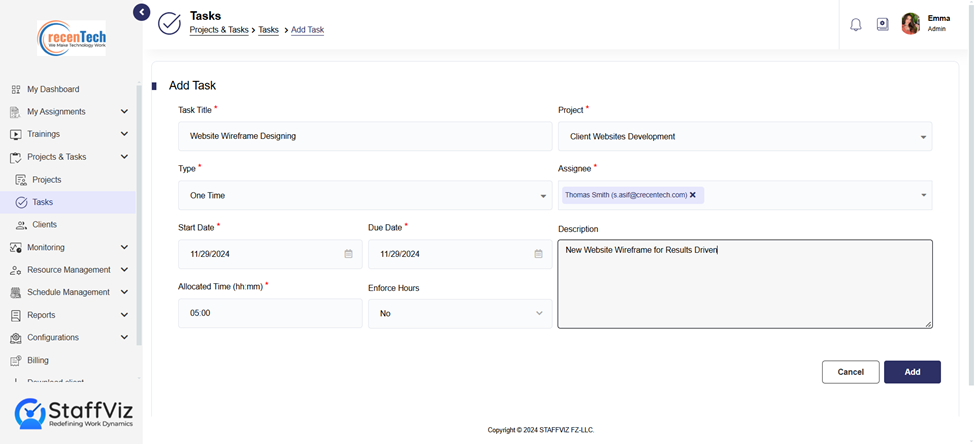
After clicking the Add takes button a new form will open. Here’s how you can fill out all the fields and add a task.

Step 1: Fill The Form
Fill
out all the following fields to create a task.
A.
Task Title: A clear and concise name of
the task to be completed.
B.
Project: A dropdown menu allowing users
to select the project this task belongs to.
C.
Assignee: A dropdown menu with all member
names, allowing admins to assign the task to a specific member.
D.
Description: A text box allowing users to
provide a more detailed description of the task, including instructions,
requirements, or any other relevant information.
E.
Task Type: A dropdown menu with options
like "One Time" or "Daily" to categorize the task based on
its nature. This helps identify recurring tasks or those with indefinite
lifespans.
Further the options in the form change with respect to your
choice in the Task Type.
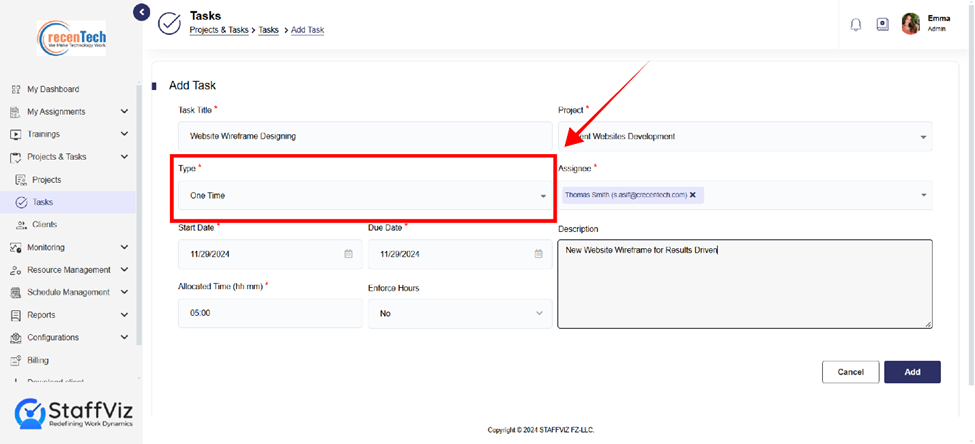
1.
Start Date: Select a date when the task
will start.
2.
Due Date: A preset date for the task
to be completed.
3.
Allocated Time: The time assigned to complete
the task.
4. Enforced Hours: Enforce hours if set to yes means that time tracking of the task will be disabled when the allocated hours are completed. While in case you select no, StaffViz will keep tracking the time, until the task is complete even if it takes more than allocated time.

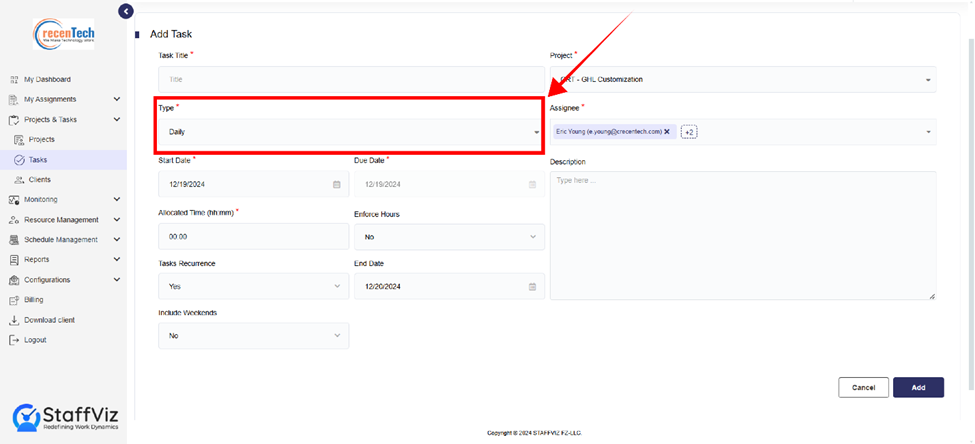
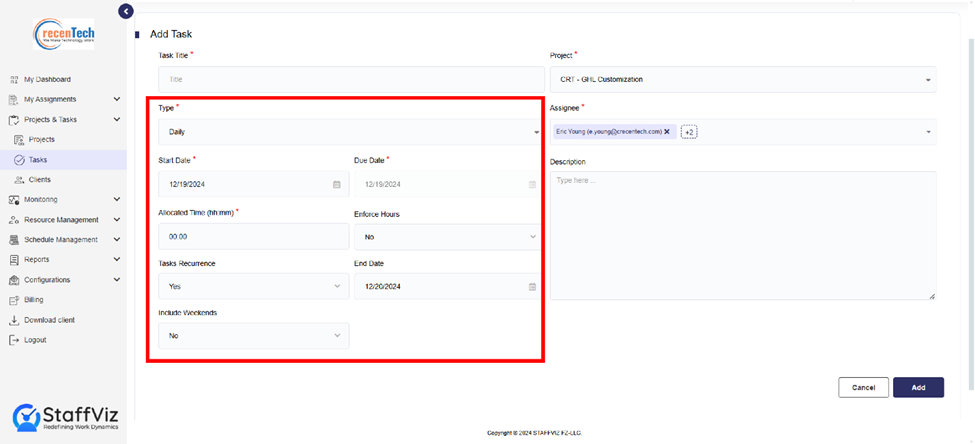
1.
Start Date: Select a date when the
task will start.
2.
Due Date: This section is disabled
cause for daily task the due date is the same date at which the task is
created.
3.
Allocated Time: The time assigned to
complete the task.
4.
Enforced Hours: Enforce hours if set
to yes means that time tracking of the task will be disabled when the allocated
hours are completed. While in case you select no, StaffViz will keep tracking
the time, until the task is complete even if it takes more than allocated time.
5.
Task Recurrence: Task recurrence
option is used to change your recurrence preferences.
6.
End Date: Select a date when you want
to stop creating recurring tasks.
7.
Include Weekends: Selecting Yes
on including weekends will create recurring tasks for weekends too. While,
selecting No option will not create any tasks on weekends.
(Weekend setting can be configured from the
company settings in the configuration module).
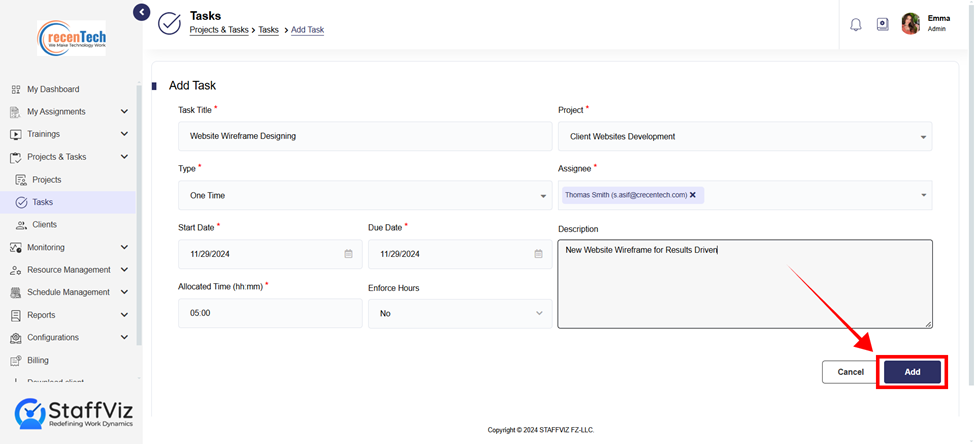
Step 2: Save Task
Once all the above fields are filled, click Save and task will be assigned to selected assignees. Assignees will receive notification about this task.
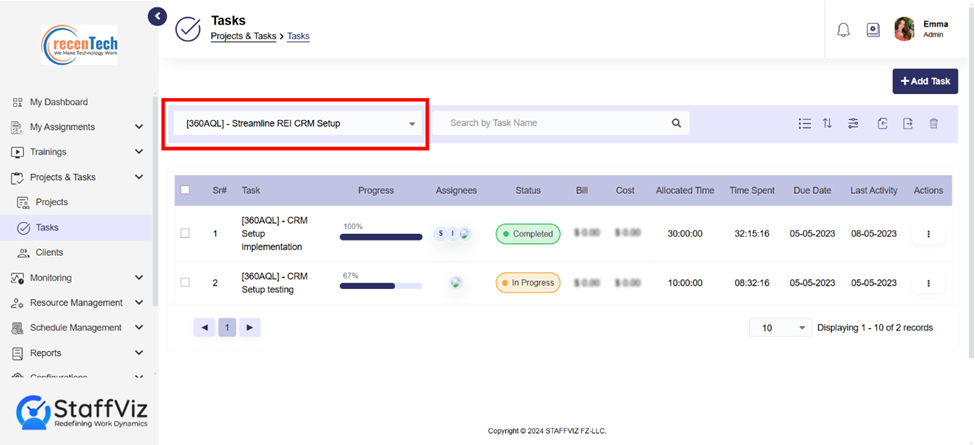
Section 2.2: Navigation Tab
The task navigation bar provides a central hub for managing
and interacting with your project's tasks. Here is a breakdown of all the sections.
Select Specific Project
This dropdown menu lists all the projects with the tasks. Selecting a specific project from this menu will filter the task for the specific projects.
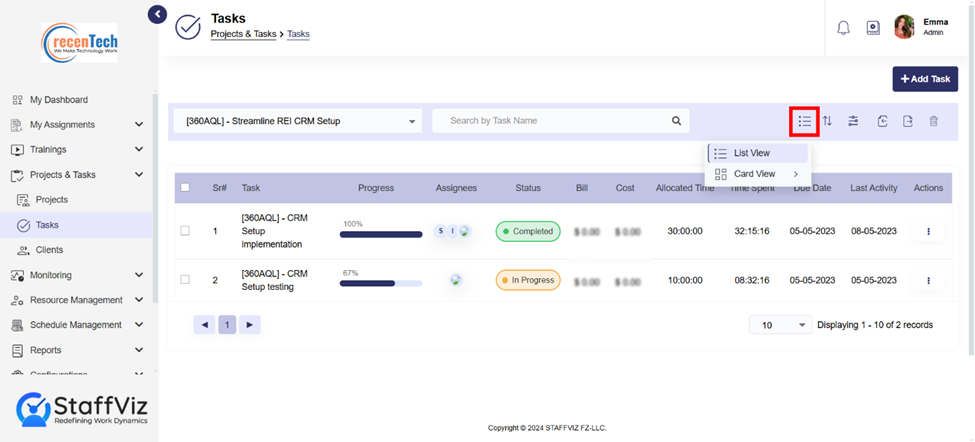
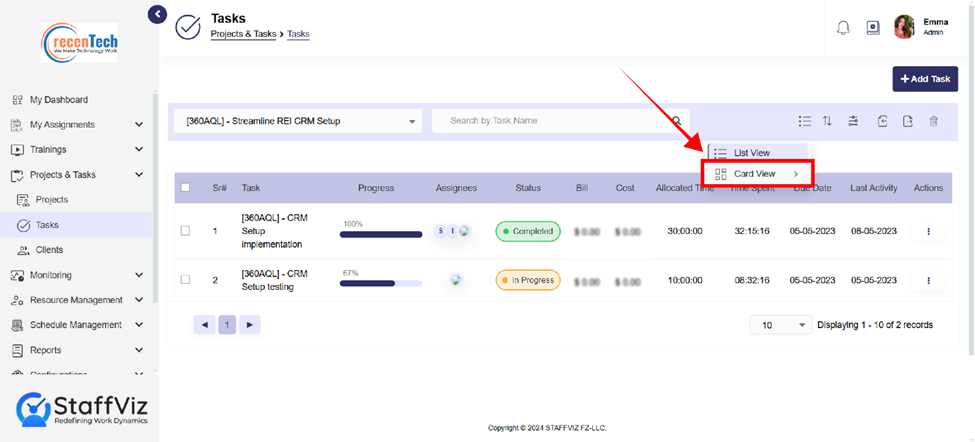
List views and card views are both methods for displaying
information, they offer different visual presentations. The lists and card view
both are discussed in detail in Section 2.3 (Task
Table/ Task Cards).
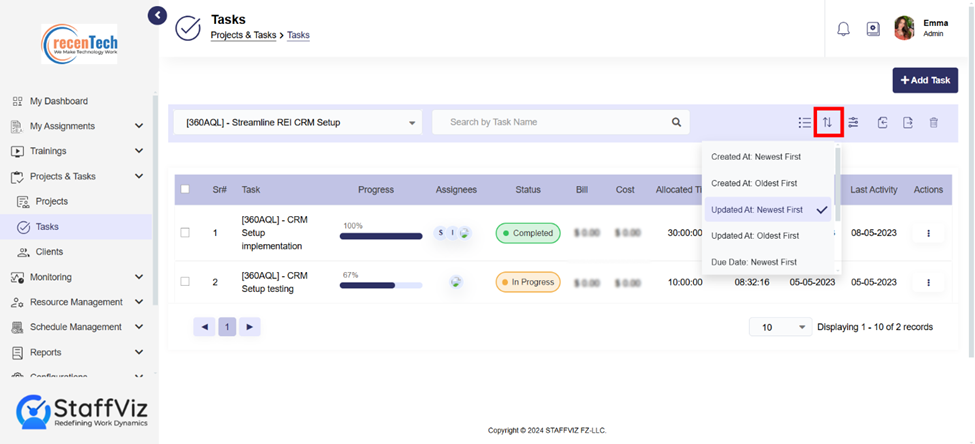
1.
Created At: Sorts tasks by the date and
time they were initially created.
2.
Updated At: Sorts tasks by the date and
time they were last modified.
3.
Budget: Sorts tasks by their associated
budget.
4. Due Date: Filter tasks by their due dates.
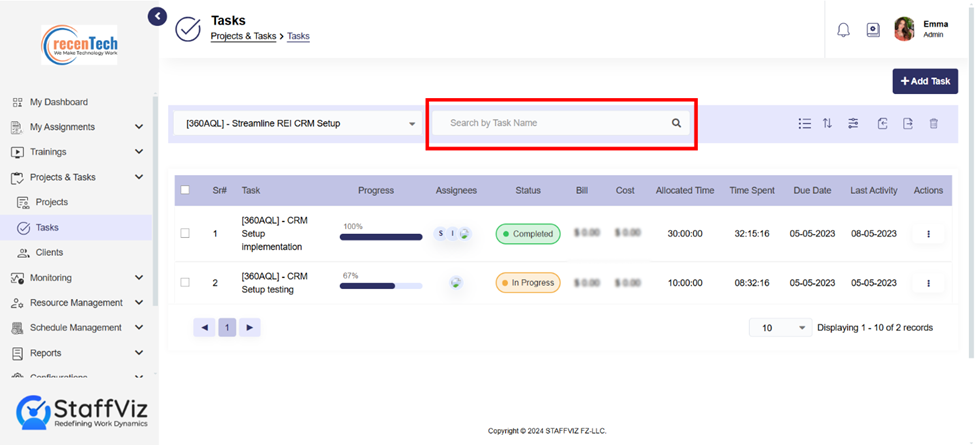
Locate tasks instantly by name or keyword, saving time compared to browsing through long lists.
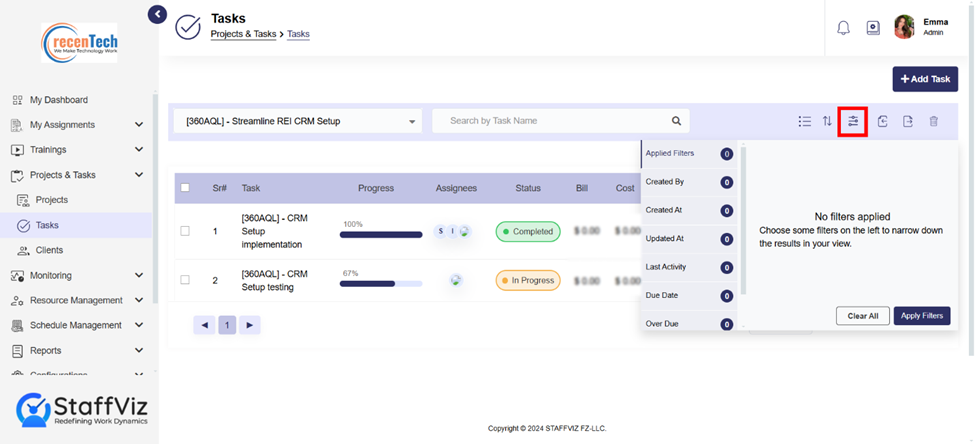
The filter panel on the left-hand side of the screen allows
you to narrow down the list of tasks displayed on the main screen according to
various criteria. This helps you quickly find the specific projects you are
looking for. You can also manage all the filters within this panel.
These options allows you to transfer data between the
application and other programs or file formats.
·
Import: The import button allows you to
bring data into the StaffViz from an external source. Clicking the import
button will initiate a process where you select the external file or data
source you want to import from.

·
Export: The export button allows you to
transfer data out of the StaffViz and save it in a different format. This is
useful for sharing project information. Clicking the export button will present
you with options to save the data in Excel spreadsheet and potentially
customize the specific date range of data you want to export.
The detailed process of import and export of
task is given in Section 2.5 (How to
Import and Export Task Data)
Section 2.3: Task Table/ Task Cards
Tasks can be viewed in both lists and card's view. Users can
change their view from lists to cards and vice versa.
This guide explains the task table, a helpful tool for managing and tracking your projects.
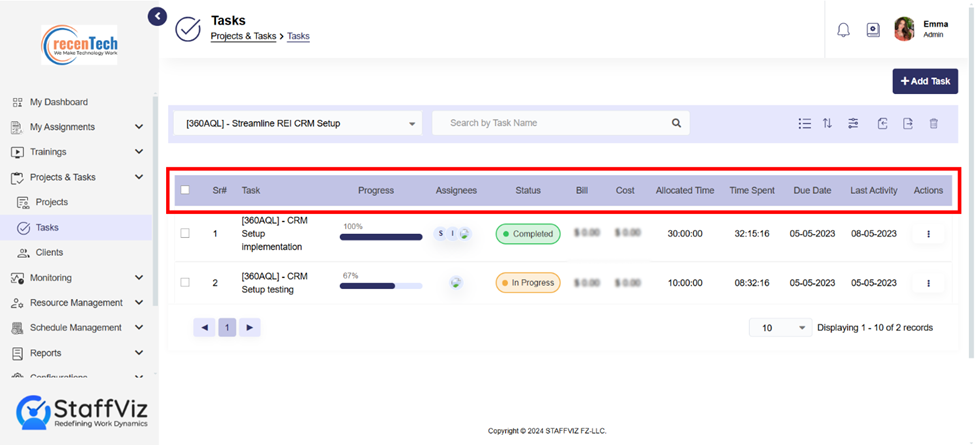
1.
Sr# (Serial Number): Unique
identification number for each task.
2. Tasks: The column showcases the tasks name.
3.
Progress: Indicates how far along a task
is towards completion. The progress percentage for a task is equally divided
between all the assignees. If all the assignees complete their part of the
task, progress will be 100%.
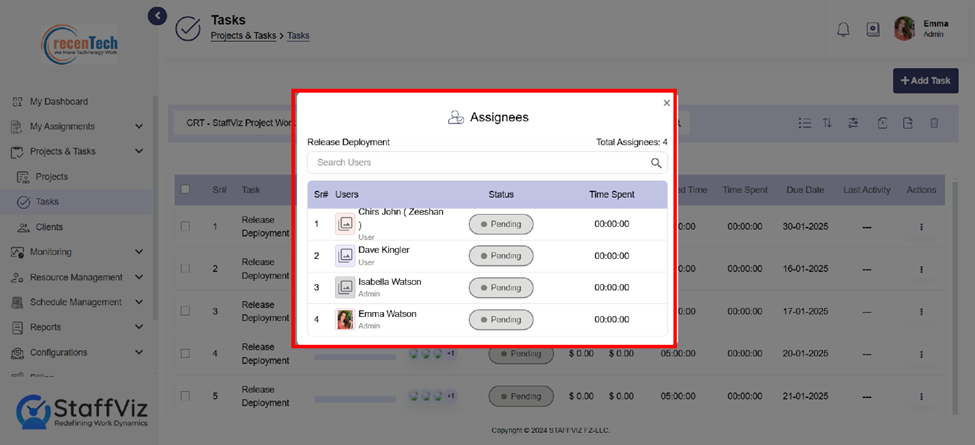
4. Assignees: Showcase the total members assigned with this task. You can click the assignees to view each assignee’s contribution in this task.
5. Status: Overall state of the task. This
could be "Pending," "In Progress," or "Completed."
6. Bill: Total amount charged to a client on
hourly basis.
7. Cost: Total cost per hour incurred by the
organization on the specific task. This includes the per hour cost of all the
assignee’s working on this task. For example, there are three employee A($20/hour),
B($22/hour), and C($18/Hour). So, the total per hour cost incurred by the
organization will be $60/hour for this specific task.
8. Allocated Time: Total time allocated for
completing the task.
9. Time Spent: Total time spent working on
the task.
10. Due
Date: The specific
deadline by which a task or project must be completed.
11. Last
Activity: Shows the most
recent update or action taken on a task.
12.
Actions: Offer further actions
you can perform using the more action options. This section is discussed in
detail in Section 2.4 (How to Use
Tasks’ Action Options).
Users can choose the cards view from the top right side of the screen.
Here in the card section, all the options and data are the same as we discussed in Section 2.3.1, which you can see above.

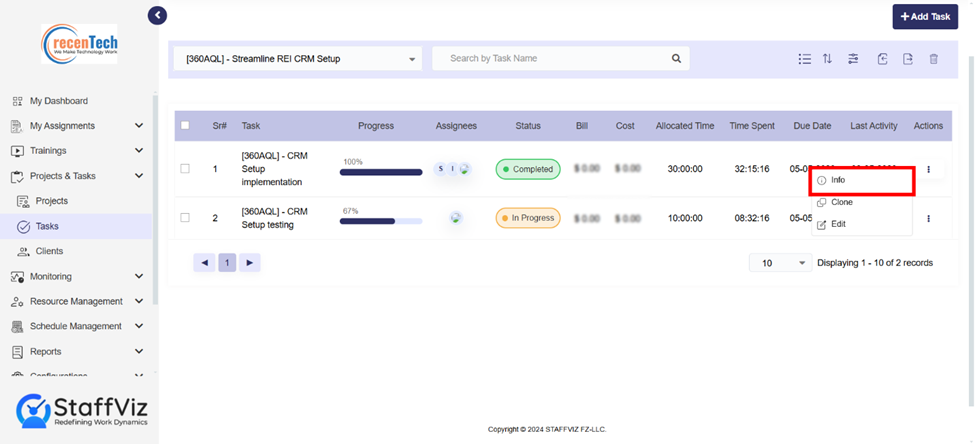
Section 2.4: How To Use Tasks’ Action Options
Action buttons offer further options that allow access to
task info, clone, and edit options.
By clicking on the info button, you will be presented with a more comprehensive overview of the task compared to the information displayed in the task table.
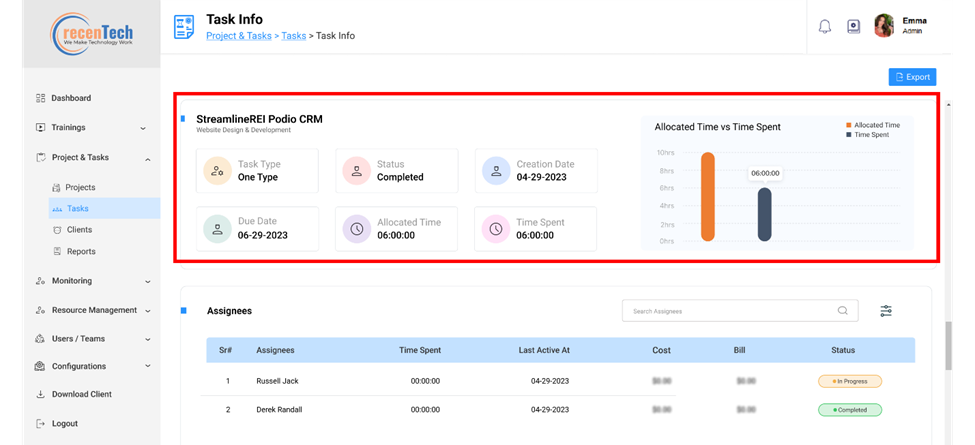
Task Details
This layout provides a more detailed view of individual
tasks within your project.
1.
Task Type: Identifies the category of the
task (e.g. Daily or One Time).
2.
Status: Overall state of the task (e.g., Pending,
In-progress, Completed).
3.
Creation Date: Date the task was created.
4.
Due Date: Date by which the task should
be completed.
5.
Allocated Time: Total time allocated for
completing the task (formatted in hours and minutes: hh : mm).
6.
Time Spent: Time spent working on the
task.
7.
Time Comparison Allocated Time vs Time Spent:
This section displays a visual comparison of the allocated time and time
spent on a comparison chart.
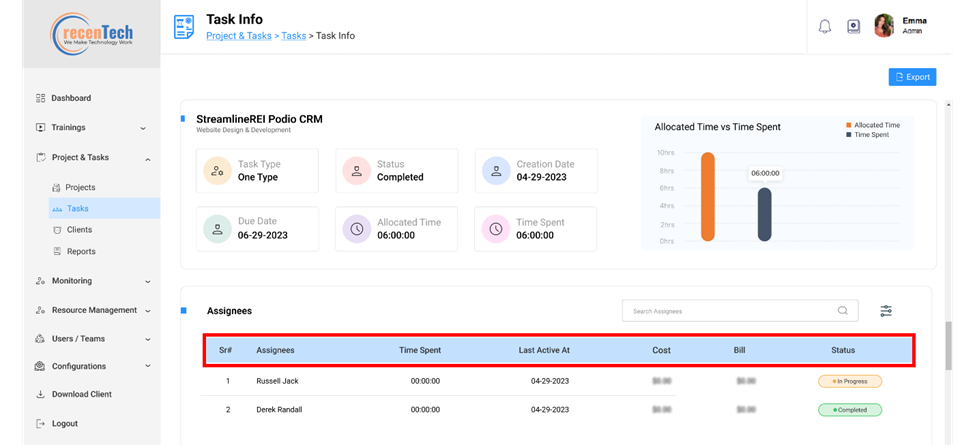
1.
Sr#: Serial number for the task,
referencing the main task table.
2.
Assignees: Team members responsible for
completing the task.
3.
Time Spent (hh : mm): Time each assignee
has spent on the task.
4.
Last Active At: Date and time the task
was last worked on.
5.
Cost: Total cost per hour incurred by the
organization on this task.
6.
Bill: Total hourly amount to be charged
to the client.
7. Status: Overall state of the task (e.g., Pending, In-progress, Completed).
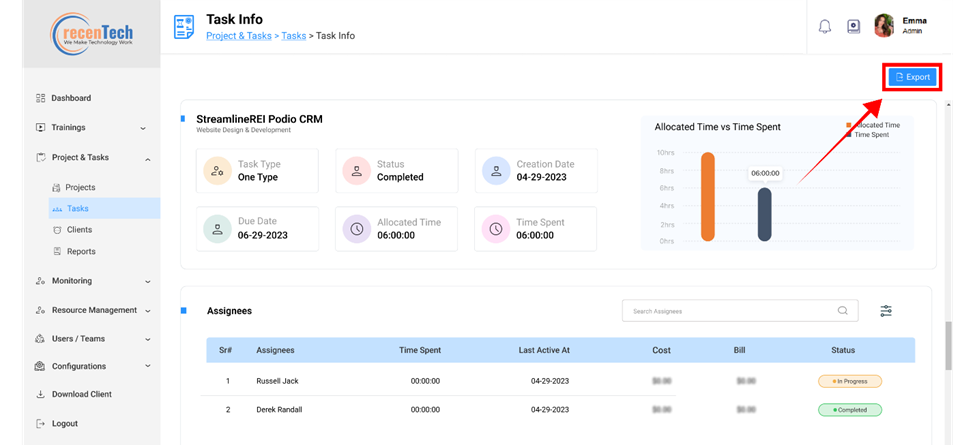
Click the export button to export data for this specific task.
This button allows you to modify various aspects of an existing task. This functionality is crucial for keeping project information current, adapting to changing requirements, and ensuring project success.
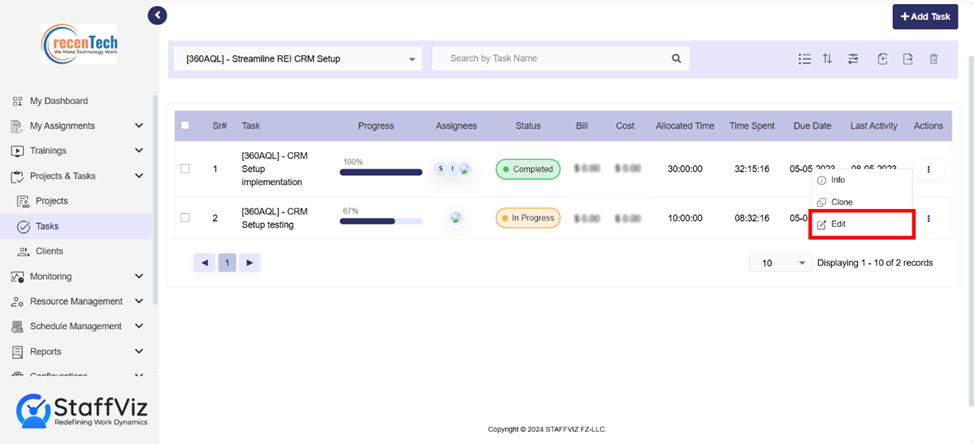
Once you click the Edit Project button, you will be
presented with a form or interface allowing you to modify various project
details. Note that, once the clock for any task is started, certain fields
can’t be edited.
All the editable fields are discussed in detail in Section 2.1 (How to Add a Task).
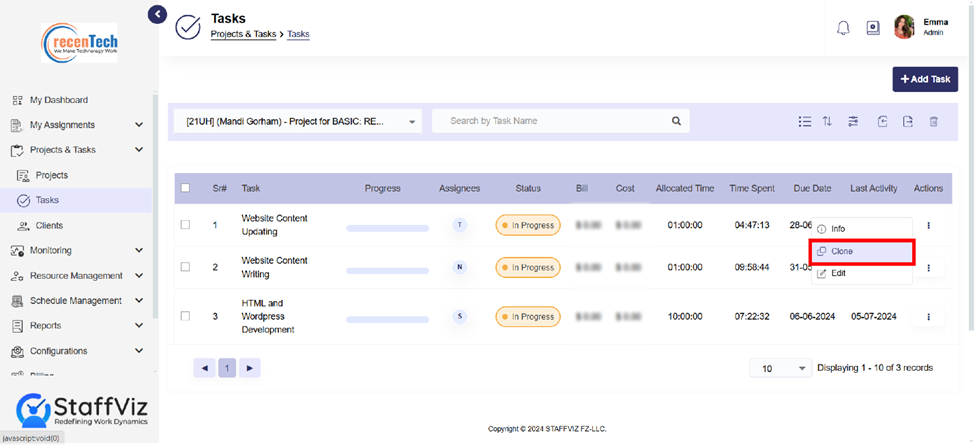
The clone task functionality allows you to create a
duplicate of an existing task. This can be beneficial for distinct reasons:
·
Creating Templates: Clone a task with a
defined structure, tasks, and settings to serve as a template for similar
future tasks.
·
Starting Similar Task: Quickly create a
new task with a similar foundation to an existing one, potentially with
modifications.
Cloning Options: How To Clone Tasks
When cloning a task, you might have the option to include or
exclude team members from the cloned version. Here’s how you can clone a task.
Step 1: Navigate to Clone Option
In the Projects and Tasks > Tasks section, please click
the More option and select Clone.
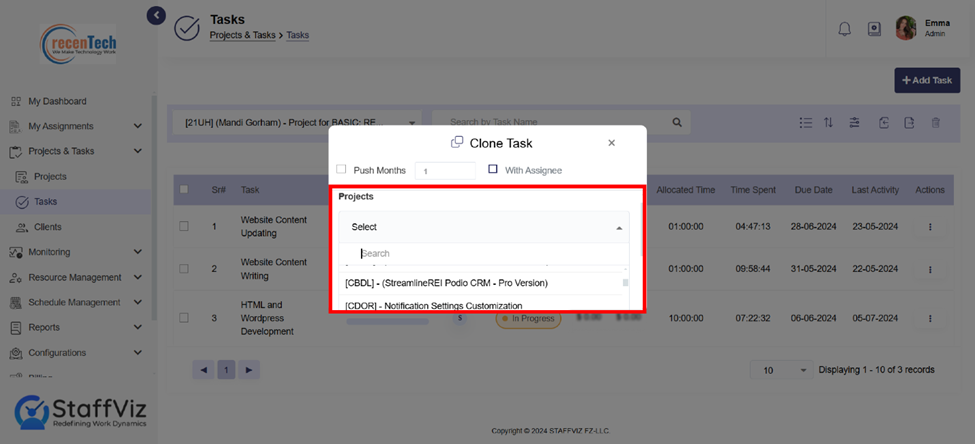
 Step 2: Select A Project
Please select a project under which the cloned task is being created.
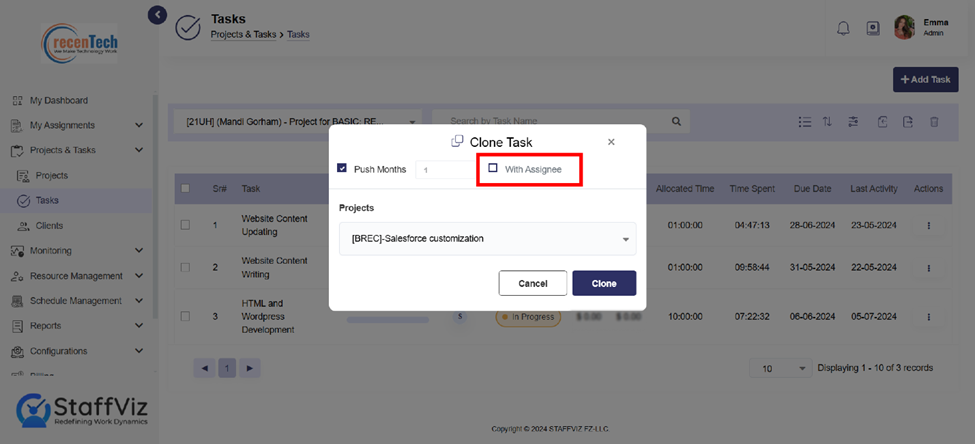
Step 3: Push Months Settings
This option allows you to select the number of months for which you want to push the task completion date.
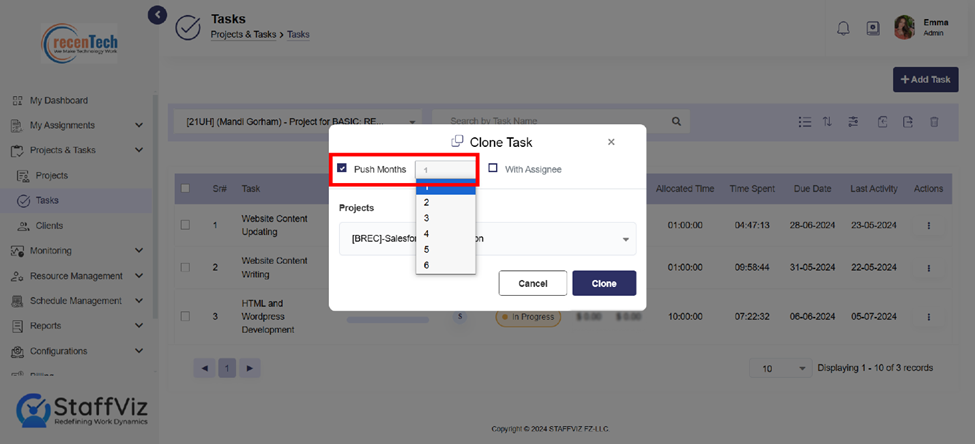
Step 4: Clone With or Without Assignees
Select whether you want to clone this task with the same assignees or not.
Step 5: Clone Task
Click the Clone button to create a cloned task.
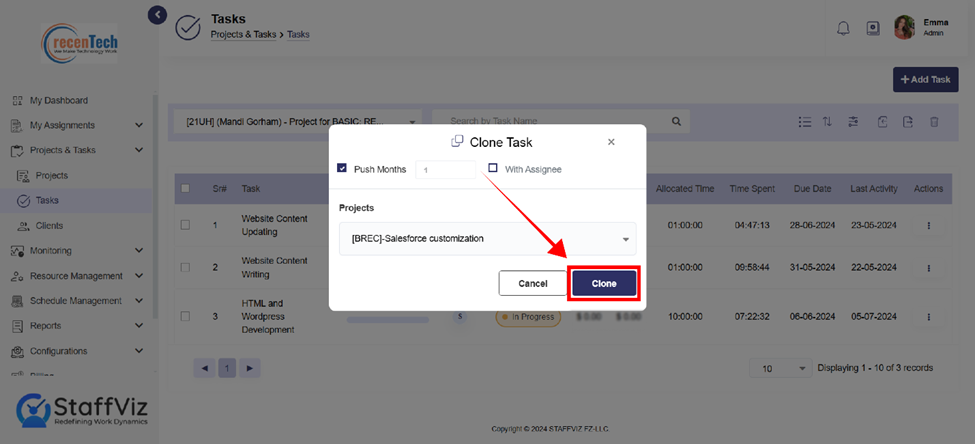
By following the above steps, you can easily clone any task
you want.
Section 2.5: How to Import and
Export Task Data
The import and
export buttons allow you to transfer data between the StaffViz and other
programs.
Exporting Tasks reports
just require one click in StaffViz.
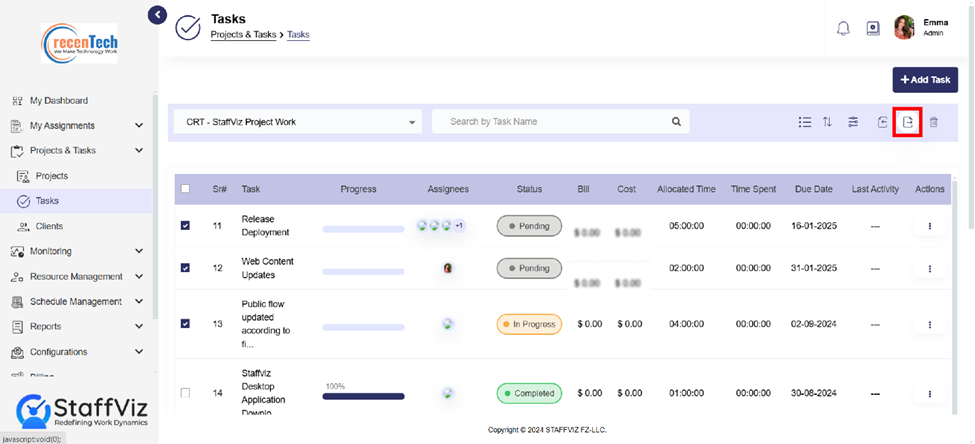
Step 1: Navigate
To Projects
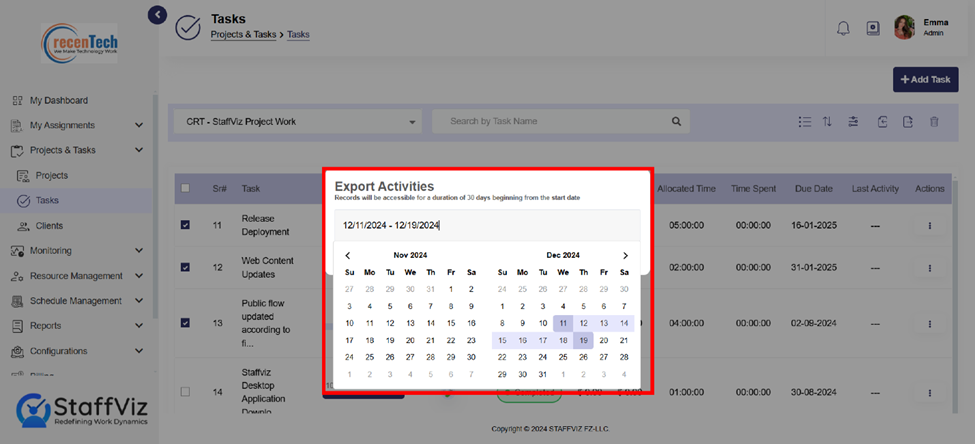
Please click Projects & Tasks > Tasks. Here Select the tasks you want to export data for and click the Export button.
Step 2: Export Task
Pop Up
A pop up will appear on your screen.
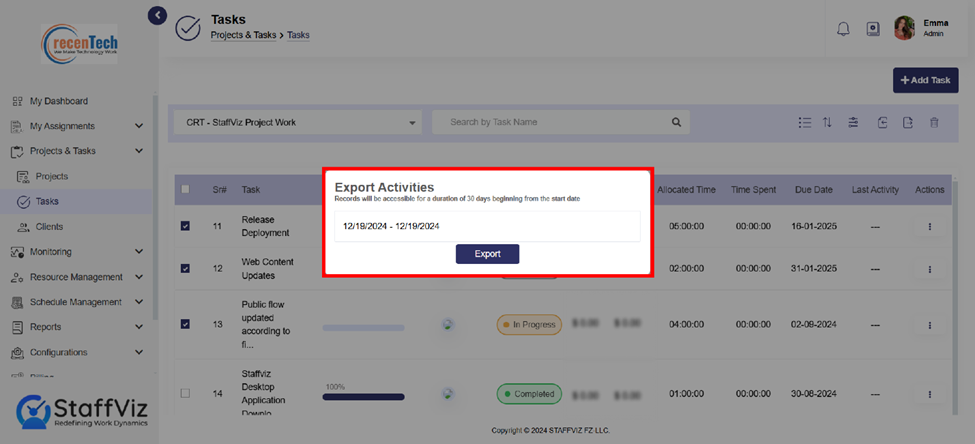
Step 3: Select Date
Range
Please select a starting and end date for the task data you require.
Step 4: Export
Data
Finally, click the Export
button.
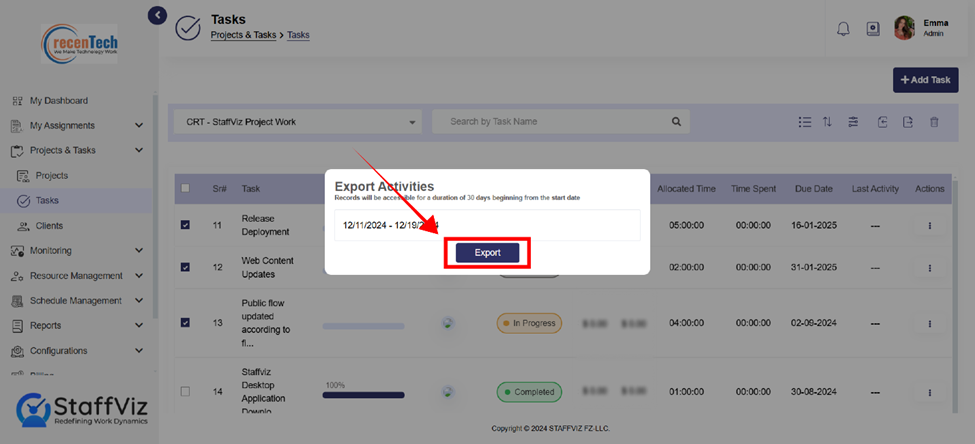
By following the above steps, the task data from the selected date range will be exported to your device in an excel worksheet.
How to Import Task DataTo import task
data into StaffViz, it's important to setup your file into a specific format.
Please follow the steps given to import project data into StaffViz.
Step 1: Click
Import
Click the Import file button and further options will drop down on your screen.

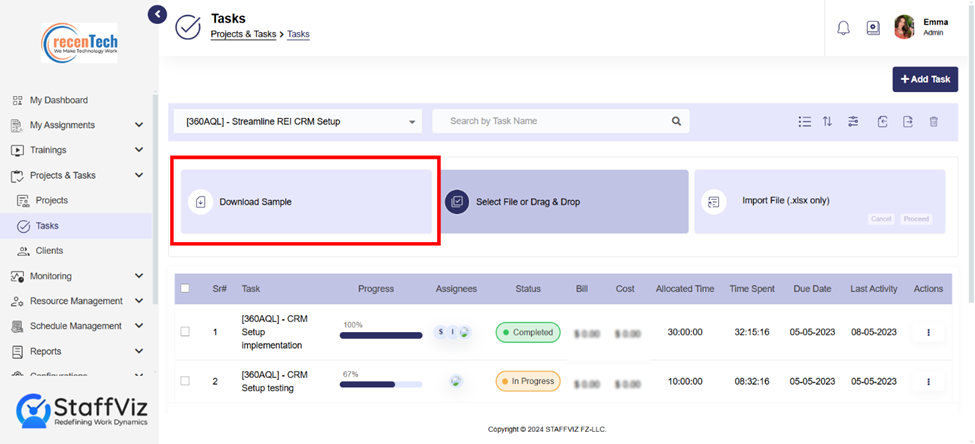
Step 2: Download
Sample
Click the download sample button and format your data as per this file.
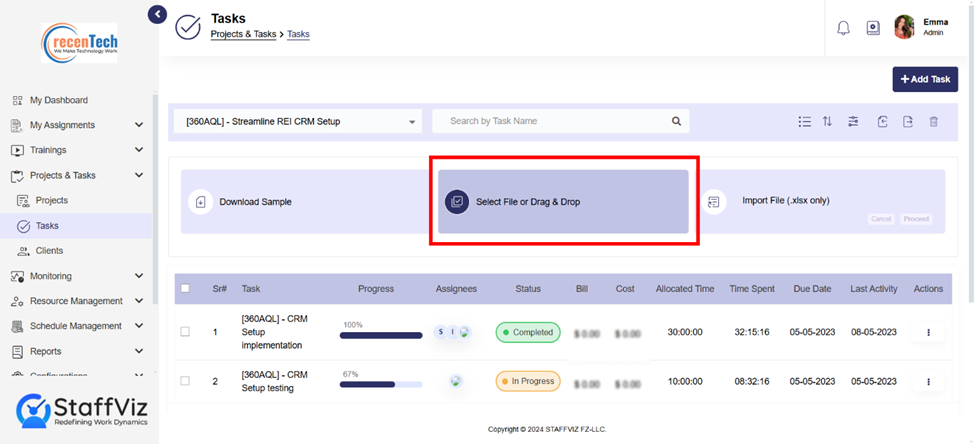
Step 3: Select
File
Click Select File or Drag & Drop button and browse the file you have created in the prescribed format to import the task data.
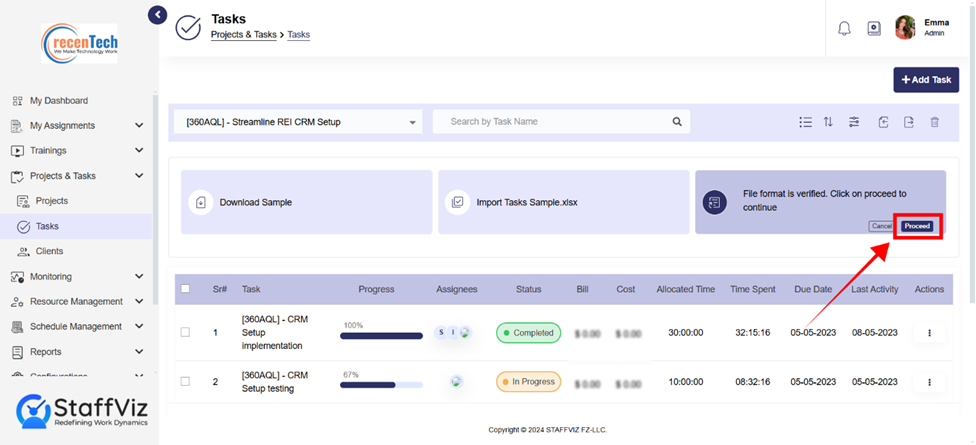
Step 4: Data
Validation
If all the data and file format is correct, your file will be uploaded and can be seen here.
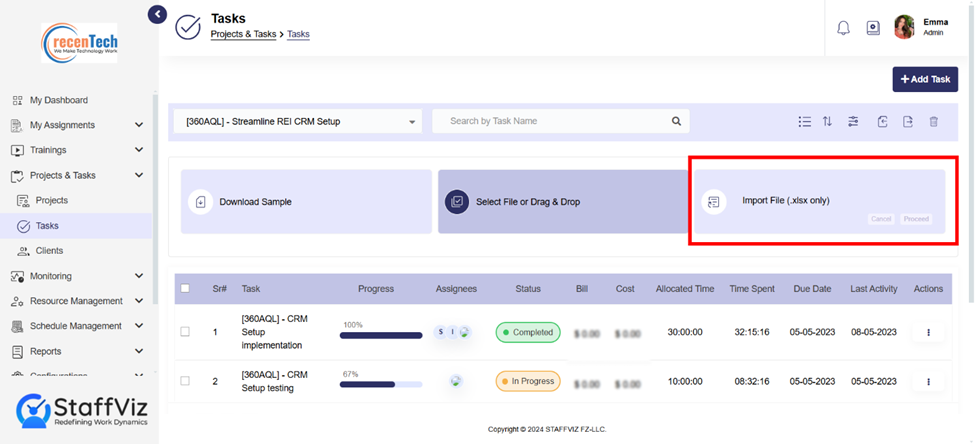
Step 5: Proceed
Click the Proceed button. With this final step your file will be uploaded to StaffViz.