Section 2: My Snapshots
Navigating to My Snapshots
Step 1
Click My Assignments > My Snapshots.
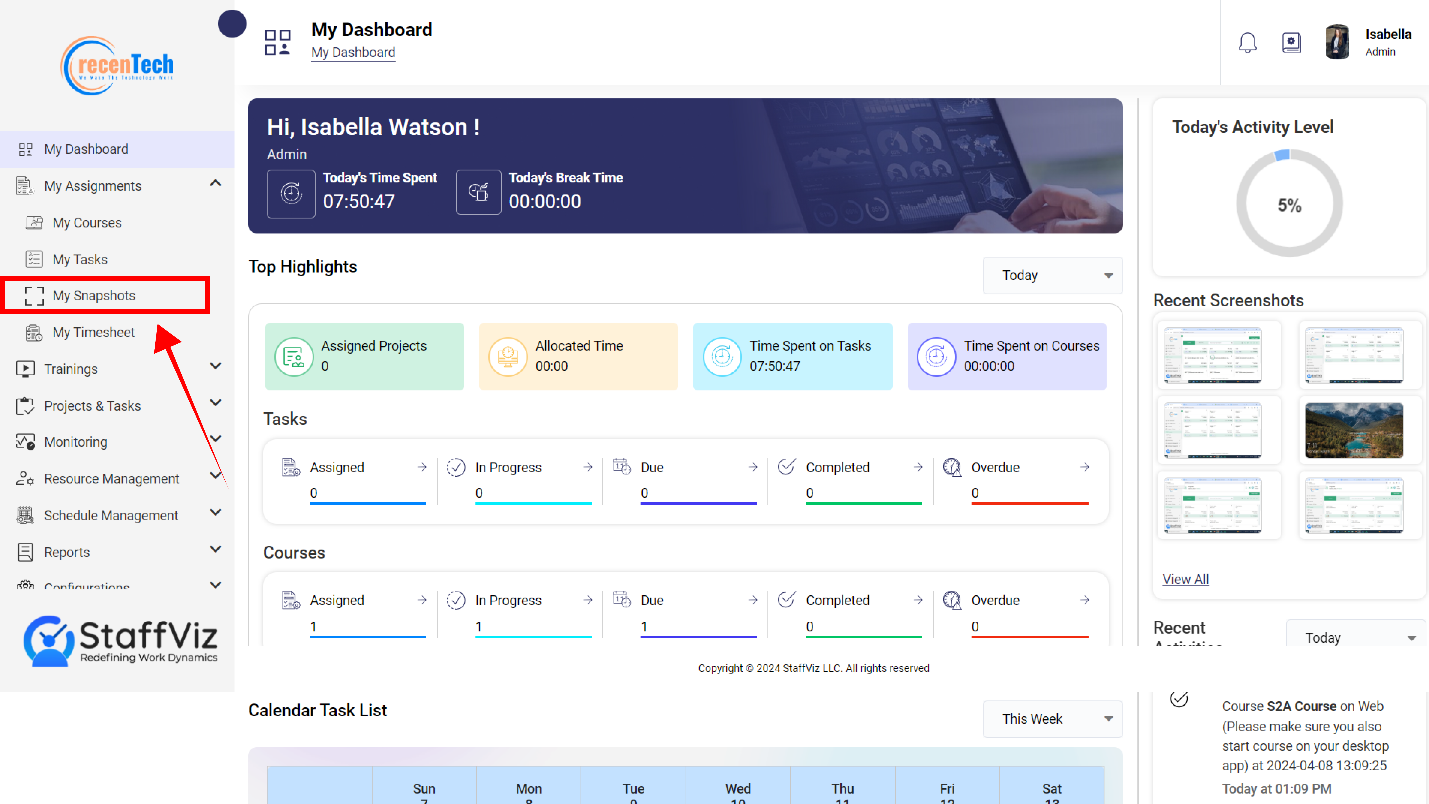
Step 2
Upon clicking the My Snapshots option on the navigation panel, a new page will open. This is My Snapshots Panel.

2.1: My Snapshots Overview
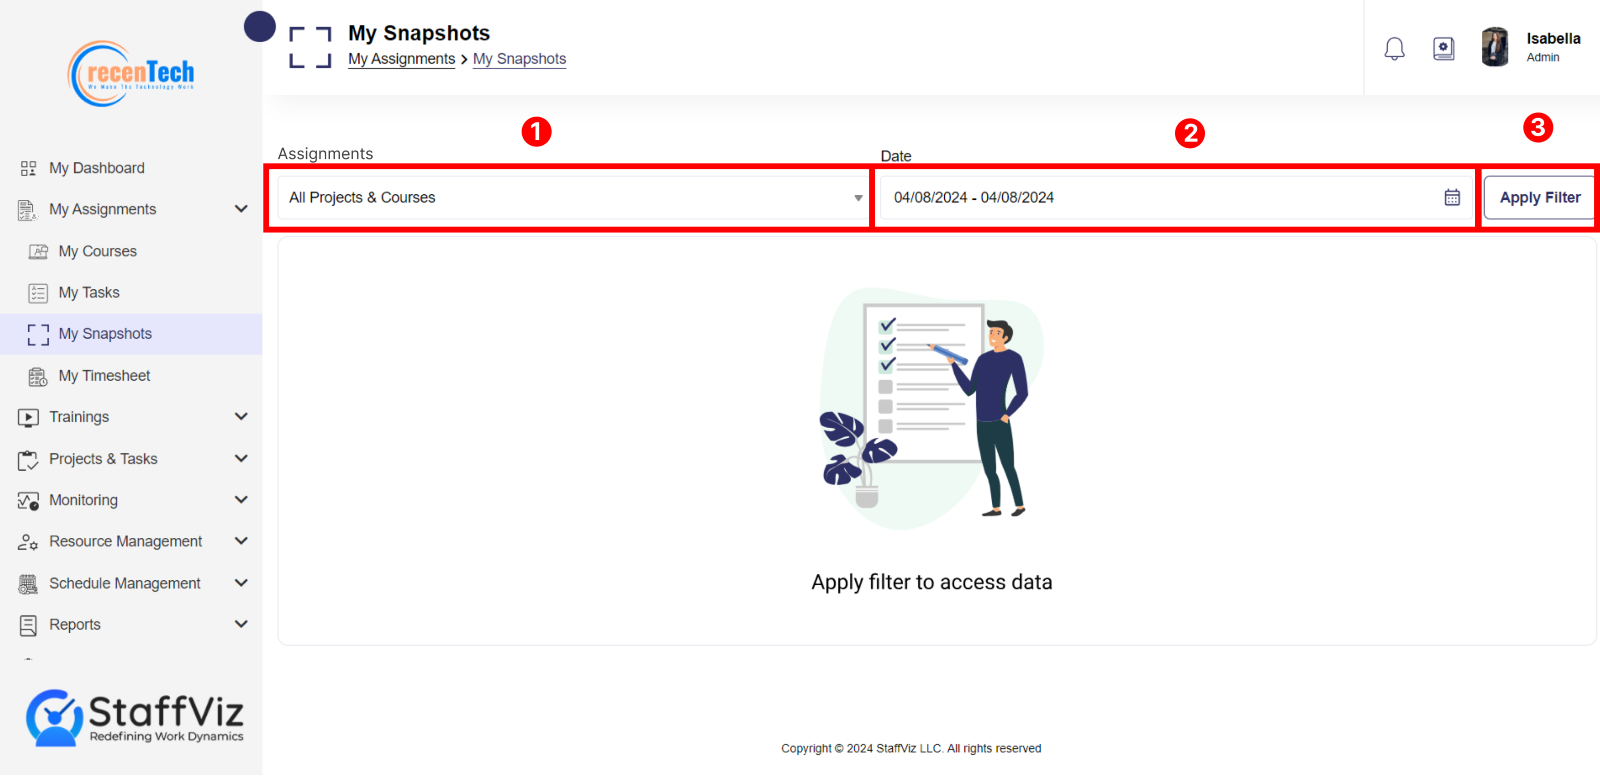
My Snapshots is on the main navigation panel, in the dropdown of My Assignments module. StaffViz keeps track of the user’s activity through taking screenshots after short intervals. These screenshots provide evidence of your activity.
In My Snapshots section, you’ll find the following options that help you find the exact screenshots you are looking for.
Assignments: In this section, you can choose courses and projects to see the relevant screenshots. You can also choose All option if you aren’t looking for the screenshots from the specific course or project.
Date: You can either choose to start and finish date to select specific days for which the screenshots are required, or you can use the options like today, last 7 days, last 30 days, this month, last month, or even last months.
Apply Filter: Once you set the filters, click this button to get results.
2.1.1: How To View Your Snapshots (For Employee)
Follow the steps to view your snapshots.
Step 1
Please click the My Assignments > My Snapshots.
Step 2
A new page will appear on your screen. This will open My Snapshots panel.

Step 3
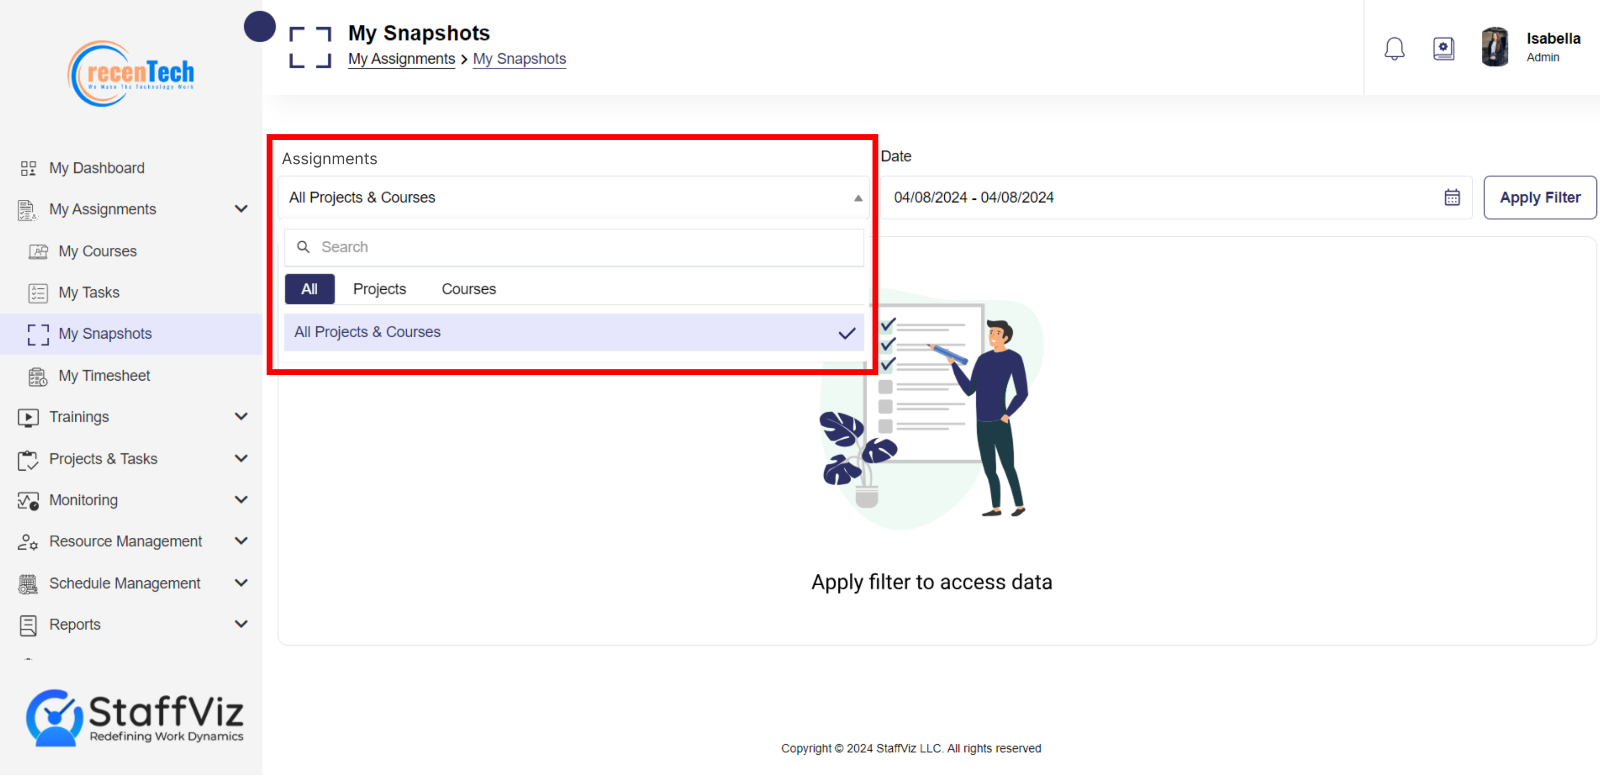
Click Assignments dropdown. You have three options.
All: Includes screenshots of all the projects and courses.
Projects: Screenshots from all assigned projects.
Courses: Screenshots from all assigned courses.
Step 4
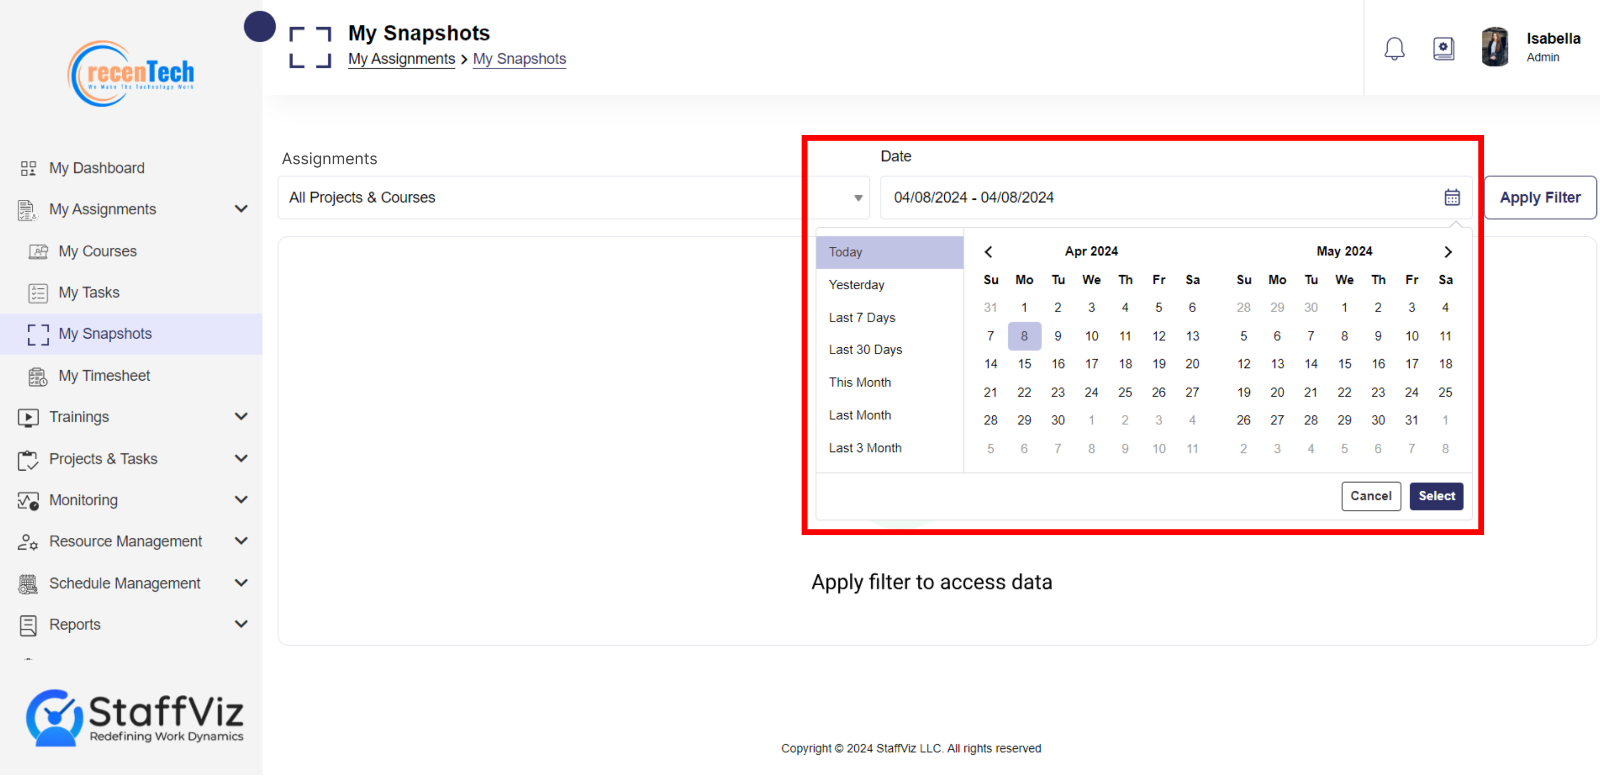
Select the date(s) for which you want the snapshots data.
You can choose Starting and Ending dates manually from the calendar.
You also have the option to choose a time from the panel beside the calendar showing options like Today, Yesterday, Last 7 days, Last 30 days and so on.
Step 5
Once all the filters are set, Click Apply Filter button.

Step 6
StaffViz will provide you with all the required screenshots based on the filters you’ve applied.
2.1.2: How to Interpret Your Snapshots Report
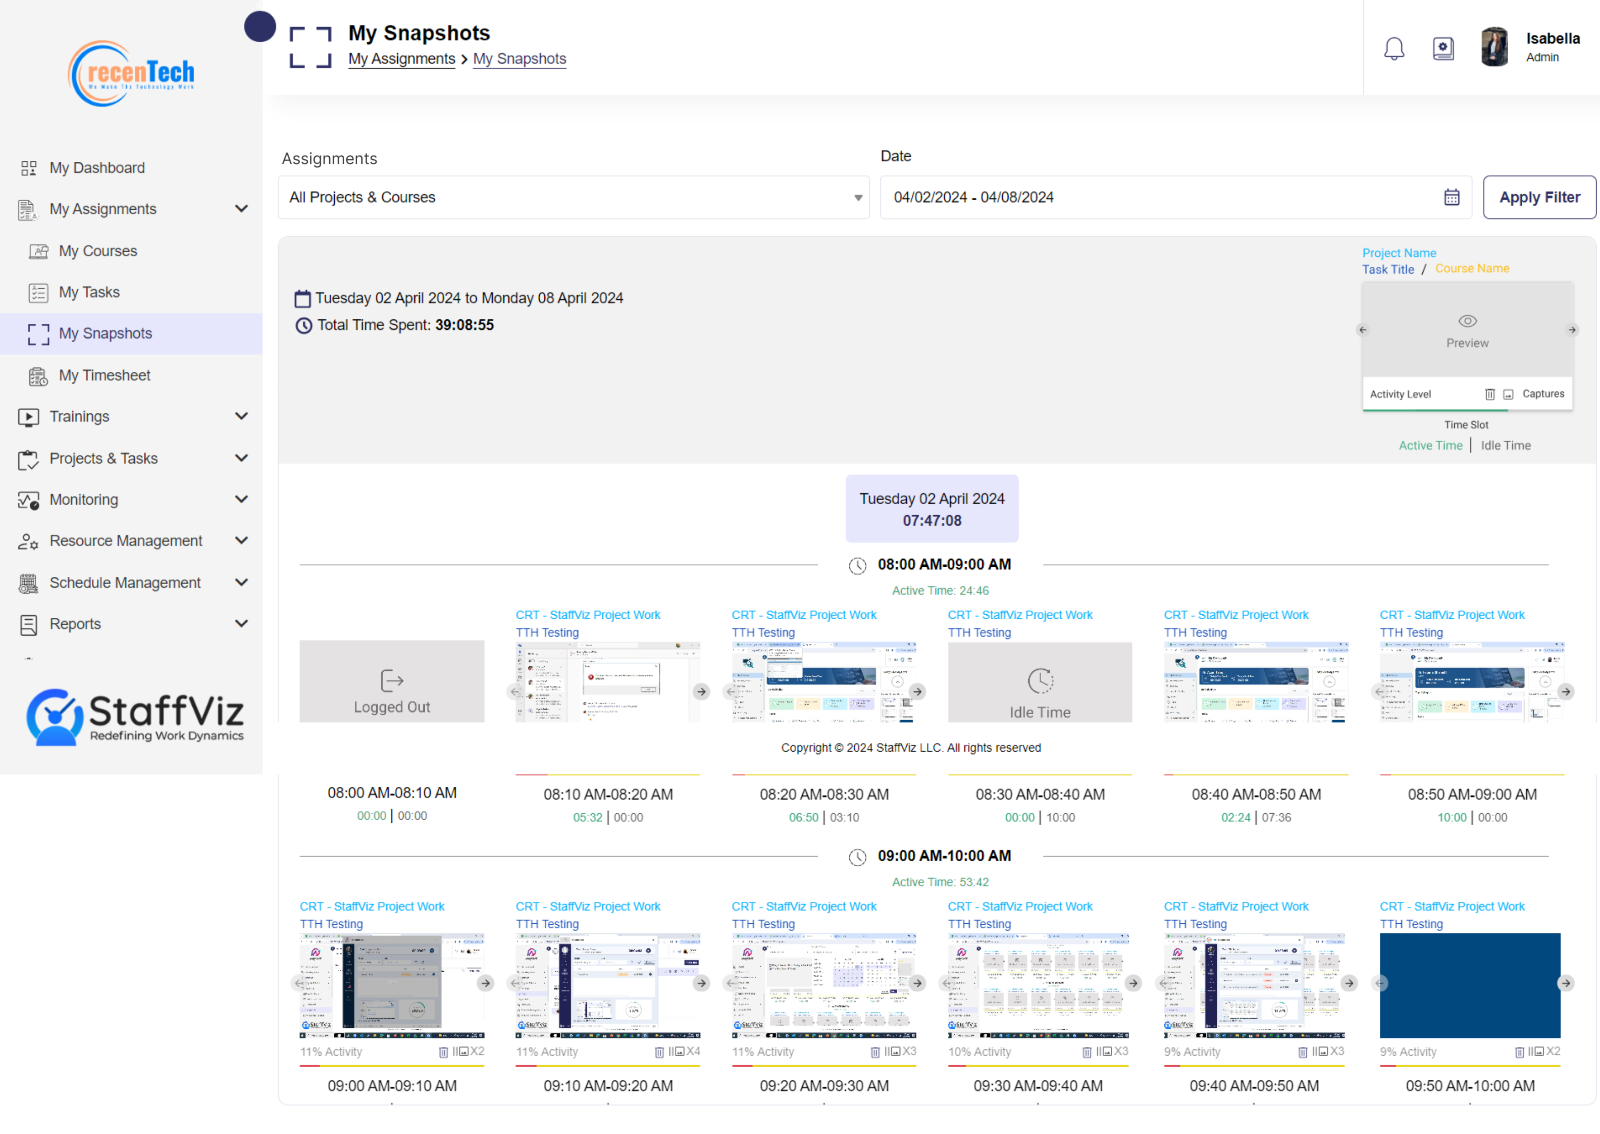
When you get your desired snapshots data, here we’ve explained everything this report has to offer, so you can easily interpret the reports.
Date Range: Displays the selected start and end dates for the report.
Total Time Spent: Shows the total duration of time recorded during the selected period.
Day & Date: Indicates the specific day of the week and its corresponding calendar date for which the snapshots data is showcased.
Total Tracked Hours: Provides the total hours monitored by the system within the above-mentioned date.
Hour Slot: Specifies the individual one-hour intervals during which snapshots were captured.
Active Time 1 Hour: Highlights the productive time recorded within the one-hour time slot.
Activity Level: Displays the percentage or metric representing user activity level during tracked periods.
Number of Screenshots: Indicates the total snapshots taken within the tracked period.
Snapshots Time Slot: Lists the intervals at which the snapshots were captured.
Navigation Arrows: Points out the buttons used to view images sequentially within a set.
Preview Snapshots: Clicking the snapshot opens a large preview of it.